
This article explains the basics of using Davinci Resolve for video editing.
DaVinci Resolve is a professional video editing application, quite similar to Adobe Premiere or Final Cut Pro, which you might be more familiar with. The great news for us it that it has a totally free version, with more than enough features for most editing jobs.
Installing Davinci Resolve
DaVinci Resolve is available for free download, for Mac or Windows computers. You can download it from BlackMagic’s website.
Starting a new Project
Open up Davinci Resolve and start a new project – give it a descriptive name to make sure you can find it again later!
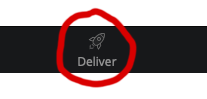
Along the bottom of your screen you’ll see this bar – each button brings up a different screen, intended for a specific job.
For now we’re just going to worry about the Media, Edit and Deliver tabs:
- Media is where you organise all the files that make up your project – for the most part bits of video and audio.
- Edit is where editing and basic effects take place
- and Deliver is where you render and export completed videos.
Exporting
There are two main ways to export using DaVinci Resolve, using the “quick export” option or the “deliver” tab (pictured above).
Quick Export
You can find the option to quick export by going to “File” (top left of the window) and then the “Quick Export” option.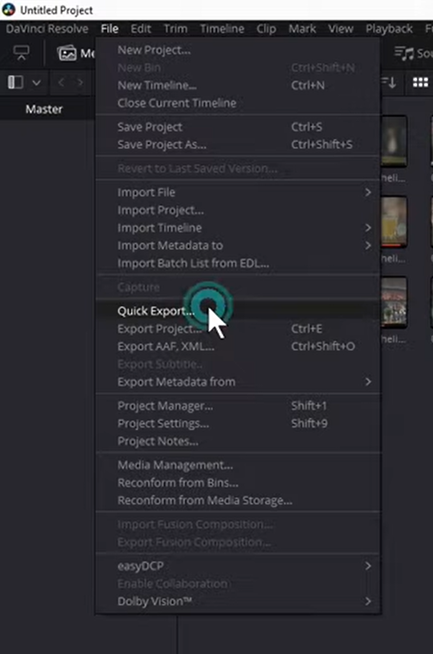
Clicking on this will bring up a window with a number of options for exporting, some of which are optimized for specific video-sharing platforms. Really any of these, particularly the Youtube or Vimeo options, fine to use to export. Select the option you would like to use, then click export. 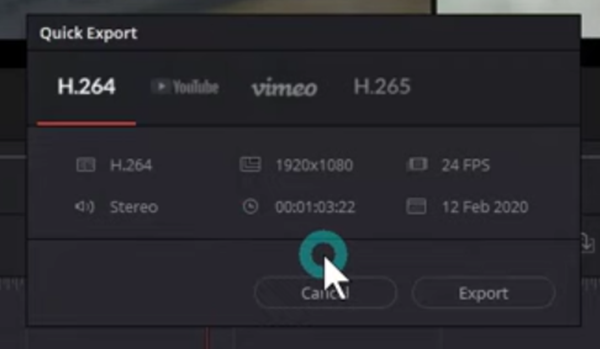
You cannot change these settings. If you would like to have more control over your export, you must use the “Deliver” tab.
Using the Deliver tab
Along the bottom of the screen is an options bar. At the end of the bar is the Deliver tab.
Clicking on this will bring up a selection of render settings on the left-hand side of the screen, above the video timeline.
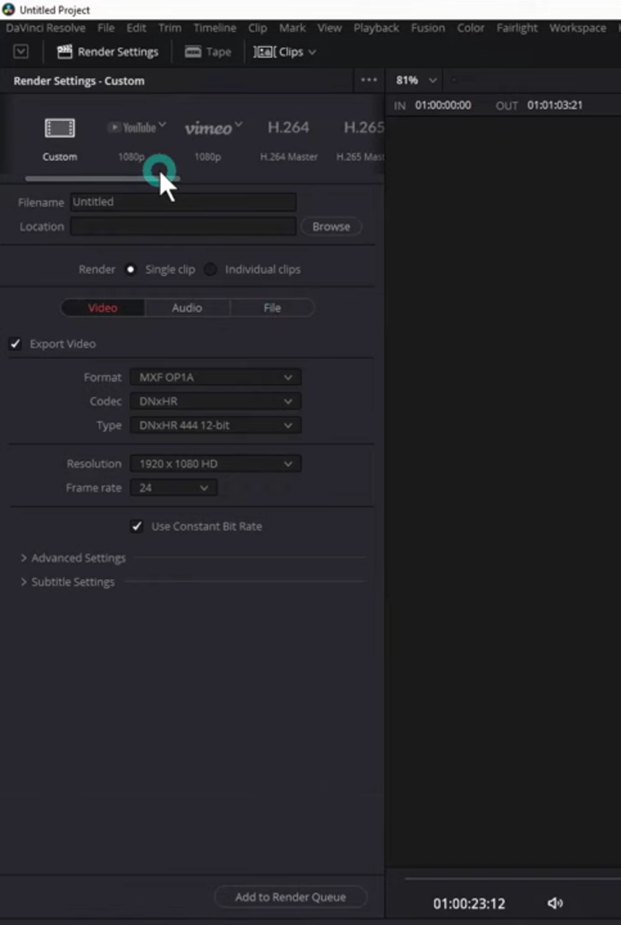
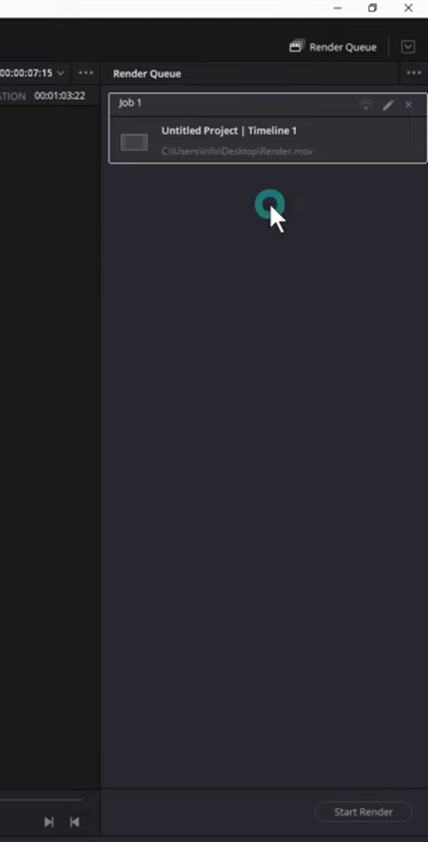
There are the same options as are available in “quick edit”, however here you can customise the render settings (if appropriate). Once you have selected your settings, click “Add to Render Queue”.
On the right-hand side of your screen, the render queue will appear. Your video doesn’t automatically begin rendering, so you can queue up several separate clips and render them all at once. To do this you must click “Start Render”. This is located at the bottom of the render queue.
More Advanced Tutorials
On the Blackmagic website training pages there are lots of tutorials for Davinci Resolve that go really in depth into organising media, editing, colour grading and more complex effects. Follow this link to access them!
You also may find the Making video content article useful.
For additional support, please contact avsupport@trinitylaban.ac.uk.