
This article, the first in a series on post-production, introduces readers to DaVinci Resolve 17, a free video-editing software. We will cover how to create a new project in DaVinci Resolve, how to select and import video and audio media to your project, and how to place, cut and resize footage.
Step 1: Install DaVinci Resolve
DaVinci Resolve is available from the Black Magic Design website here. To download it, click on the link on the provided page and select the software type appropriate to your operating system. We recommend that you download DaVinci Resolve 17, as that is the most recently released version and will be the one we refer to in these tutorials. You will need to register your details with Black Magic Design in order to download the software.
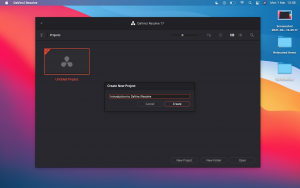
Create a New Project
One installed, open DaVinci Resolve and click ‘New Project’. You’ll be asked to enter the name of your new
project and click ‘Create’. This will take you to DaVinci’s default setup page.
Step 2: Getting Started
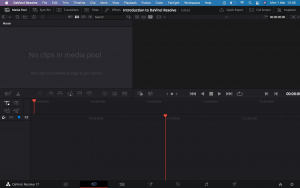
DaVinci has seven major functions as a programme, which are handily divided into distinct sections at the bottom of the programme window. These are: Media, Cut, Edit, Fusion, Colour, Fairlight (sound), and Deliver (shown below).
![]()
When you open DaVinci Resolve, you’ll automatically find yourself in the ‘Cut’ panel, with your media pool visible to the left-hand-side. To begin working with video, we’ll first need to load the video content we want to use into DaVinci. To do this, either go to ‘File’, ‘Import’ and then ‘Media’, or simply open your files in a separate window and then drag them over into the ‘media pool’ are in DaVinci. This will add your content to your project’s media library. If you want to keep your project organised, you can also create subfolders called ‘Bins’ where specific video files might go. For example, video files for a section of your film devoted to an outdoor dance section might be called ‘Outdoor’. Keeping video content organised in this way will be very helpful as you add more media to your project over time.
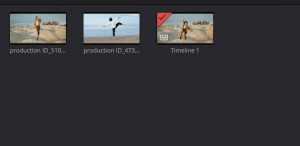
Once media has been added to DaVinci’s media pool, it will look something like this:
Step 3: Adding Content to Timeline and Cutting Clips
Each of these clips in your media pool can now be selected and added to your project. Like most video-editing softwares, DaVinci uses a timeline composed of individual tracks for placing and organising clips. When you create your project, two tracks will already be prepared for placing media content.
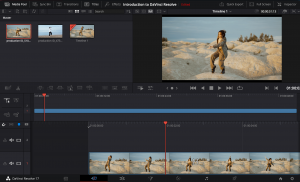
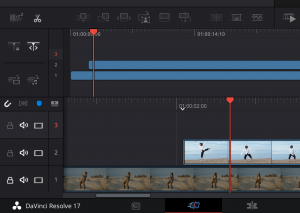
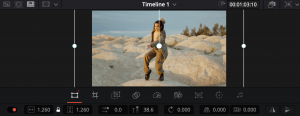
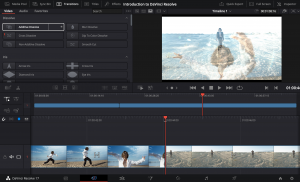
As you can see, we have dragged a clip of our dancer from our media pool into our timeline, and we can see our timeline represented in the ‘Timeline 1’ video window on the right-hand-side. The blue bar across the middle of the screen also represents your project timeline, but zoomed out to better show you your project’s length. Dragging the red arrow across our zoomed in timeline will also pull it across the larger timeline, so for the most part the larger timeline is there for organisational purposes.
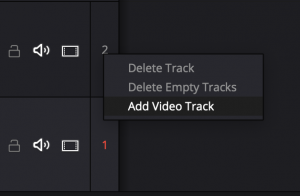
When deciding where particular clips will go in a project, you may want to move clips around to better understand how they fit together before making your final cuts. To do this, using multiple tracks can be very helpful. To add a new track to your project timeline, click on the ‘Add Track’ button (+ icon) or right-click on your tracks and click ‘Add Video Track’ from there.
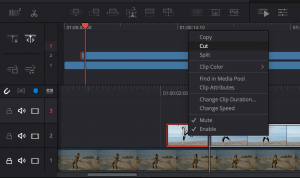
Once you’ve dragged a clip into your project timeline, you can start thinking about the sections of that clip you’d like to use. For example, you might want to cut-out a few seconds at the beginning and end of your video. To do this, drag the red playhead arrow over the exact place where you’d like to make a cut and click on the ‘Split Clip’ scissors icon on the left-hand-side. This will split the clip into two sections. Then click on the part of the clip you want to delete and press backspace, or right-click on the clip and select ‘Cut’.
Once you’re happy with the clip placement and cuts you’ve made, it’s highly recommended you move all clips into a single track. This is because rendering multiple tracks laid on top of each other can be very heavy work for your computer, so minimising the amount of processing necessary to export your project is both timesaving and less risky. Read more about exporting in our exporting section.
Step 4: Repositioning and Editing your Clip
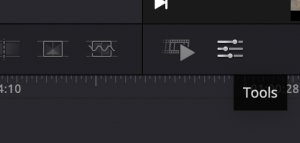
Once you’re happy with the placement of clips in your timeline, you might want to consider cropping the size of your clips or selecting particular areas to focus on. DaVinci has a number of tools to help you do this. Select the ‘Tools’ button from the central bar to reveal tools below your main timeline monitor.
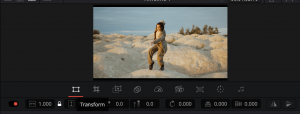
The tools we’ll focus on here are ‘Transform and ‘Crop’. Both allow you to reposition your clip in order to focus attention on a specific area. For example, in the clip above we have used the Transform tool to enlarge the dancer, bringing them more in line with their size in a following clip.
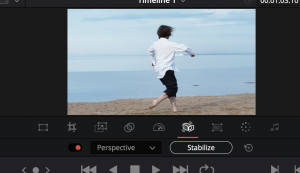
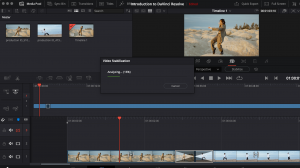
Other tools available are ‘Dynamic Zoom’, ‘Composite’, ‘Speed’, ‘Stabilisation’, ‘Lens Correction’, ‘Colour’ and ‘Audio’. Some of these tools will be covered in later sections of these tutorials. For now, we’re going to focus on stabilisation, as it can be very useful for footage filmed with hand-held cameras, particularly with enlarged clips. DaVinci’s automated stabilisation tool is very effective and easy to use. Simply click on the Stabilisation tool and select ‘Stabilize’. This will analyse the video clip you have highlighted in your timeline and automatically perform stabilisation for you (this may take a few minutes, depending on the size of your clip). Toggle the red on-off switch next to the dropdown menu to compare before and after the stabilisation.
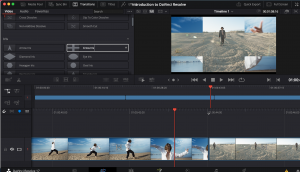
Step 5: Creating Transitions Between Clips
Once you’re happy with the size, position and placement of your clips, you might consider how to cut between them. DaVinci comes with a few transitions effects with different aesthetic qualities. To access them, click on the ‘Transitions’ tab on the top left of the ‘Cut’ screen. This will reveal a number of different transition options, categorised as Dissolve, Iris, Motion, Shape, Wipe and Fusion. Hovering over each transition option with your timeline screen to the right will reveal a preview of what each effect will look like. Below, you can see examples of an Additive Dissolve and Cross Iris effect. The most popular effects used when building a portfolio are a Cross-Dissolve or Additive Dissolve, as these are simple and undistracting. Once you’ve found a transition you want to use, click and drag it to the gap between two clips on your timeline.
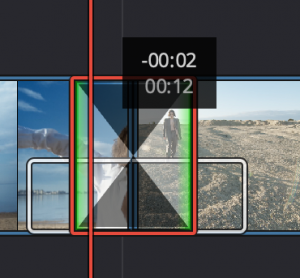
Once you’ve placed the transition where you’d like it to go, you can change the speed of the transition to suit your preference. Just hover over the side of side of the transition and drag.
When adding transitions to your showreel, it’s good to think about theme, purpose and consistency. A consistent showreel will appear more considered and helps yours stand-out in reviewing processes. Likewise, a flashy transition can seem sudden and out of place when used arbitrarily.
Reviewing your Edit
Now that you’ve placed your clips in an order you like and added transitions between them, it’s worth reviewing your work up to this point before moving on to the next section. Are you happy with the length of time shown to different portions of your work? Is there enough variation between sections, do the transitions follow a pattern or showcase some kind of development? Feeling content with the structure of your work at this stage is useful because it will make the following stages easier: timing your work to music, adding colour effects to different sections etc. Having a rough draft of the showreel order means you won’t have to worry about making changes later after your effects have already been added.
Here are two short-showreels I’ve put together using some free stock footage. A cross-dissolve effect has been used throughout both of them.