
The audio recorders at Laban Library are very flexible and enable you to get a really high-quality recording. Using all of the features can get a little complicated which is why we’ve put together this article to help you get started.
- Audio recorder
- Power supply
Click to view the images full screen.
Recording
How to record
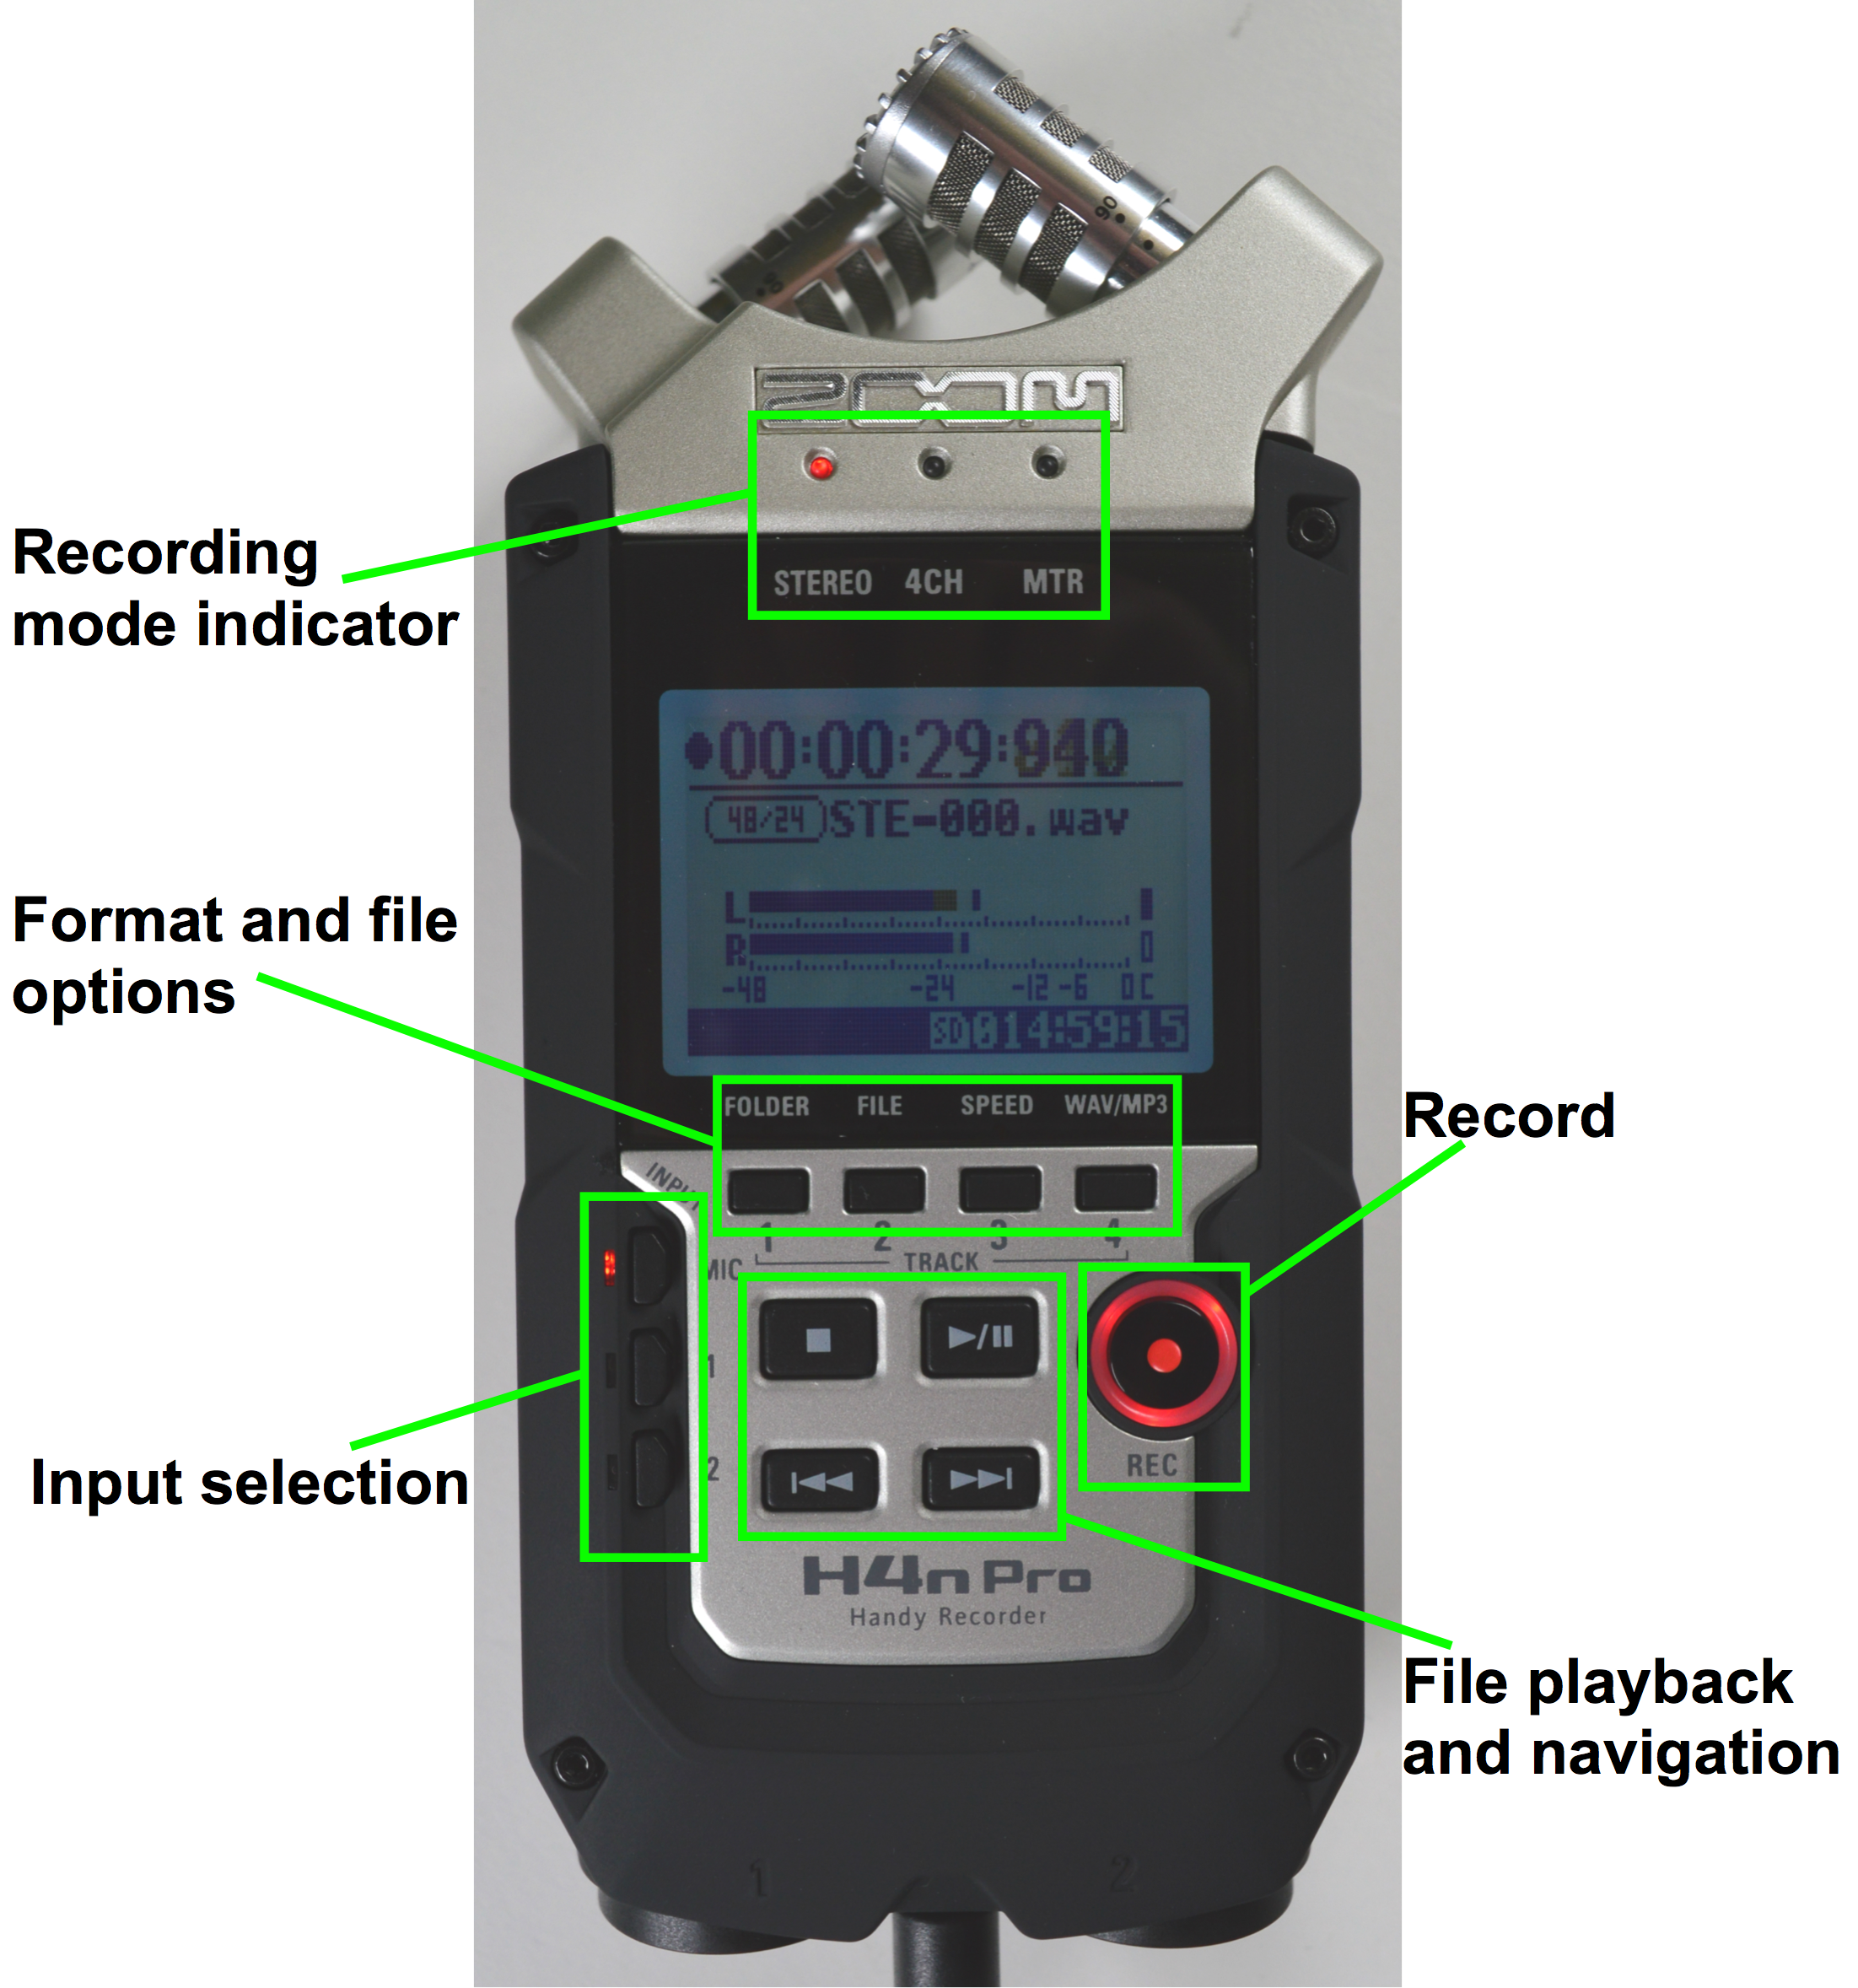
The first time you press the RECORD button, the light around it will start flashing. The recorder is not recording yet!
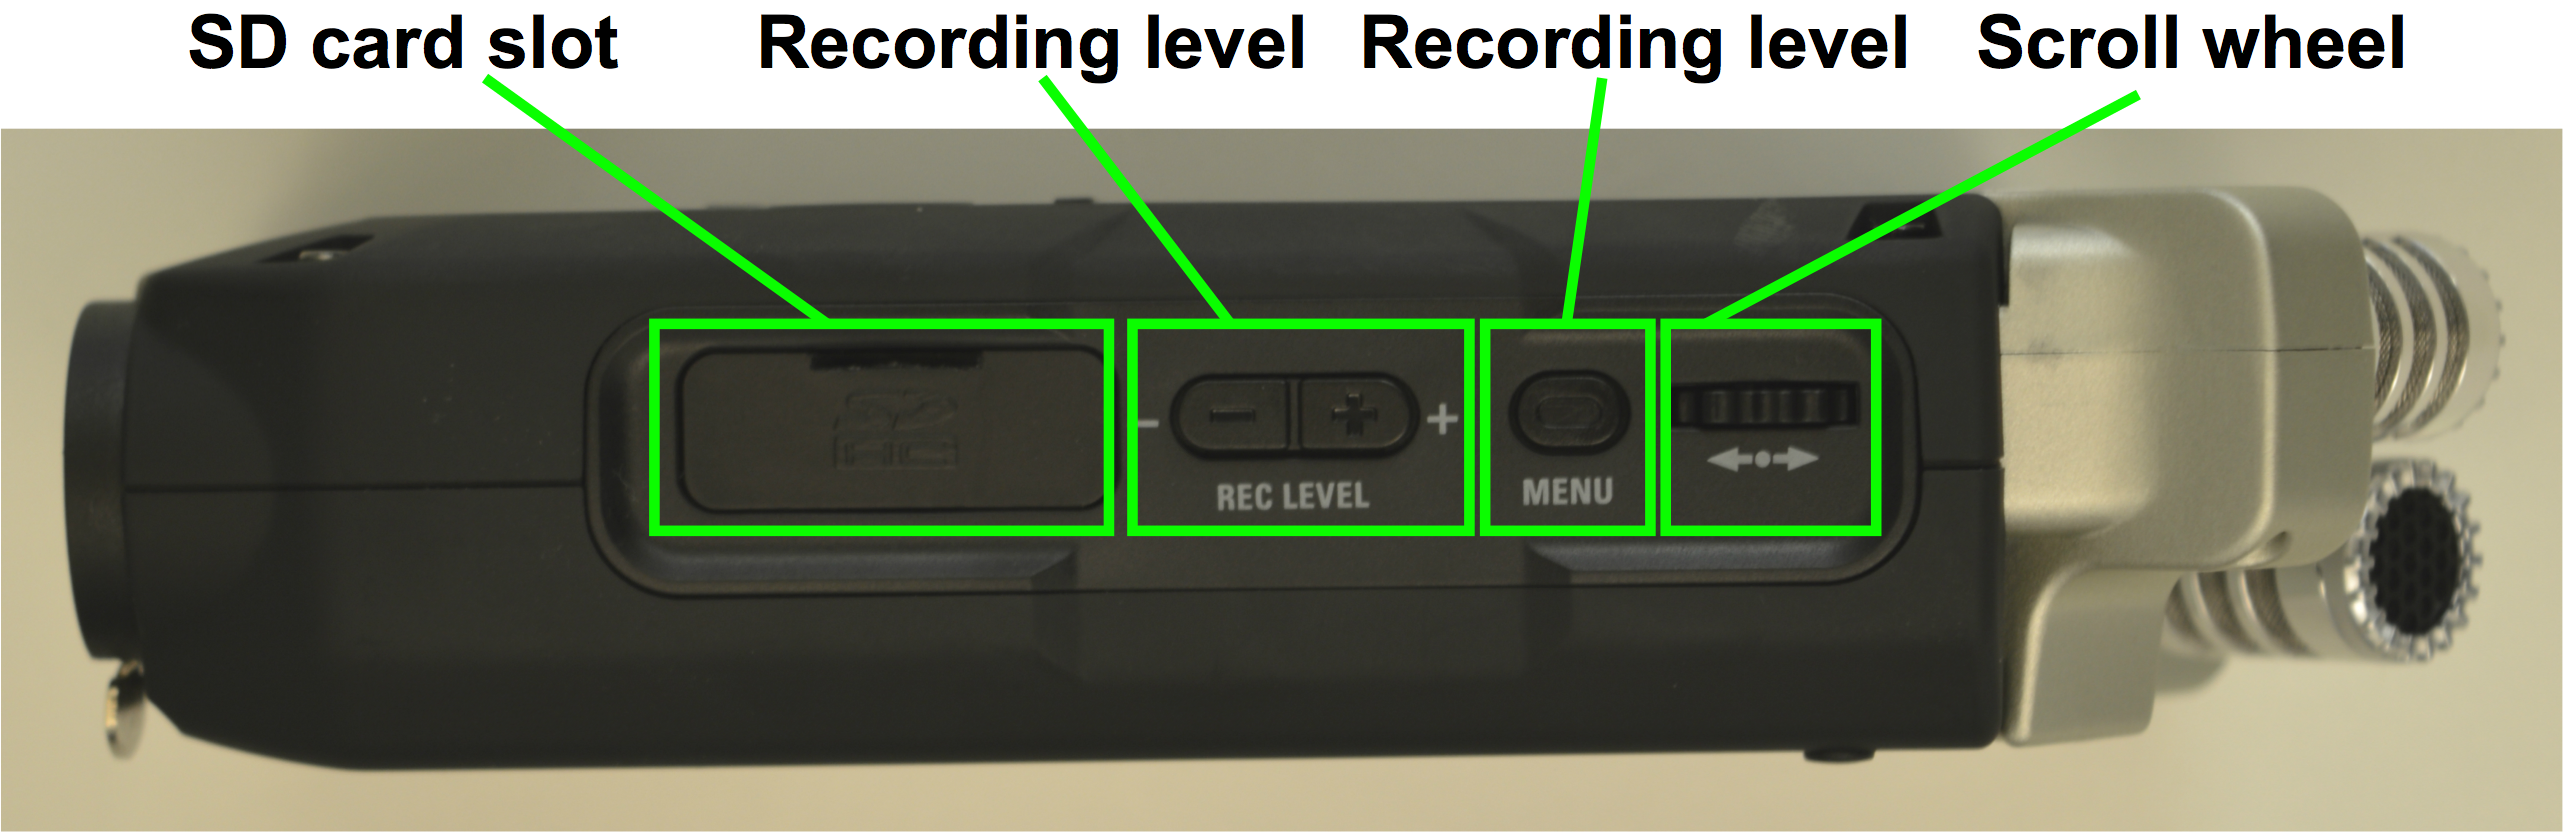
You should be able to hear what the recorder can hear through the headphones, and see the levels moving on the screen. The volume of the recording can be changed with the buttons on the right-hand side of the recorder labelled MIC LEVEL. Make sure that you don’t let the levels get too loud or your recording will be clipped – this is indicated by the ‘lights’ on the screen to the far right of the audio metre.
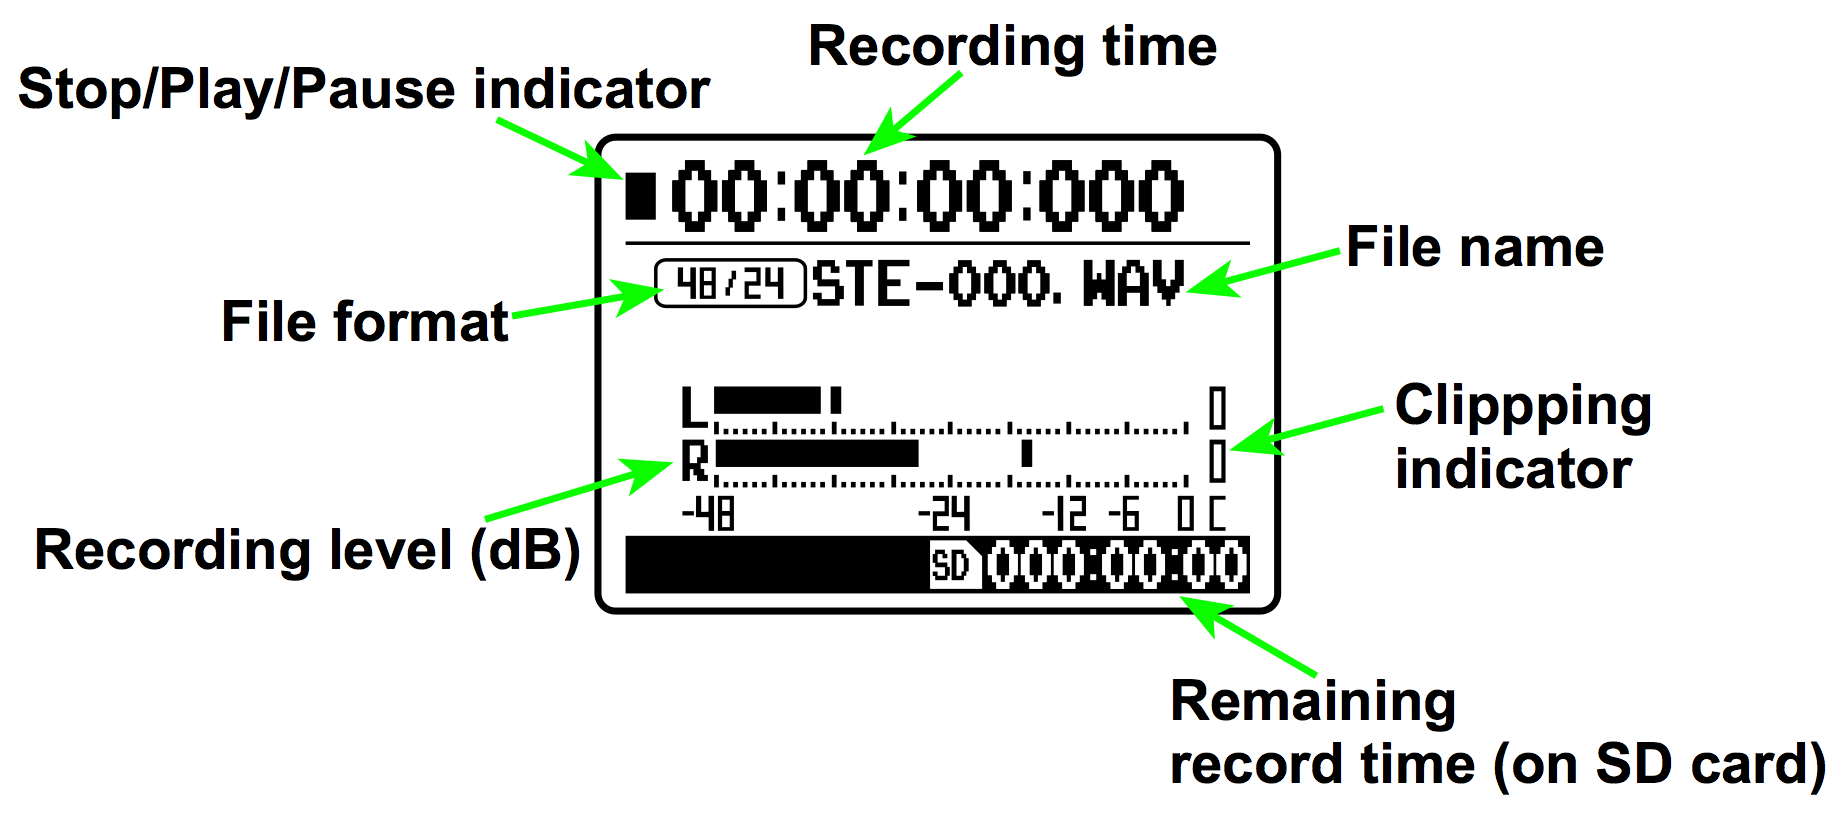
Once the recording level has been set, press the RECORD button again to start recording – the light around the record button should become solid (not flashing). You can see the recording time on the screen, as well as the audio level.
Watching the levels and clipping
If the audio level gets too high, the sound will clip. This means that the sound source is too loud for the microphone and the recording level will have to be reduced. Clipping causes distortion on the final recording. You can see if clipping has occurred by looking at the right side of the screen – at the right-end of the audio metre – there are little ‘lights’ which will be filled in when clipping has occurred.
Stop Recording
Press the STOP button to stop recording – the light on the RECORD button will go off and the icon in top corner of the screen will change to the stop icon.
Post-recording
Playback
In order to playback your recordings simply select the recording you wish to play using the scroll wheel, then press the PLAY button.
Transferring files from SD card
Once recording is complete it’s time to put the files onto the computer. Simply switch off the recorder and eject the SD card. Put the SD card into your computer (either in the SD card slot or via a USB SD card reader – available to borrow from the library) and open the contents. You will find 3 folders – one for each recording mode. Open STEREO folder (or the folder corresponding to the mode you recorded in). In each of these three folders there are 10 subfolders labelled 1-10. Your recording is in the folder which you specified back at the beginning of the recording process. Simply copy and paste or drag and drop the file/s (the default file name is STE-000.wav) on to your computer.
Preparing for recording
Battery / power supply
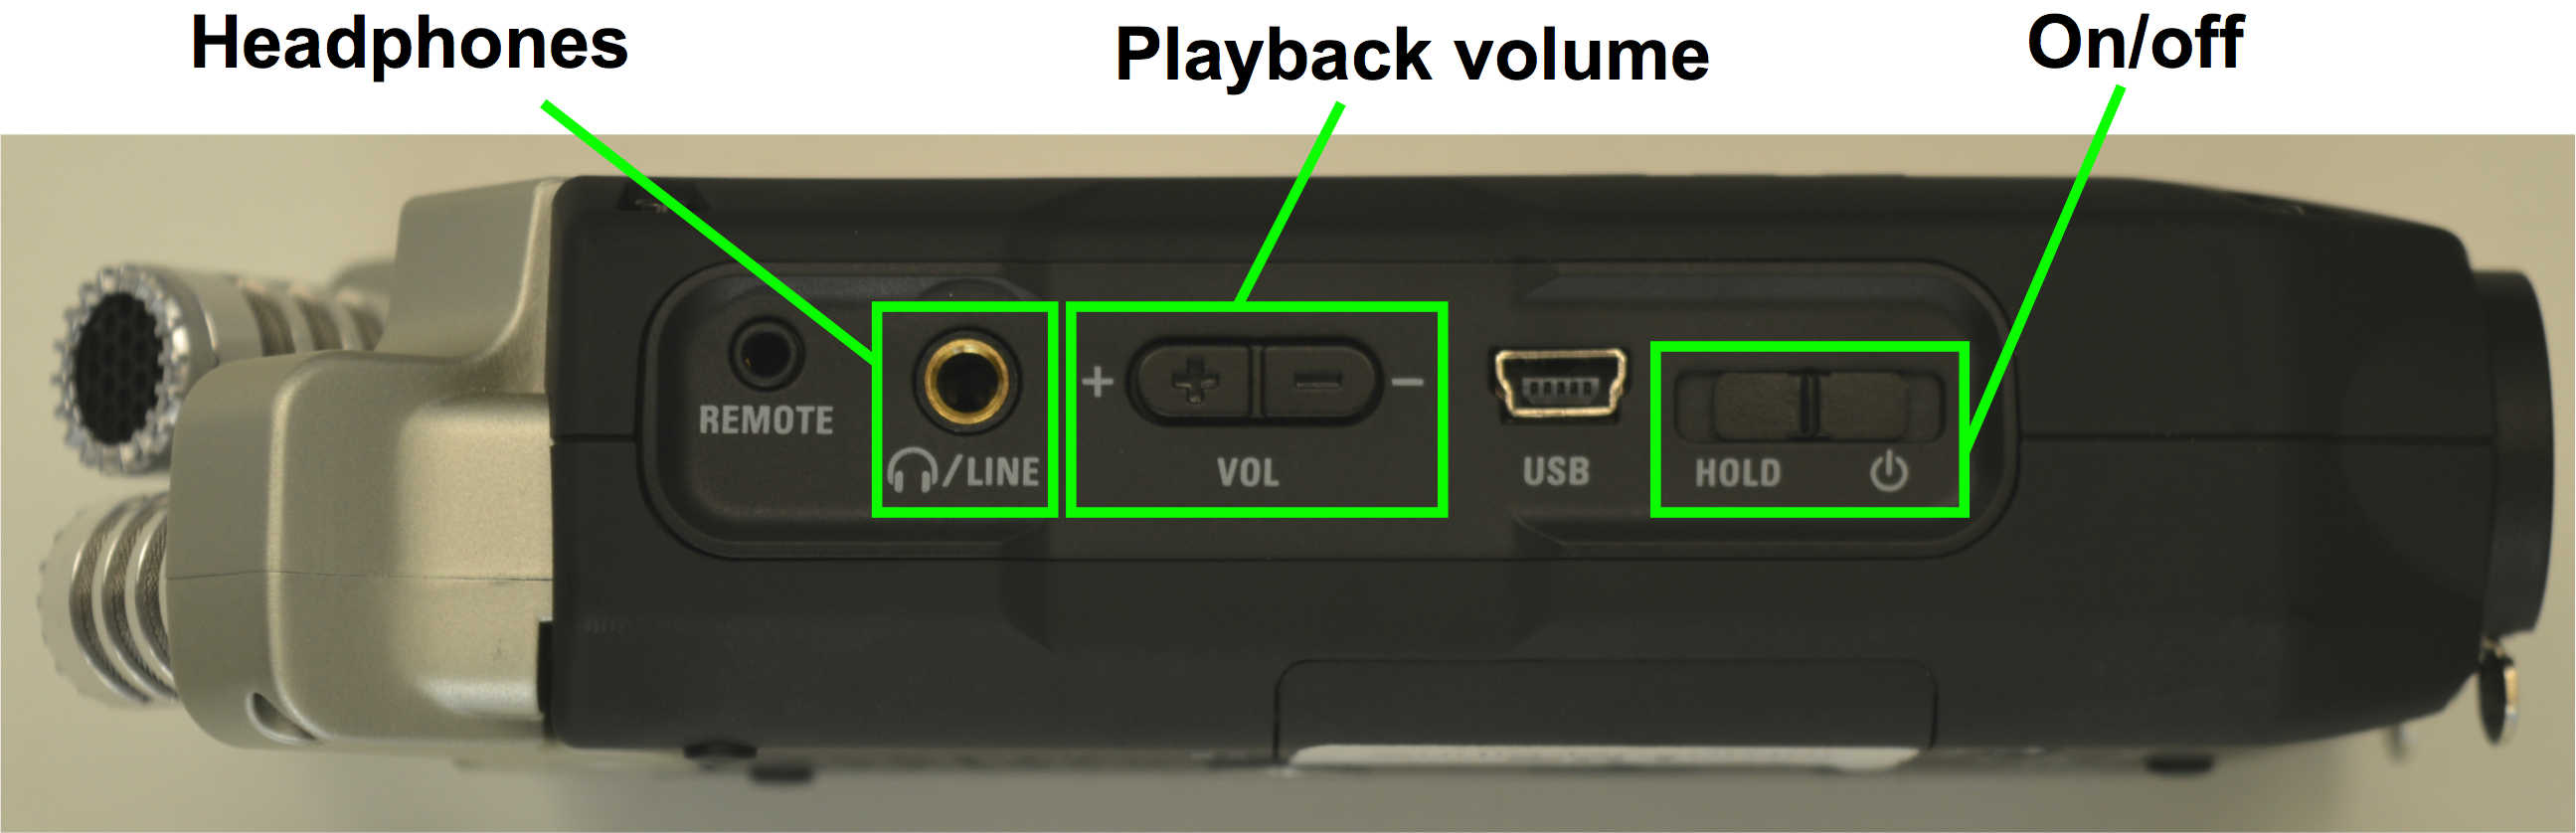
The audio recorders available for loan are supplied with a power adapter. This is NOT a charger, only a power supply – this plugs in on the bottom side of the device. Alternatively, the audio recorders take two AA batteries which are NOT supplied by the library.
SD card
Begin by inserting your SD card into the slot on the right-hand side of the recorder. Please note that the recorders will not work with an SD card over 32 Gb in capacity.
Turning on
The ON switch is on the left-hand side at the bottom. Pull the switch down and release. The screen will come on and light up.
Headphones
You may want to use headphones to monitor the sound whilst recording, simply plug headphones into the headphone socket on the left-hand side.
Pick up area (90º / 120º)
The built-in microphones at the top of the recorder can be angled differently depending on your recording situation. Simply twist the microphones between the 90º and 120º positions – 90º will focus the recording more, 120º will pick up sound from a wider area.
Changing Settings
Setting Date and Time
You may want to set the date and time so that the recording metadata is correct. To do this press the MENU button on the right-hand side and use the scroll wheel to navigate to SYSTEM then DATE/TIME. Press the scroll wheel to select each option. Use the scroll wheel to set the date and time then select OK when done. Press MENU again to exit the menu.
Mode
Ensure that the MODE is set to STEREO by looking at the 3 red lights above the screen – the light farthest left is the STEREO indicator. We recommend using STEREO mode.
Save folder
Next select the save folder by pressing the FOLDER button (farthest left) underneath the screen. There are 10 folders to choose from – remember which one you choose as you will need it later. Use the selection wheel at the top of the right-hand side and scroll through the folders. To select simply press down on the scroll wheel.
Recording Formats
We recommend using .WAV 48kHz 24bit to record in. The audio recorders can also record in .MP3 format but the quality of your recording will be reduced due to .MP3 being a more compressed format.
For more advanced use please refer to the Zoom H4n Manual.