
![]() This content is related to the Faculty of Dance
This content is related to the Faculty of Dance
The Pro video cameras in the library offer a range of features that allow you to shoot high quality footage and have better control over setting up your image. Ideal for recording a performance or shooting a creative video.
If you just need to shoot something simple and don’t require a complicated setup, the Standard video cameras may be a better option.
Setting up the camera
- If using a tripod, ensure the tripod mount is screwed securely to the bottom of the camera and attached to the tripod.
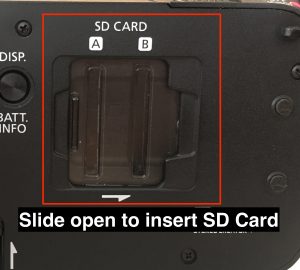
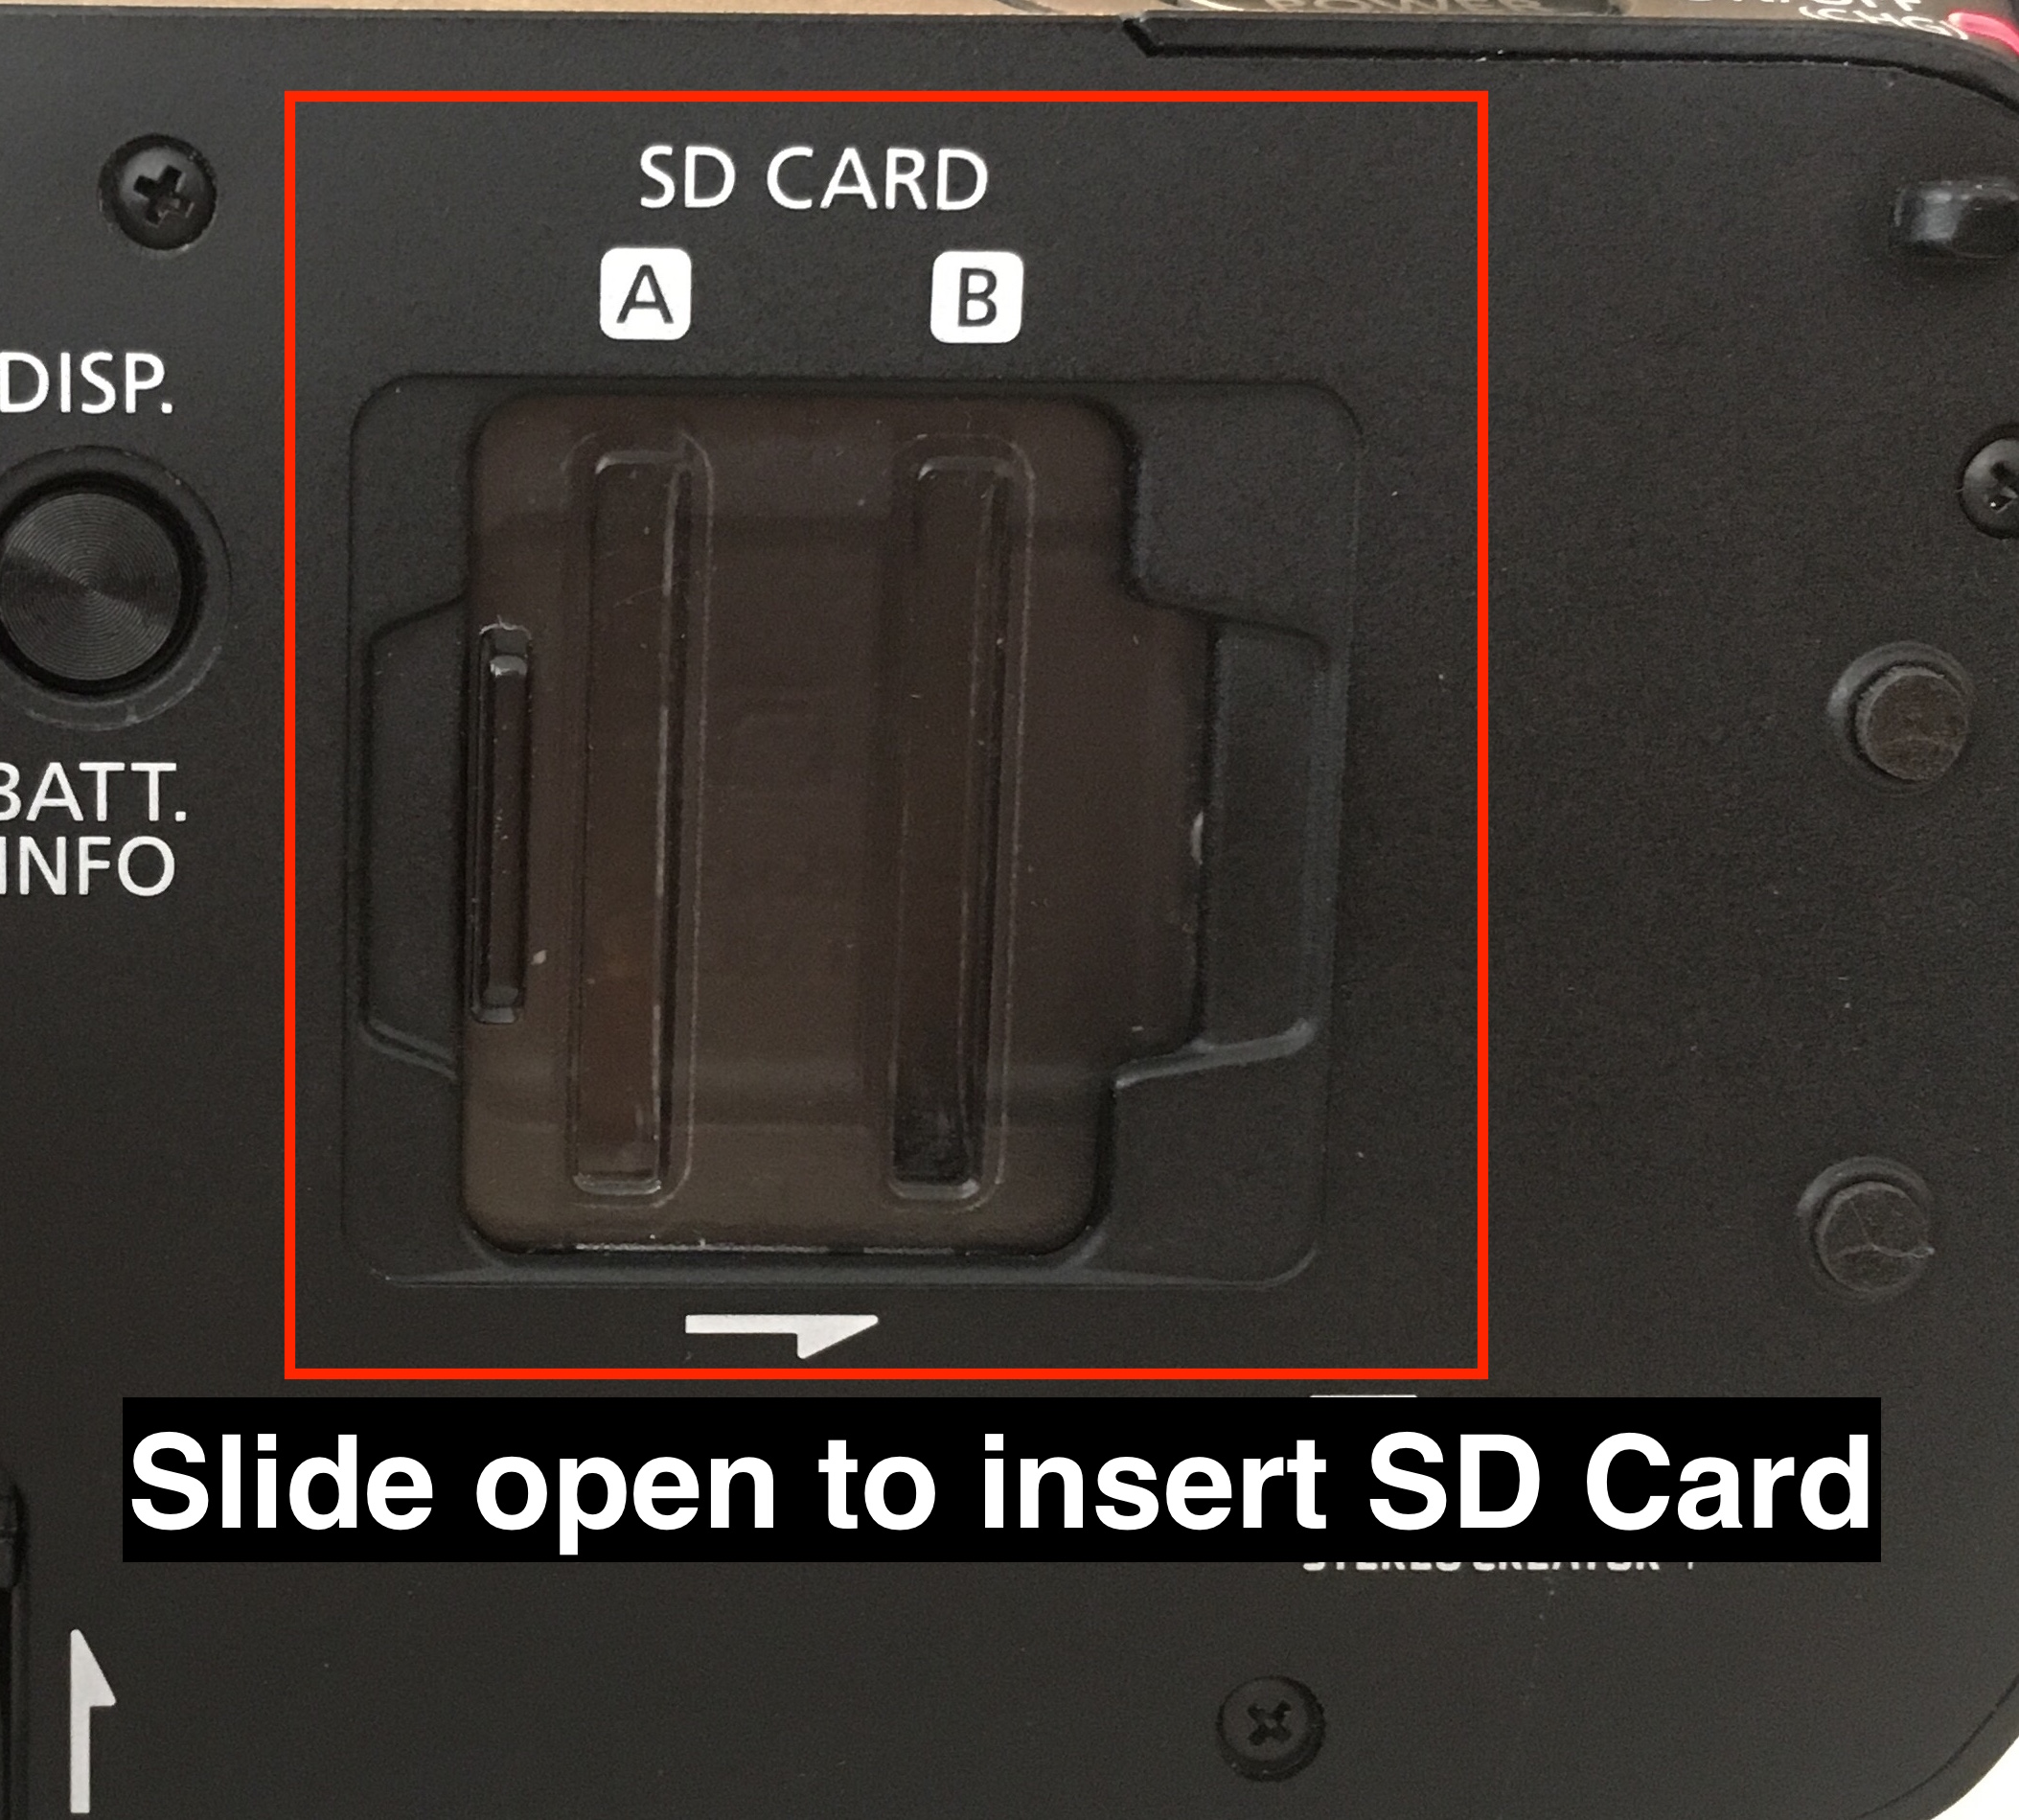
- This camera allows you to load 2 SD cards, which extends the amount of time you can record for, due to the large file sizes this camera generates this can be useful to ensure you don’t run out of space whilst recording. Make sure there is an SD card loaded into the camera.
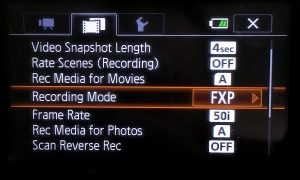
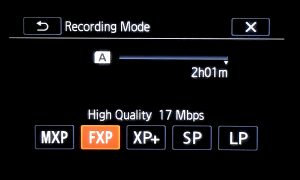
- We recommend shooting in the FXP 17 Mbps recording mode which is a higher quality format. You can access the recording mode setting by tapping the FUNC. button > MENU > tapping on the second menu tab > scrolling to ‘Recording Mode‘ and selecting your desired preference.
- For ease of use you can enable AUTO mode by using the switch on the top right hand side of the camera. This will automatically adjust camera settings for you.
If you wish to manually adjust the settings yourself, you can switch to M which enables manual shooting mode.
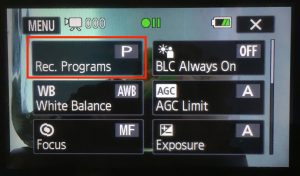
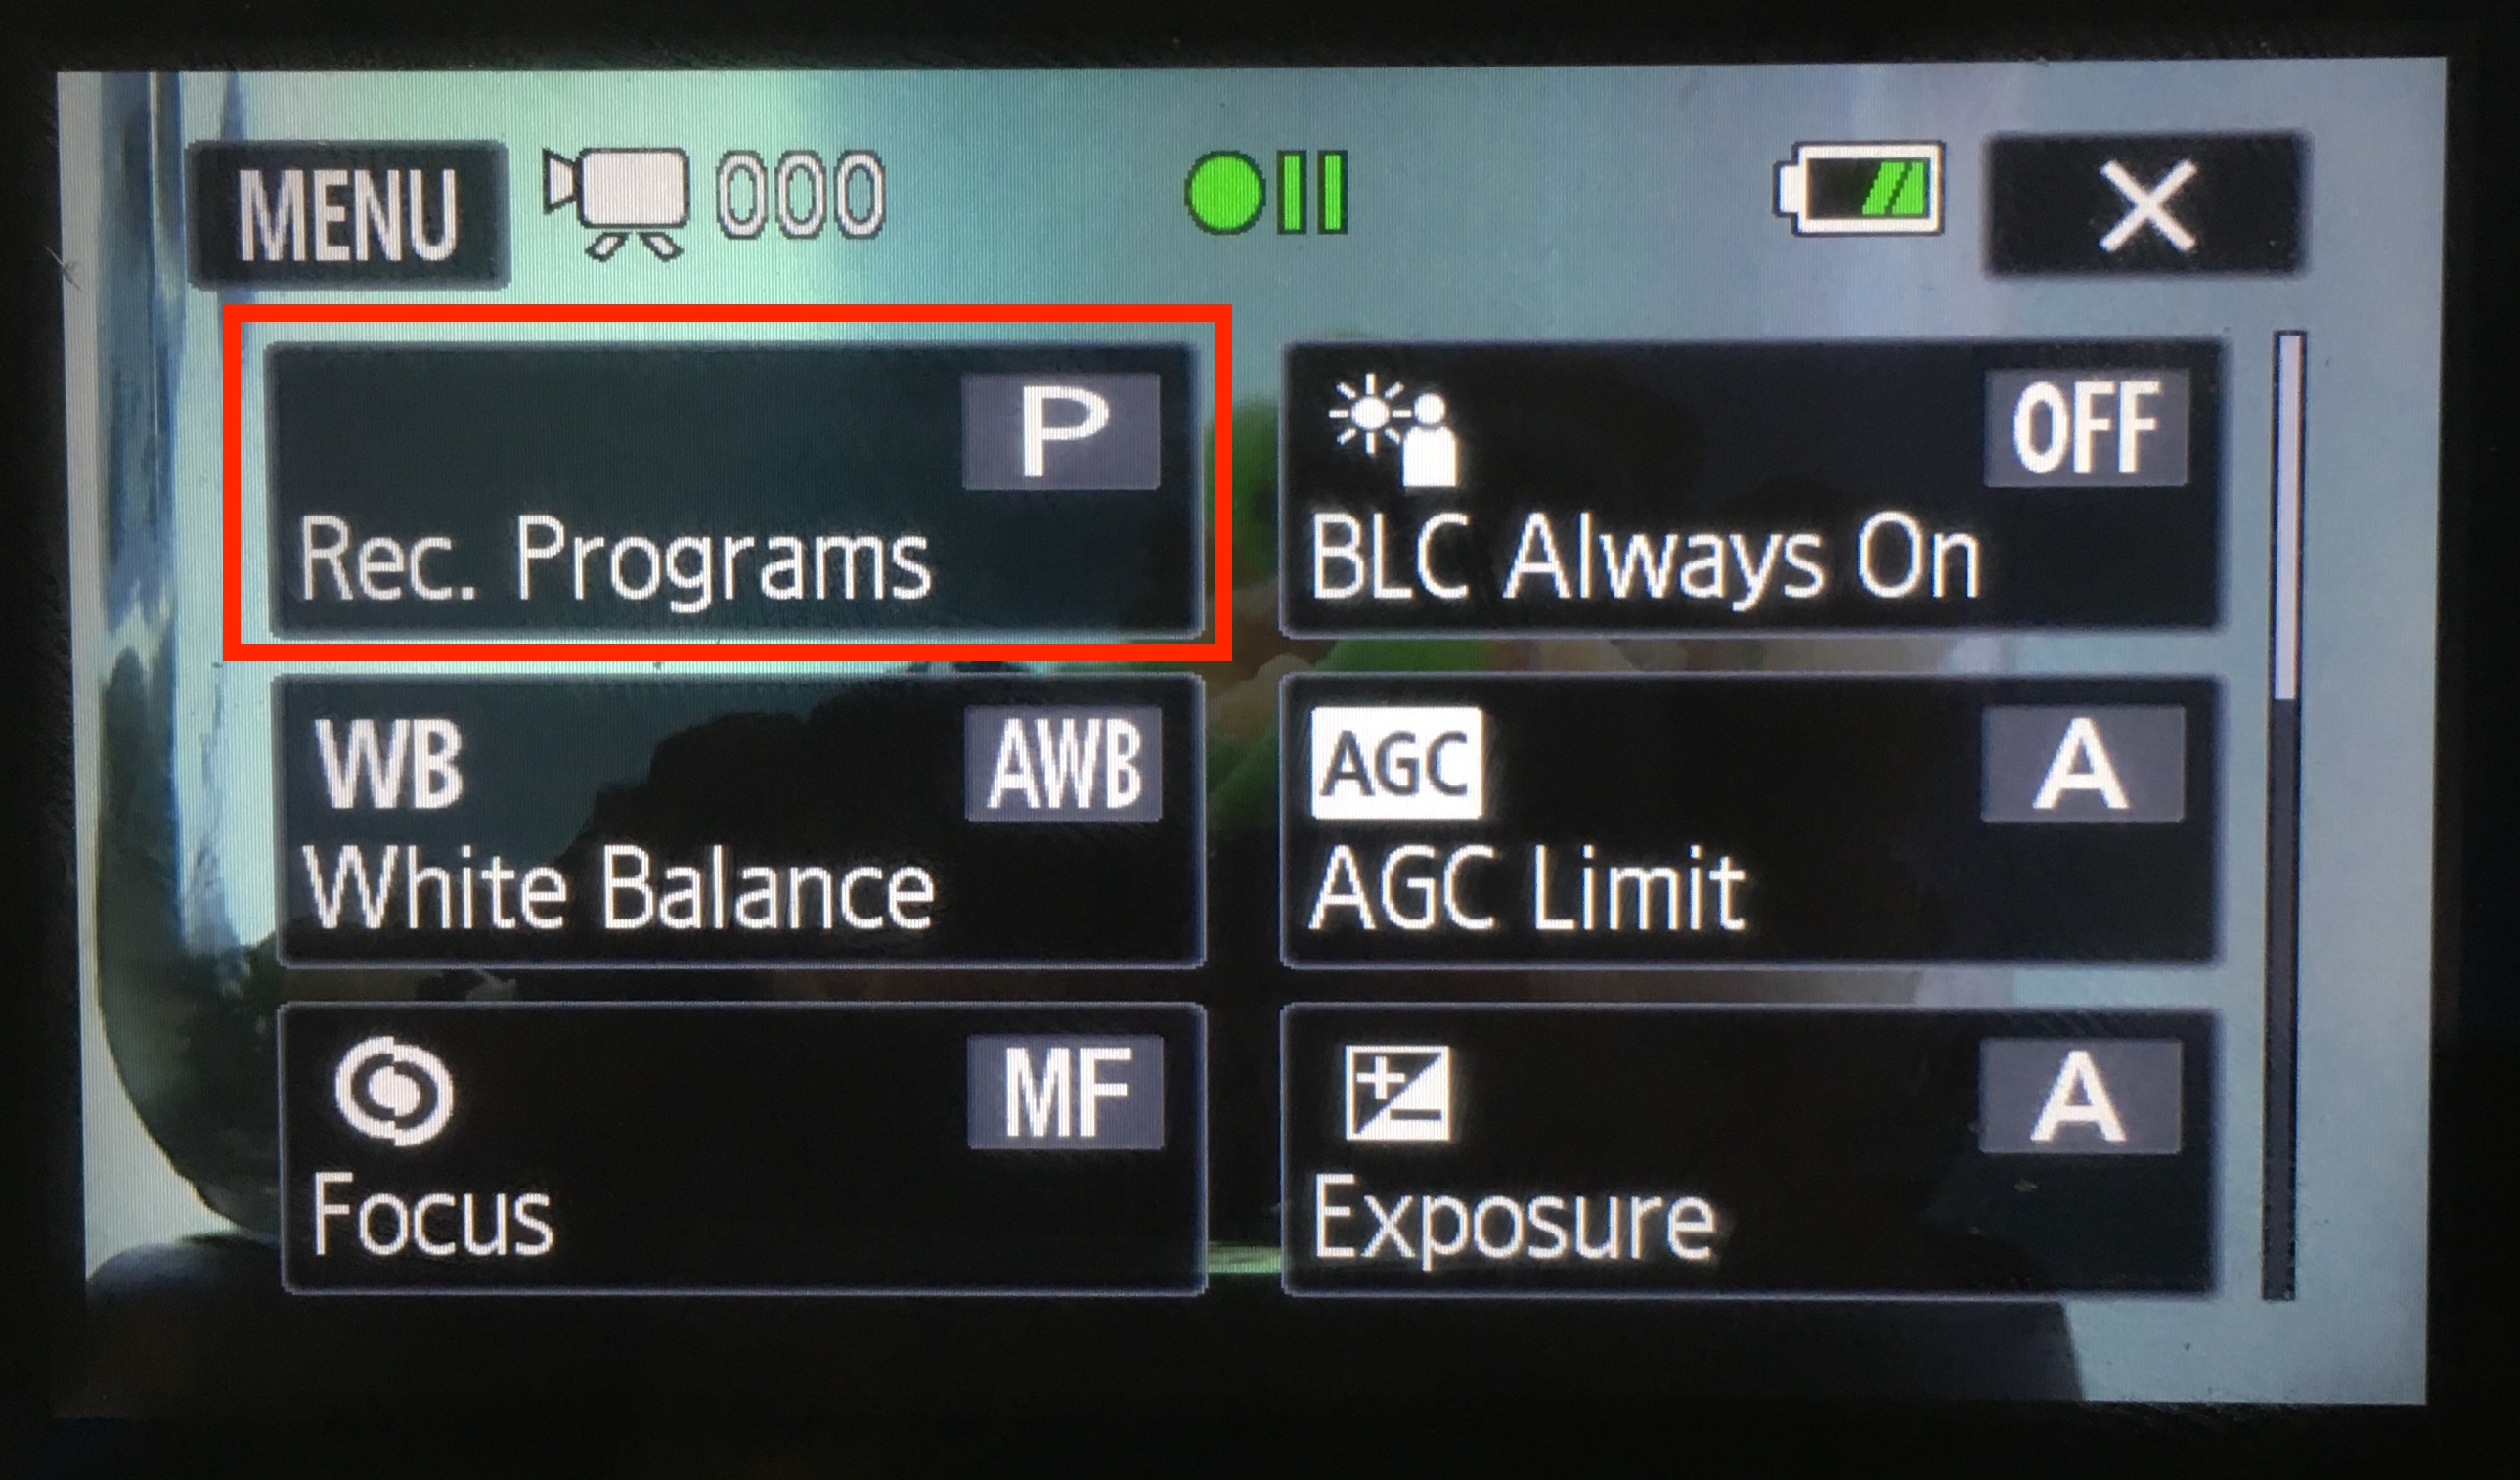
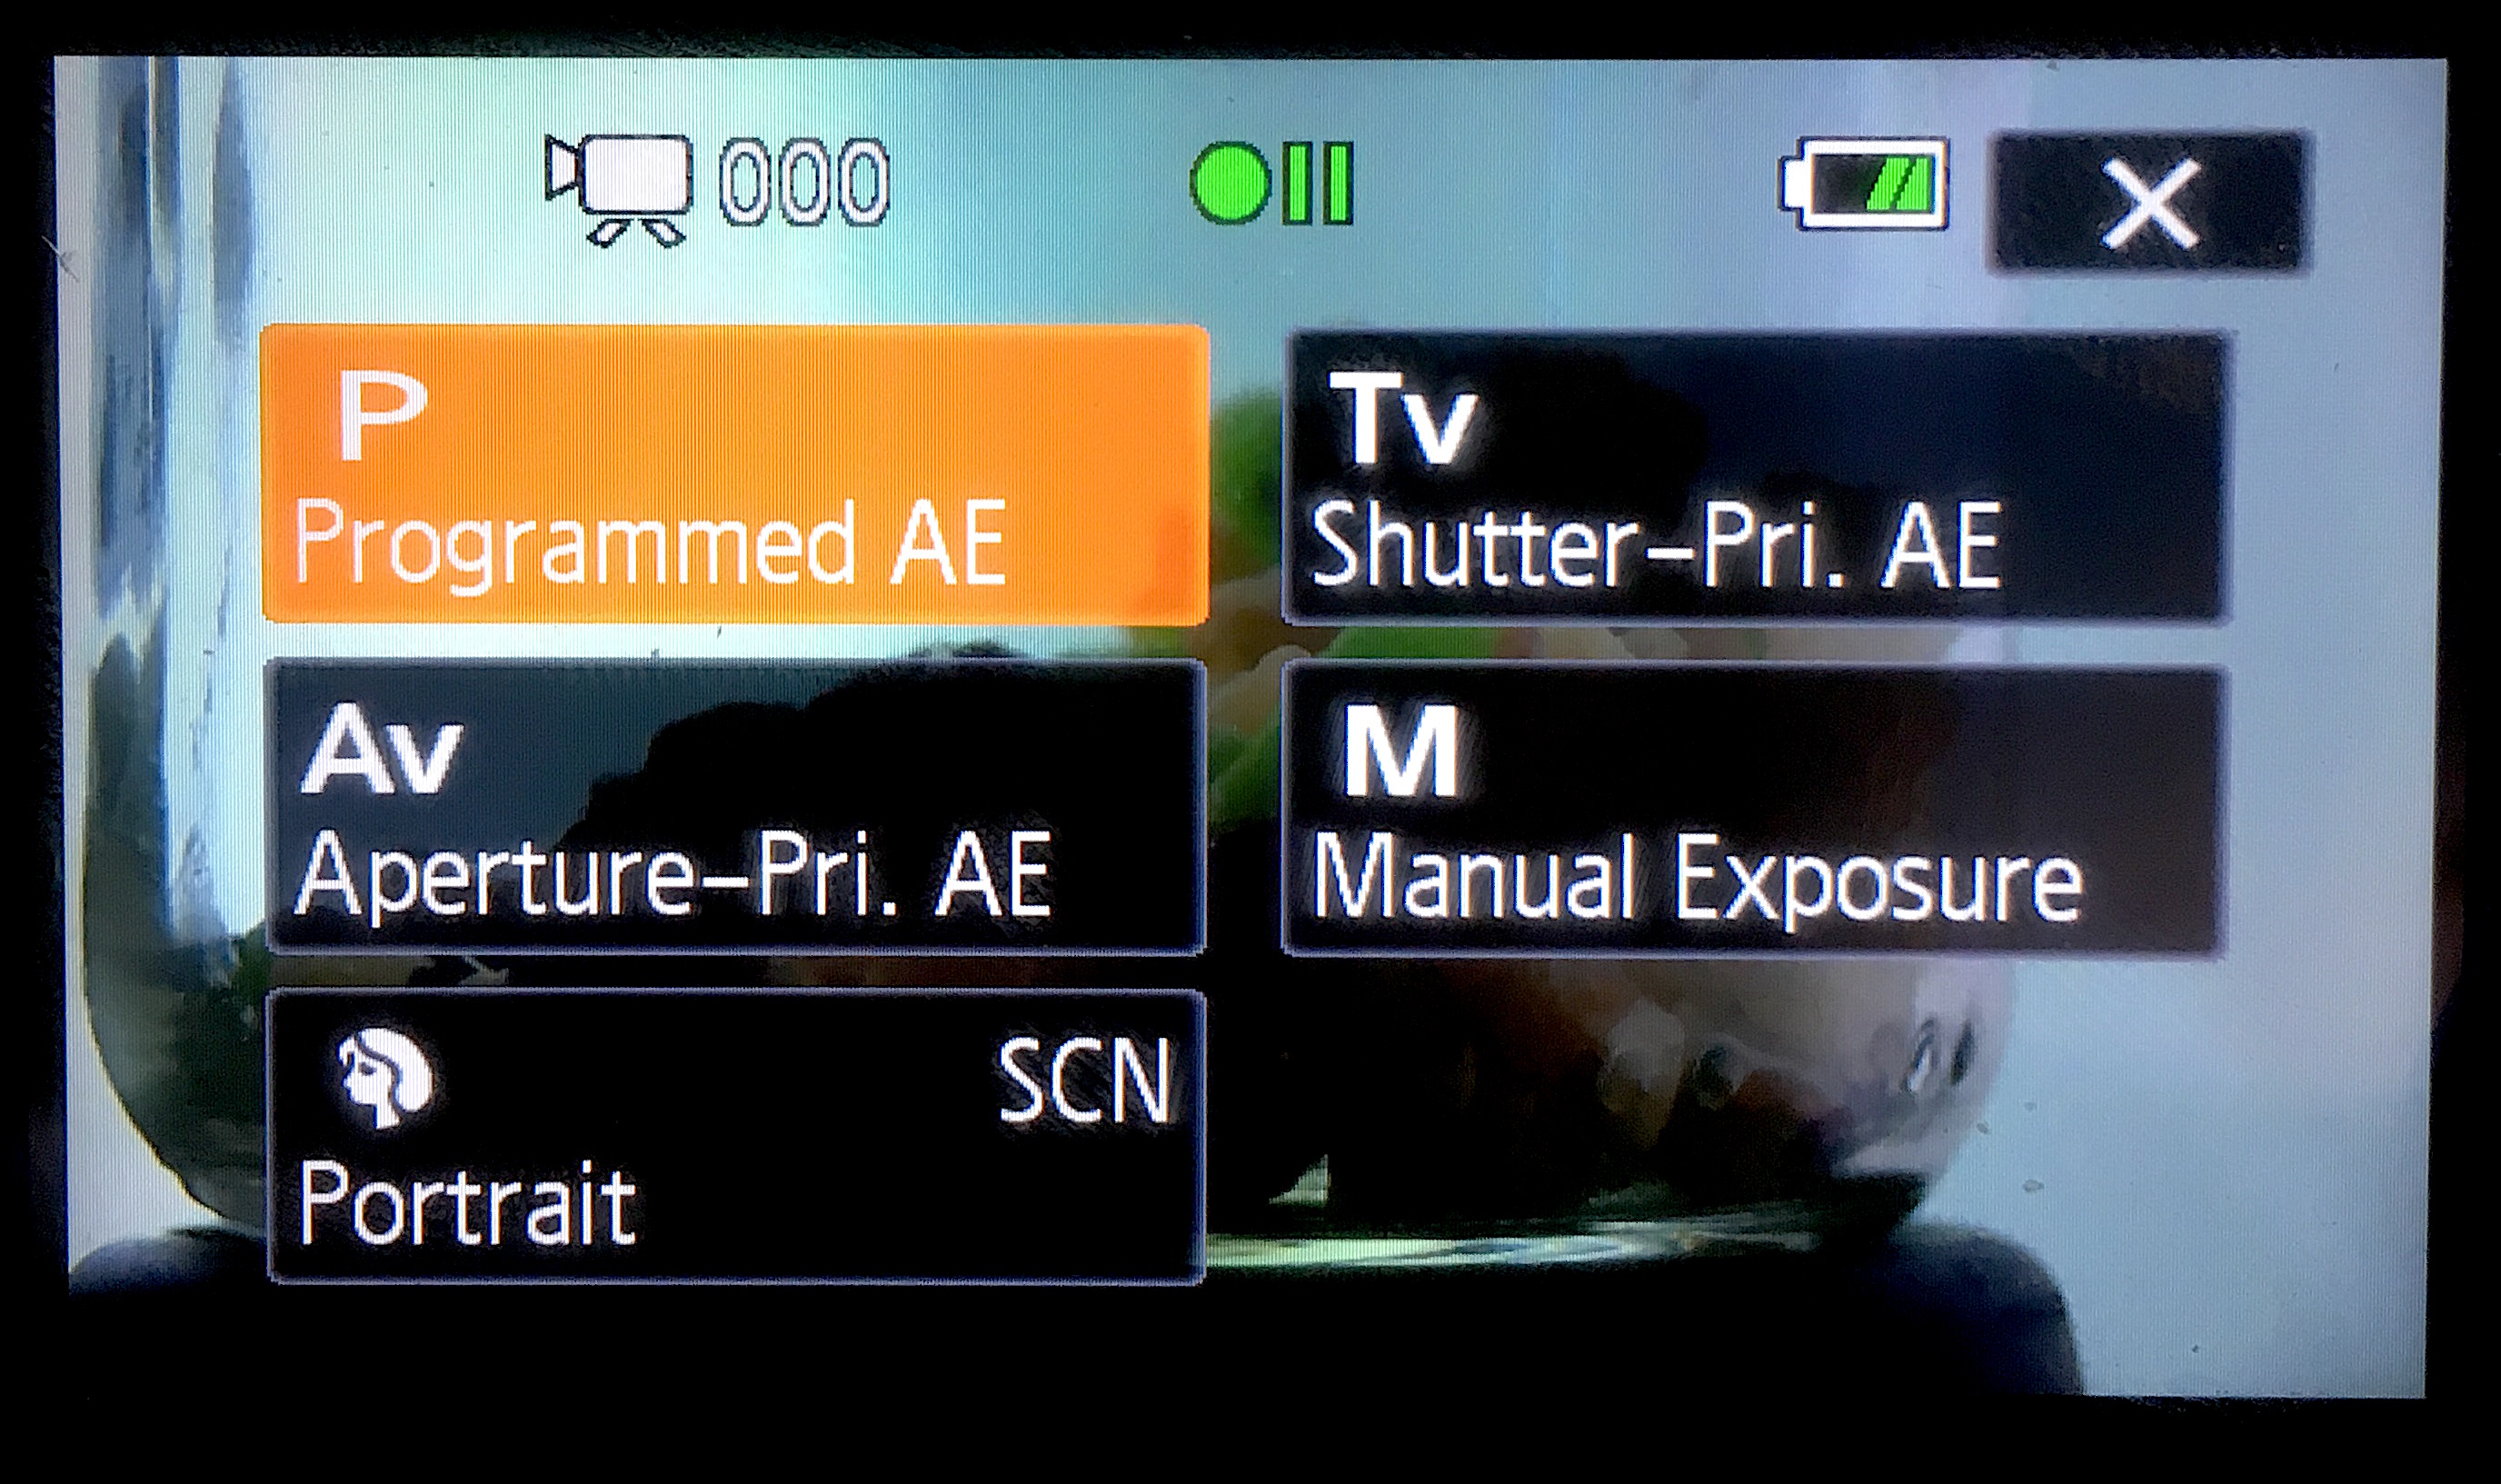
- In manual shooting mode. by tapping FUNC. and then the ‘Rec. Programs‘ option, you will find a few modes which tell the camera what to control.
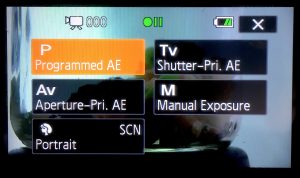
– Programmed AE: This functions similarly to AUTO mode, and the camera will automatically adjust shutter speed and aperture.
– Shutter-Pri. AE: Set the shutter speed, and the camera will automatically adjust the aperture for optimal exposure.
– Aperture-Pri. AE: Set the aperture, and the camera will automatically adjust the shutter speed.
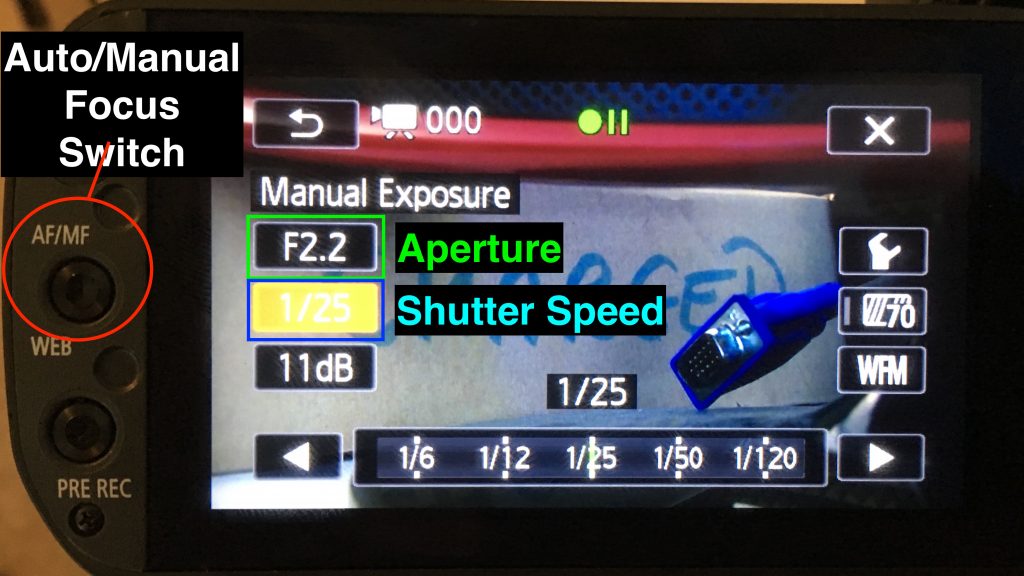
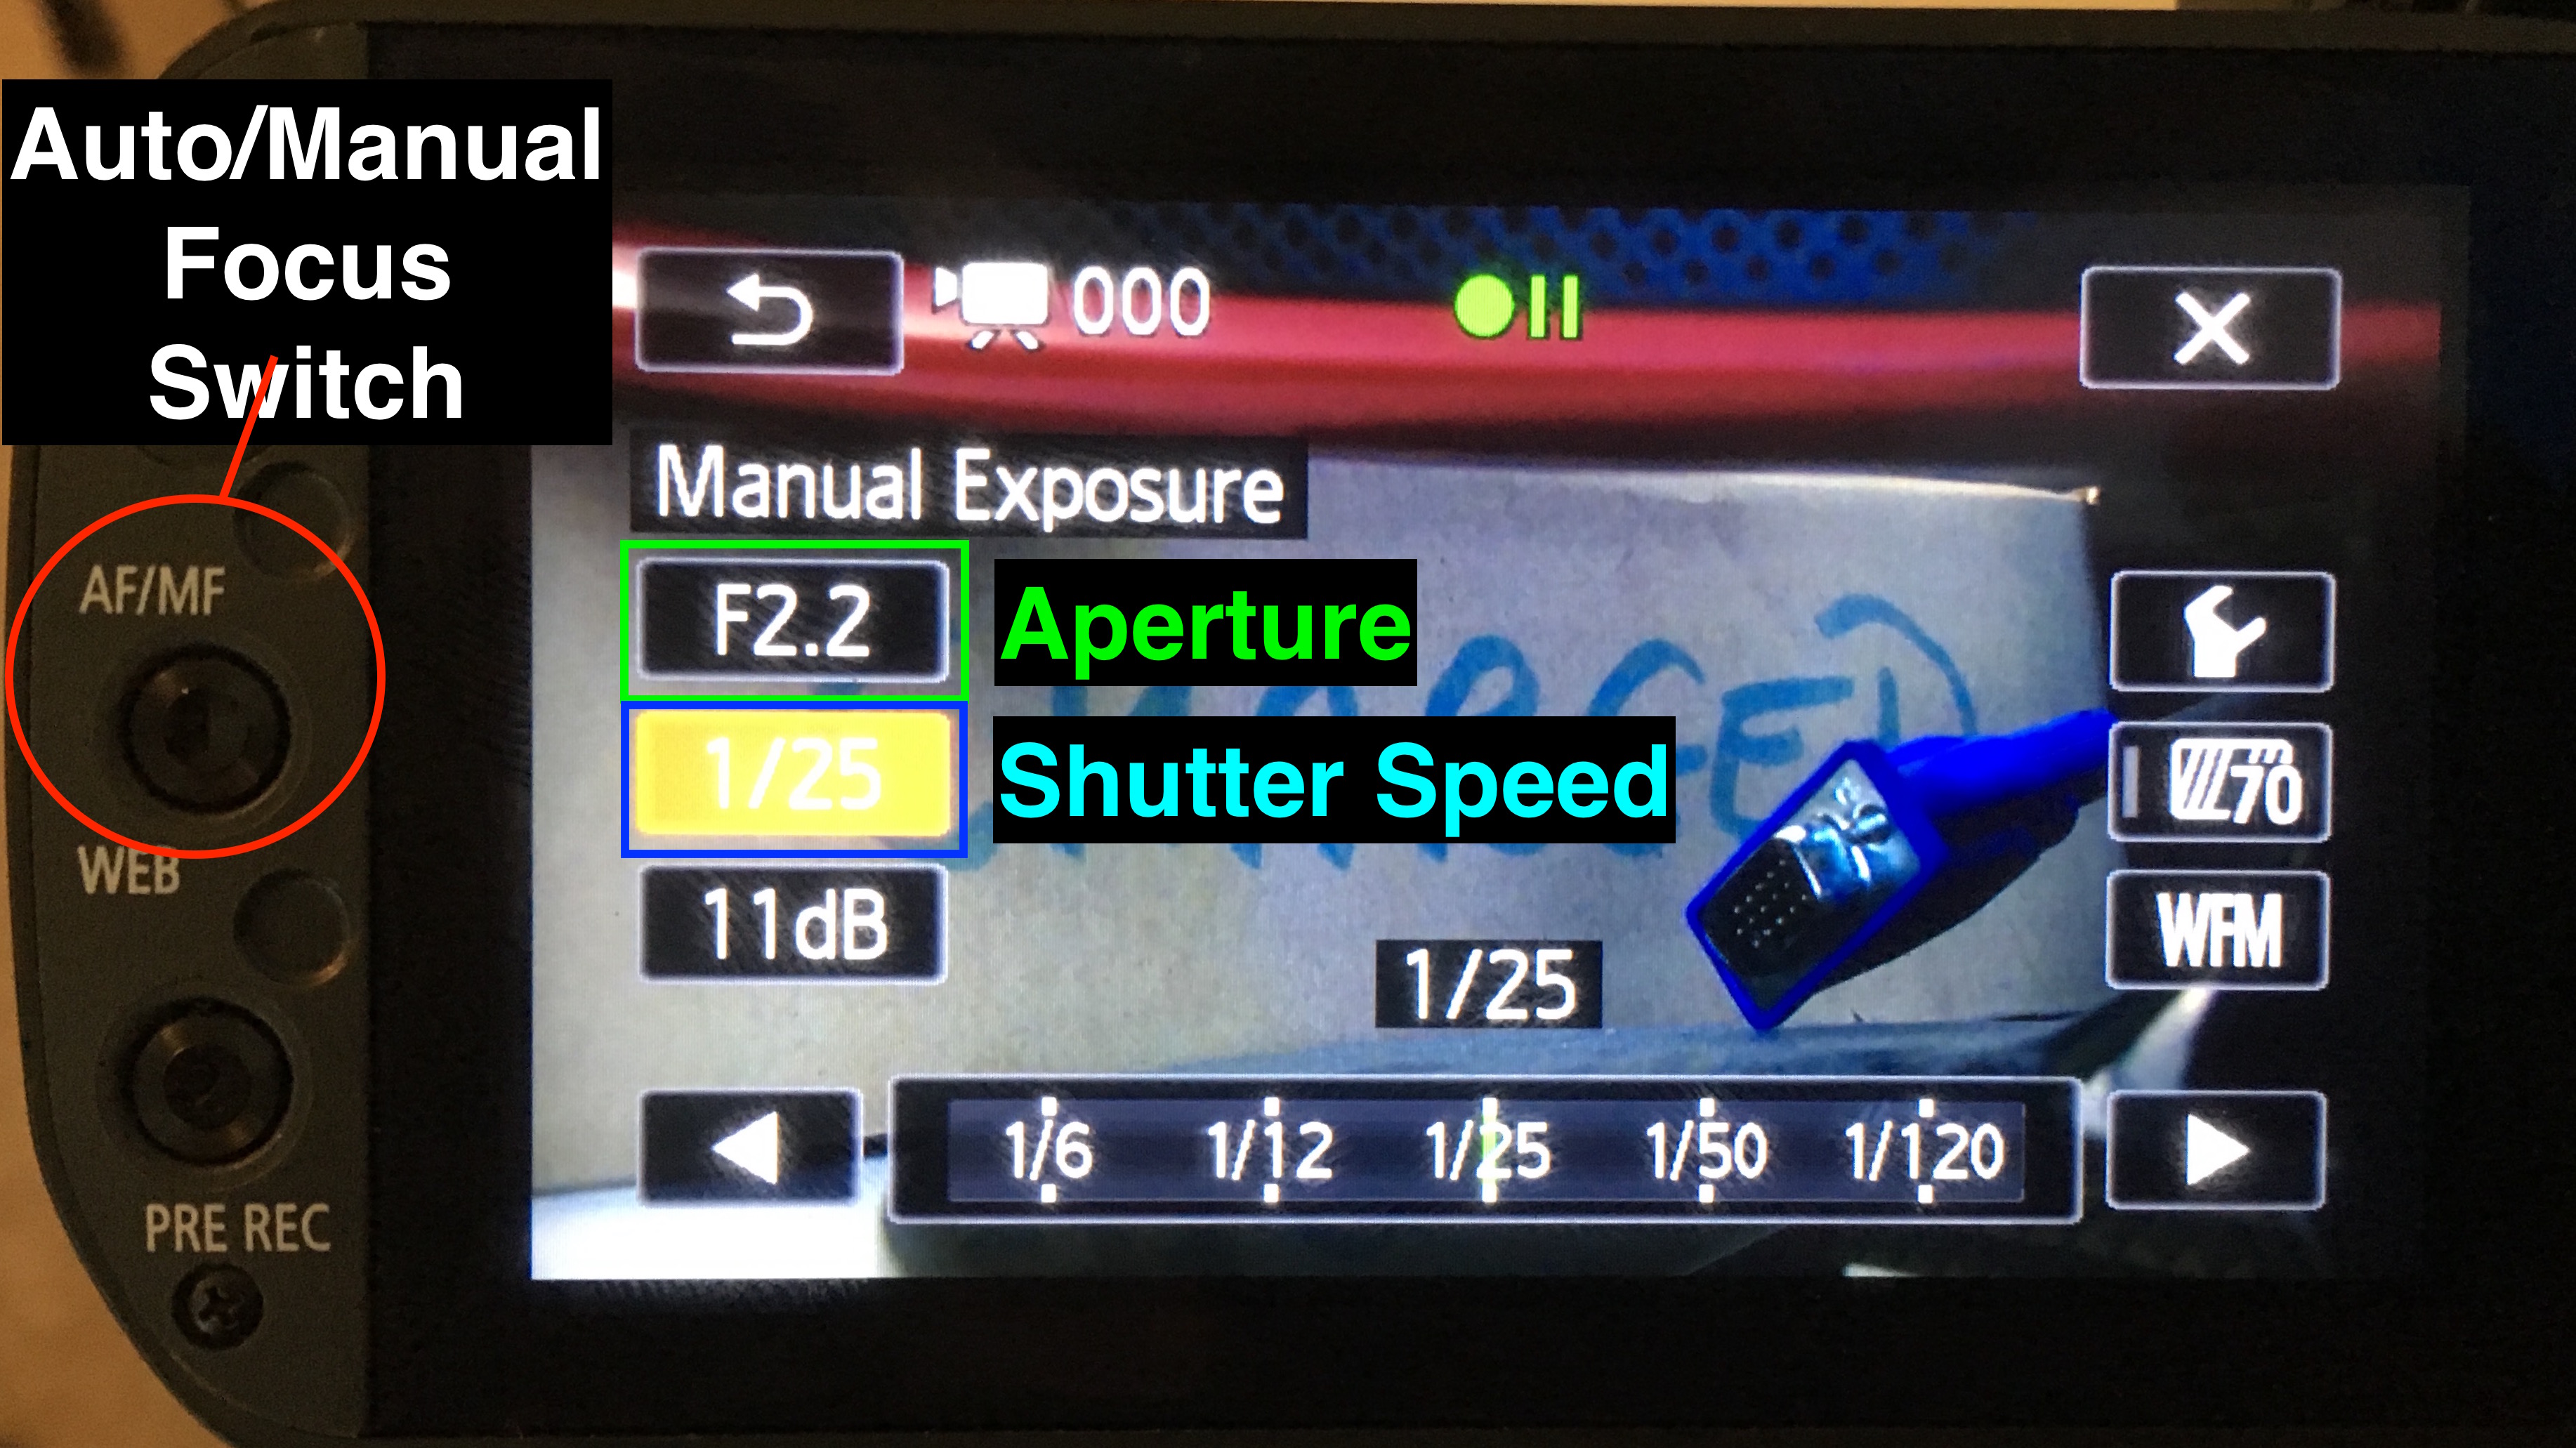
– Manual Exposure: You will be able to manually adjust the exposure settings of your camera.
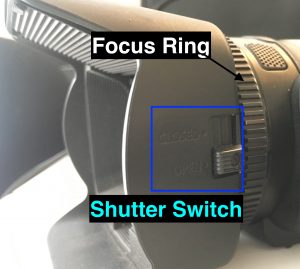
– SCN: Scene mode let’s you choose from a variety of preset options which change the camera settings to best fit the listed conditions i.e Night Scenes, Sunsets etc. - You can switch between manual and auto focus by pressing the AF/MF button on the side of the cameras display. You can use the focus ring on the front of the camera to manually adjust your focus.
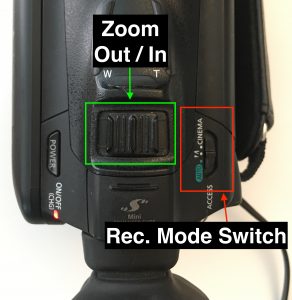
- You can zoom in and out by using the slider at the top of the camera.


Recording footage
- To start recording, make sure the camera shutter is open and push the START/STOP button once at the back of the camera beside the viewfinder.
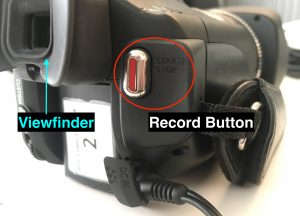
- If you would like to use the viewfinder instead of the fold out display to view your shot, you can gently pull the viewfinder out to enable it.
- Once you have finished recording push the START/STOP button again to end the recording.
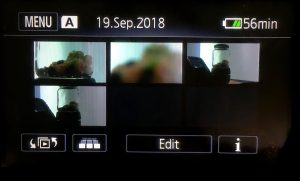
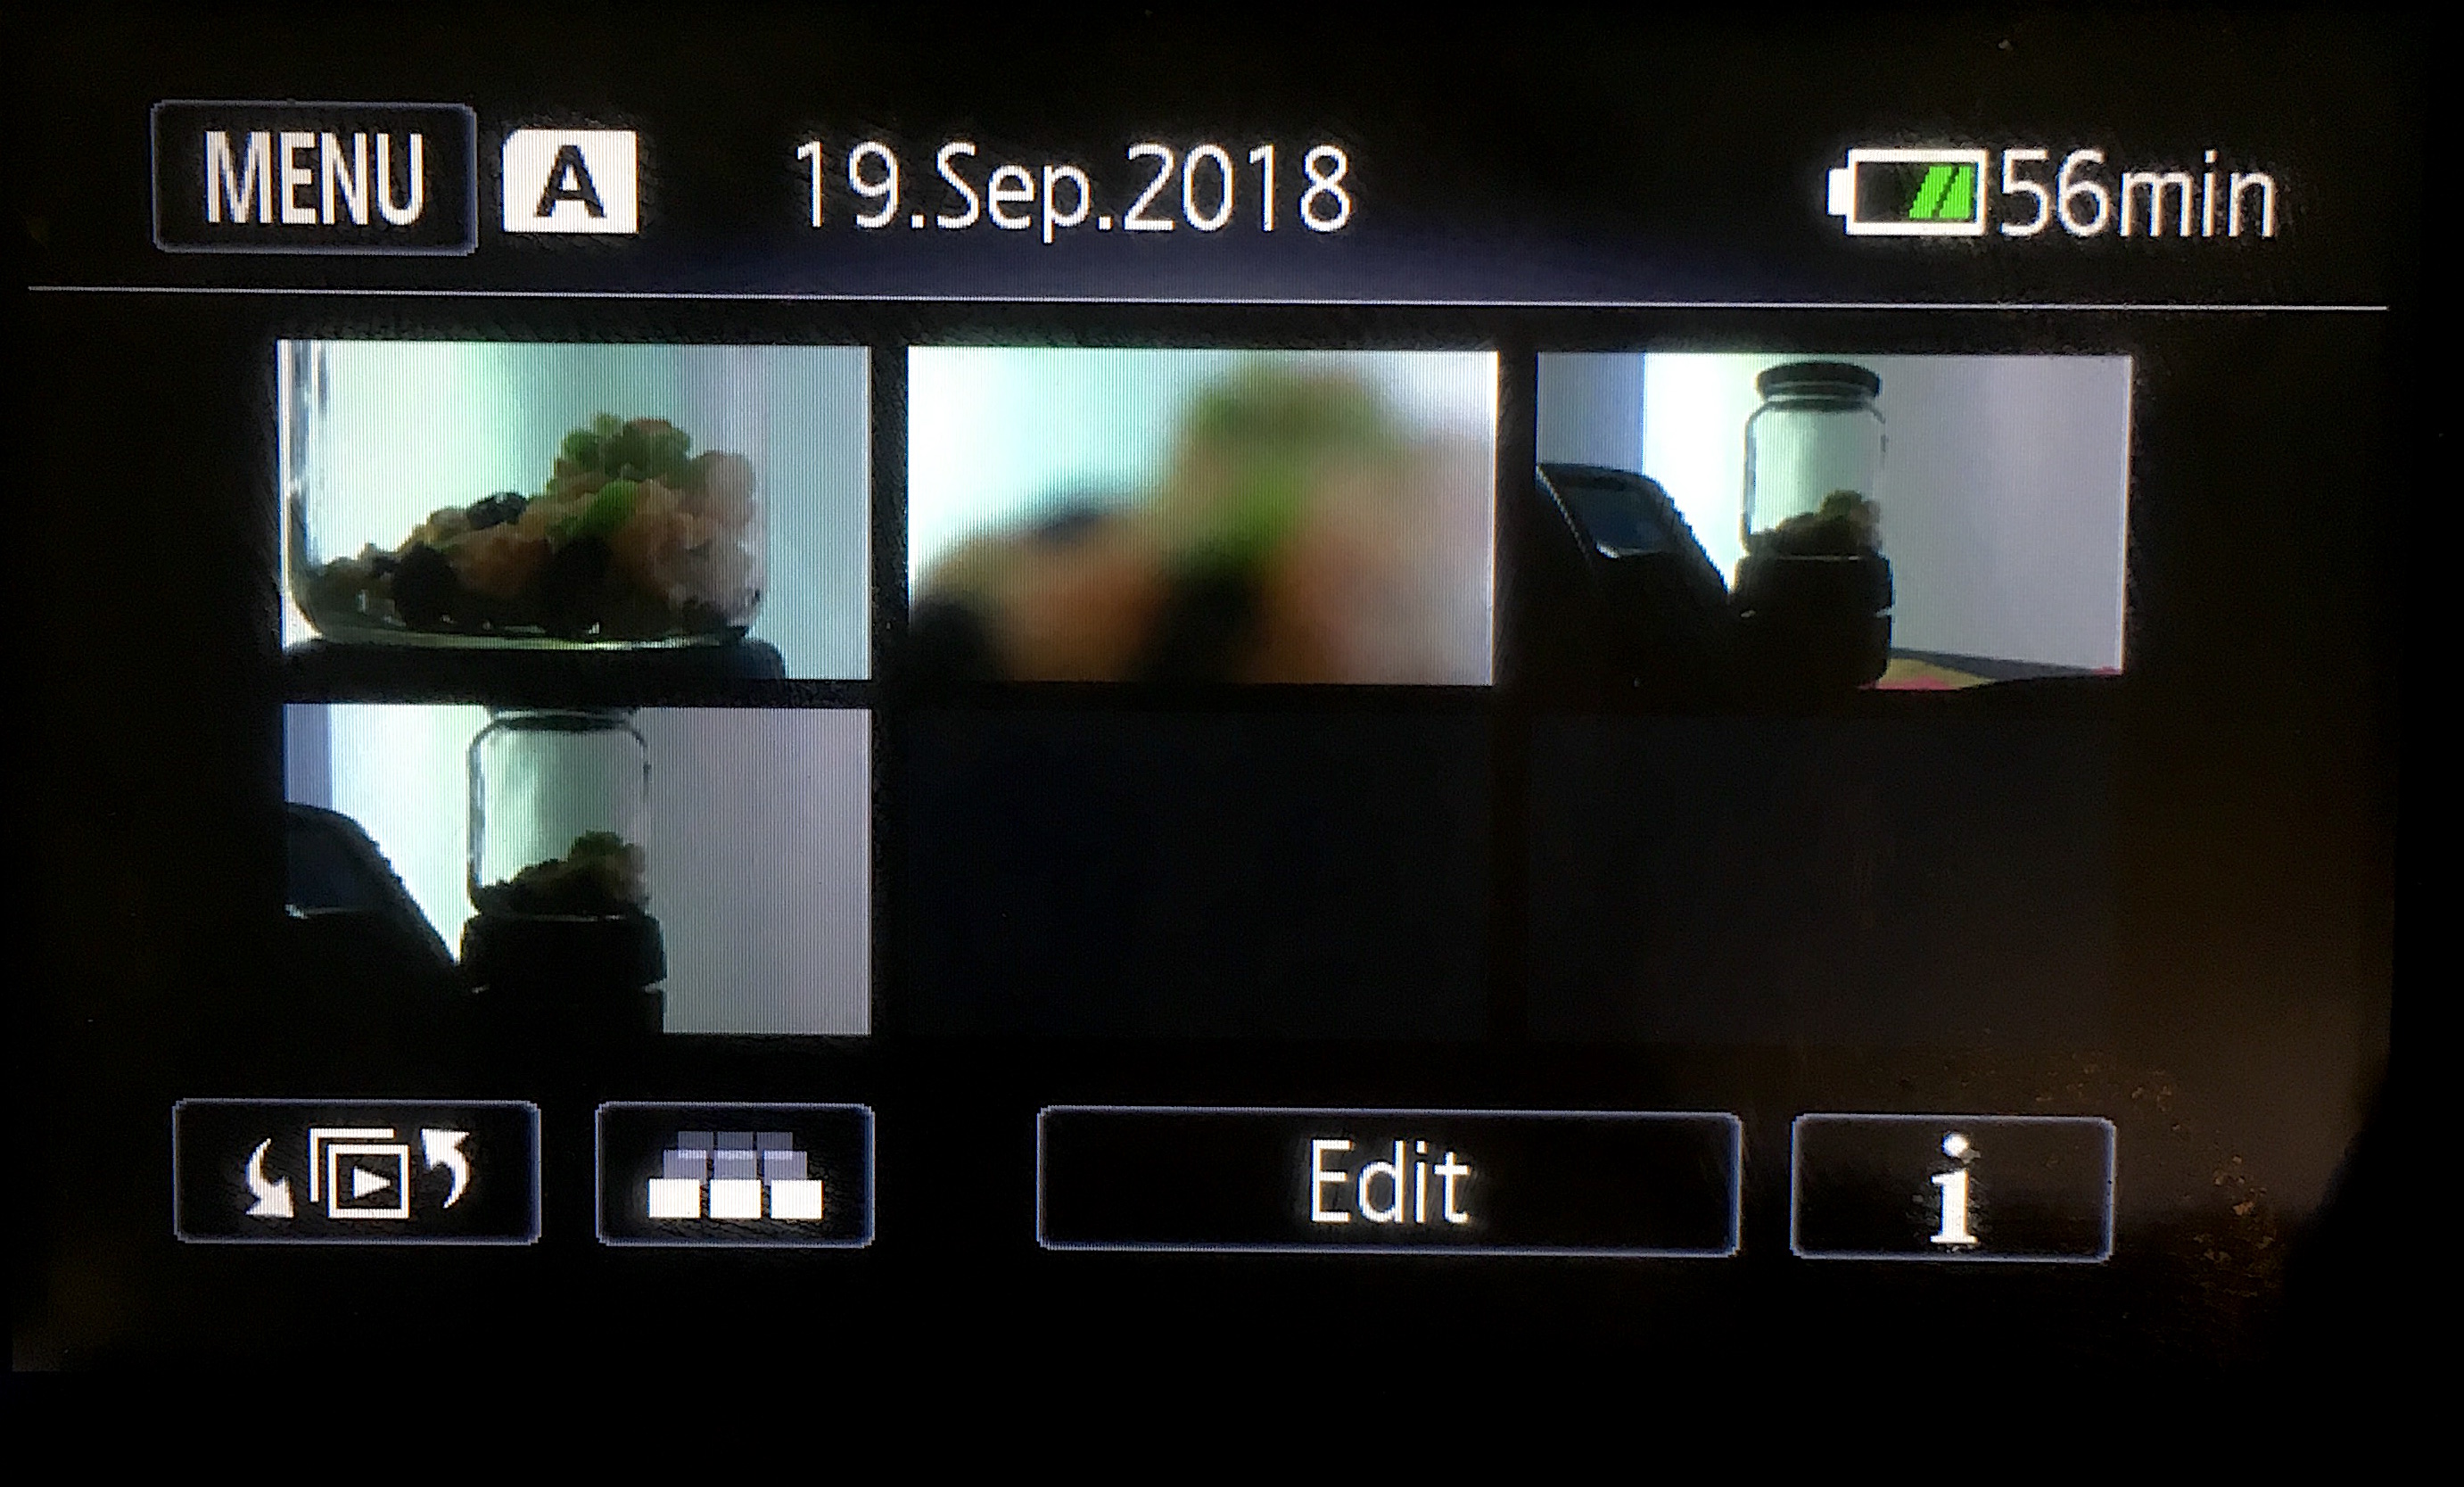
- To watch your recorded footage, push the preview button on the left hand side of the camera.
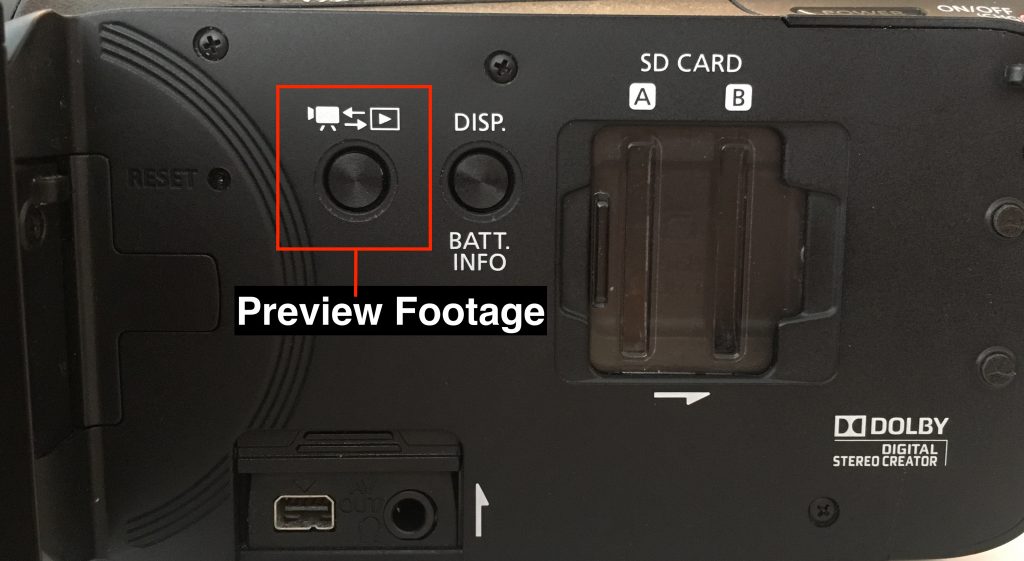
- From here you can watch your footage, and delete unwanted clips by tapping the Edit button.
- Push the preview button again to return to shooting mode.


Please refer to the documentation at the end of this article to find the instruction manuals for your camera if you need further help.
Transferring your files to a computer
- Remove the SD card from your camera and insert it into your computer’s SD card reader.
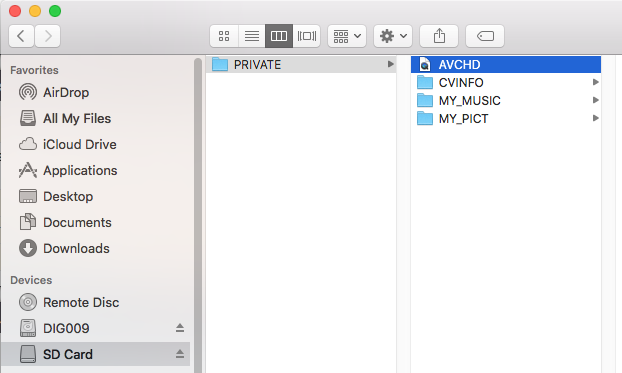
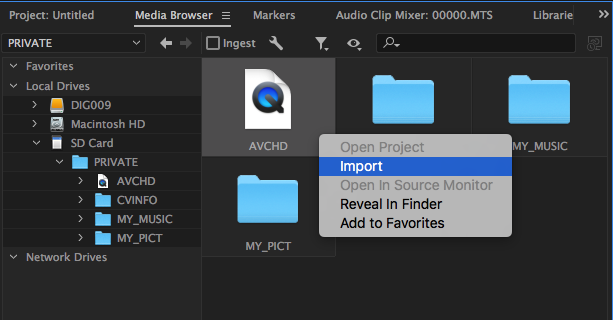
- If using a Mac, open Finder, you can find your SD card under ‘Devices’ on the sidebar, open the ‘PRIVATE’ folder. You will see a file called ‘AVCHD’.
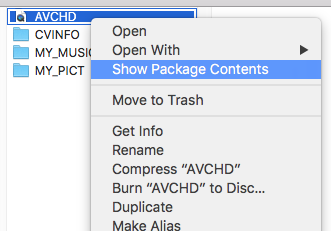
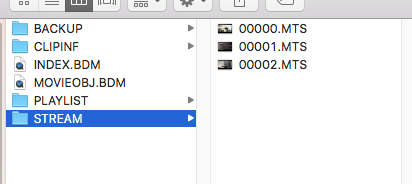
- If you right click ‘AVCHD‘ and select ‘Show Package Contents‘, then do the same for the ‘BDMV’ file, you will find a folder called ‘STREAM‘ which contains your movie files.
- In order to edit your movie files you will need all the supporting files in the AVCHD file, so copy the AVCHD file in the ‘PRIVATE‘ folder to transfer your data.
- You can then locate the AVCHD file into your editing software (in Premiere, use the Media Browser), and IMPORT the AVCHD file.

Finding your metadata
There are two ways to check on your video files metadata, if you wish to just view the shutter speed and aperture that you recorded your footage on and have access to the camera, follow these steps:
- Insert the SD card into the camera.
- Go to the preview footage menu
- Press the MENU button.
- Scroll down to and select “Data Code“.
- Scroll down to and select “Camera Data“.
- Navigate back to the preview window and select your clip.
- The recording settings will now display at the bottom right hand side of the screen whilst previewing your footage.
If you would like to access the full range of metadata that your video files contain, we’d recommend using a command line tool called ExifTool.
Formatting your SD card
Once you have finished transferring your footage you may want to erase the footage to free up space on the SD card.
- Insert the SD card into the camera.
- Go to the preview footage menu.
- Press the MENU button.
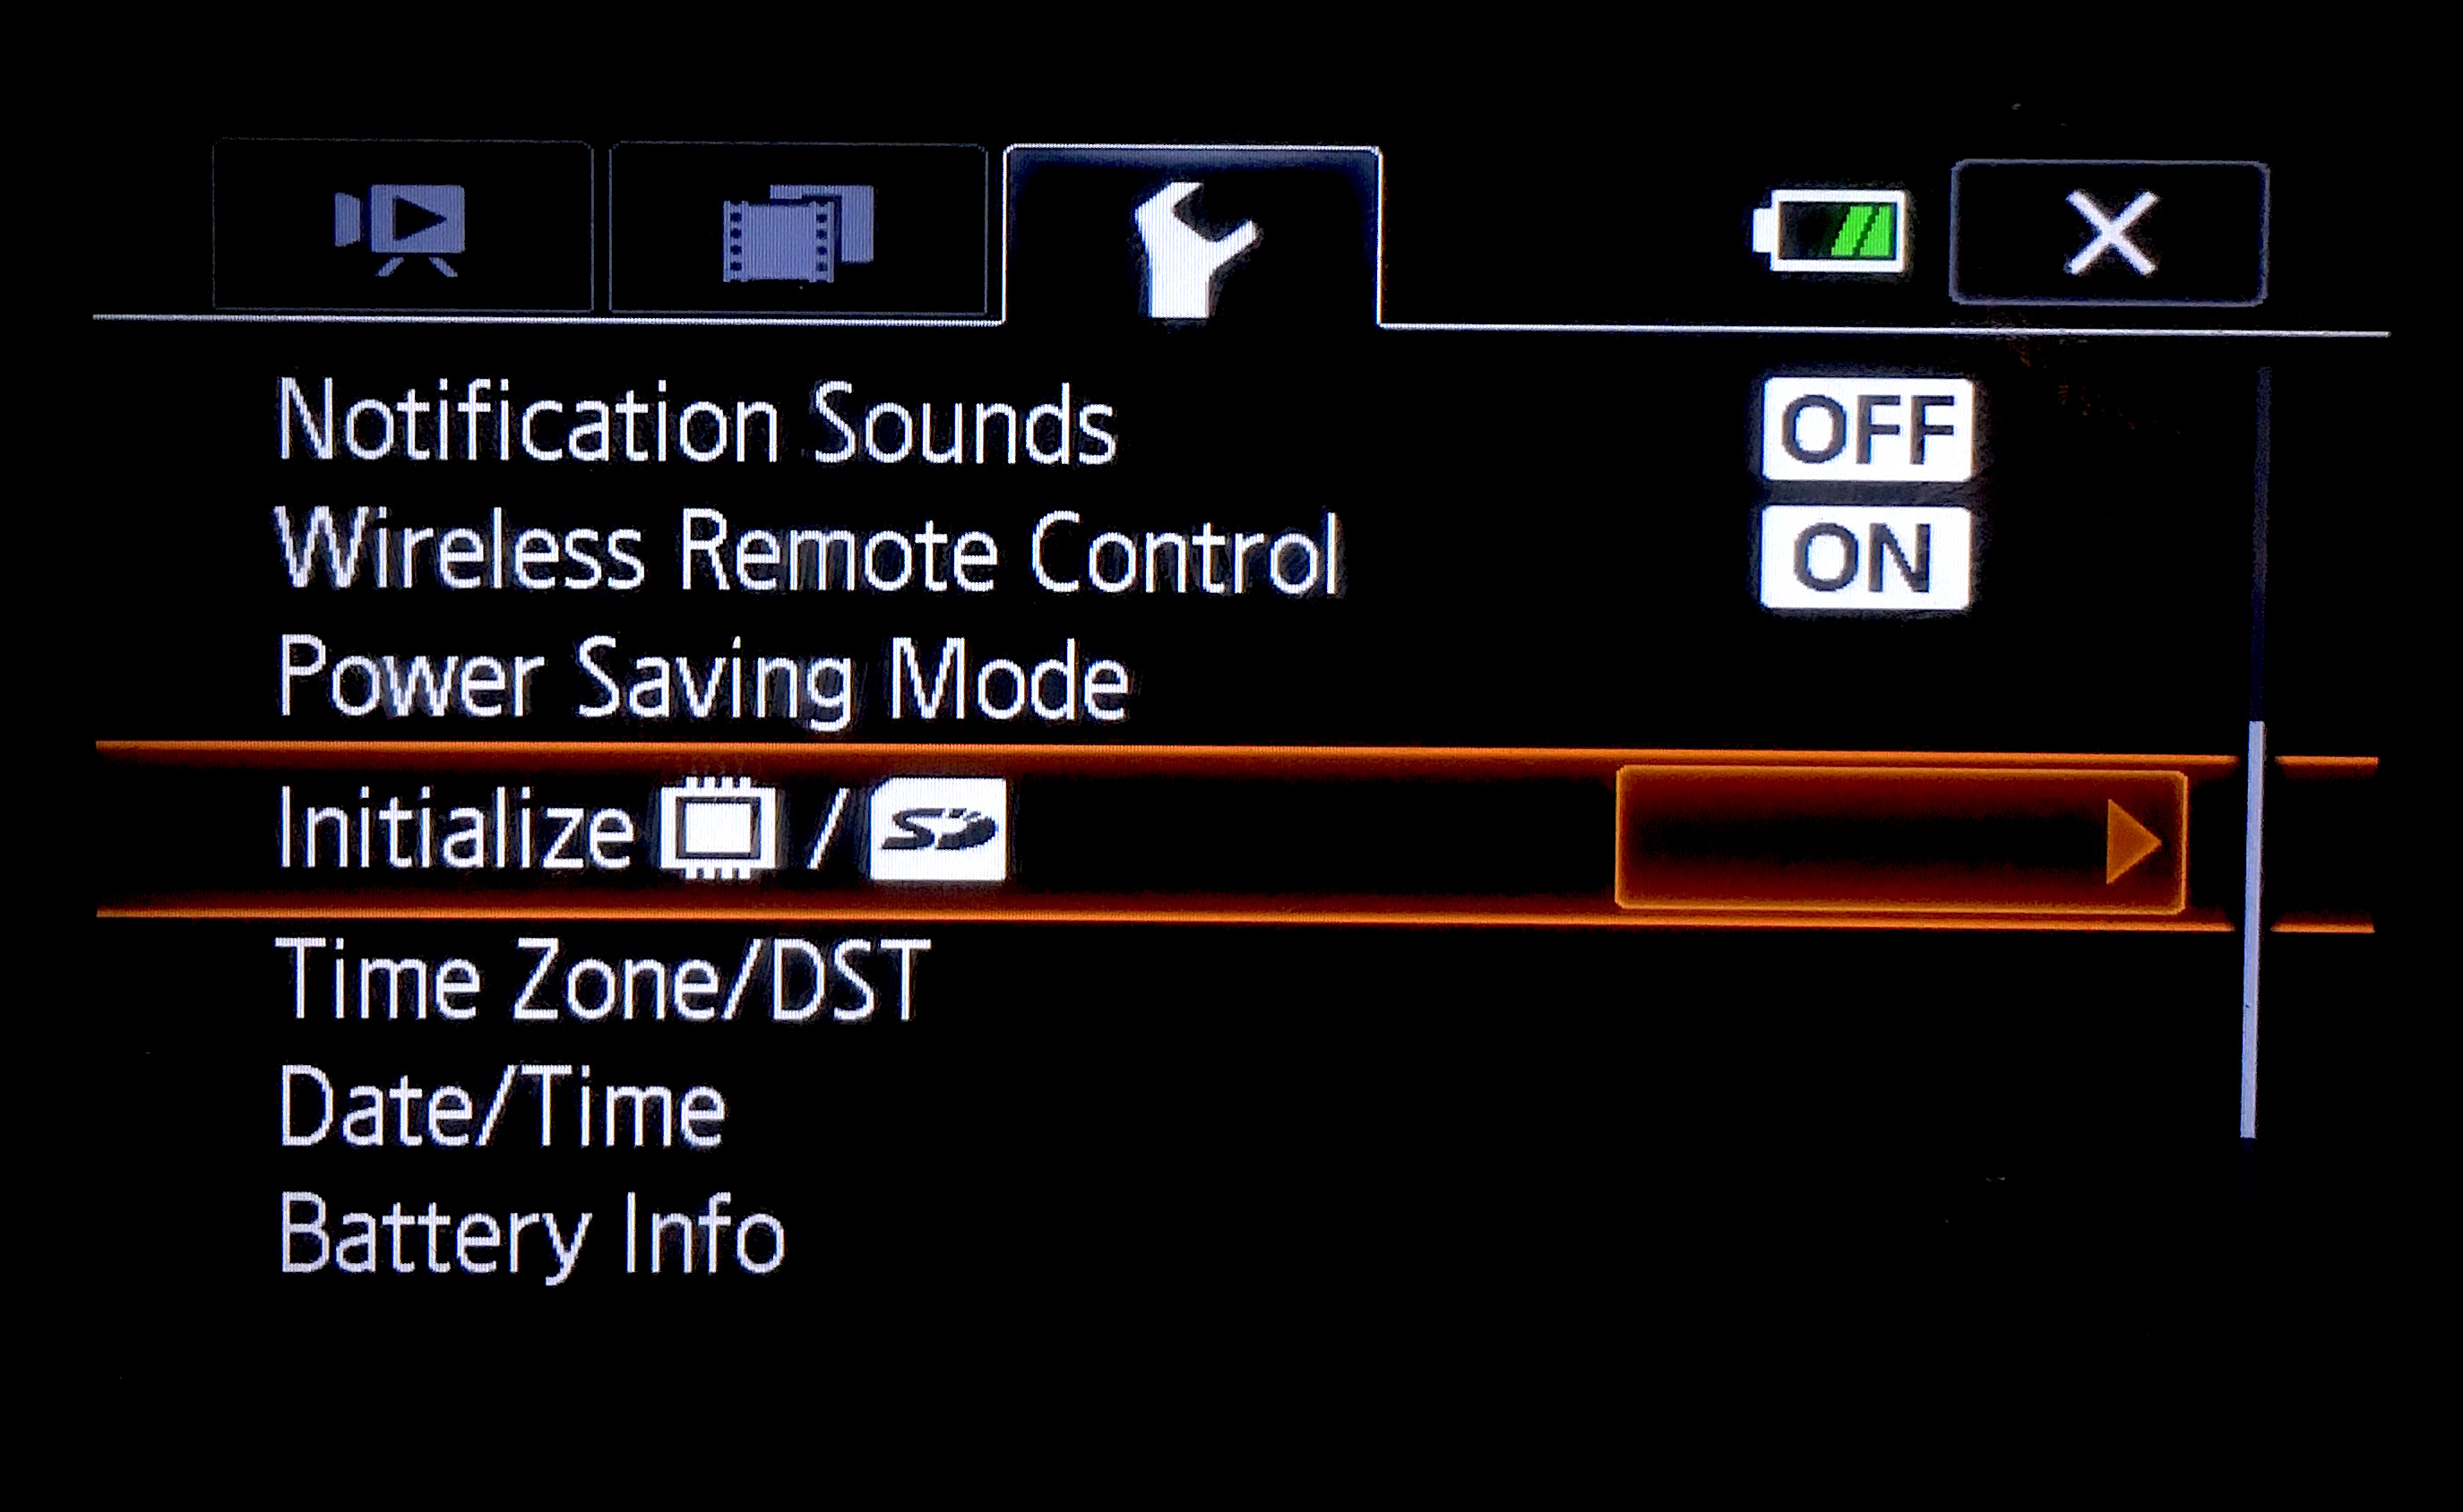
- Navigate to the third menu tab (spanner icon).
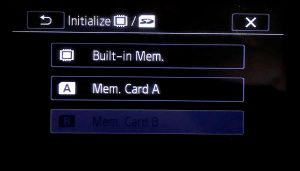
- Scroll down to the ‘Initialize‘ option.

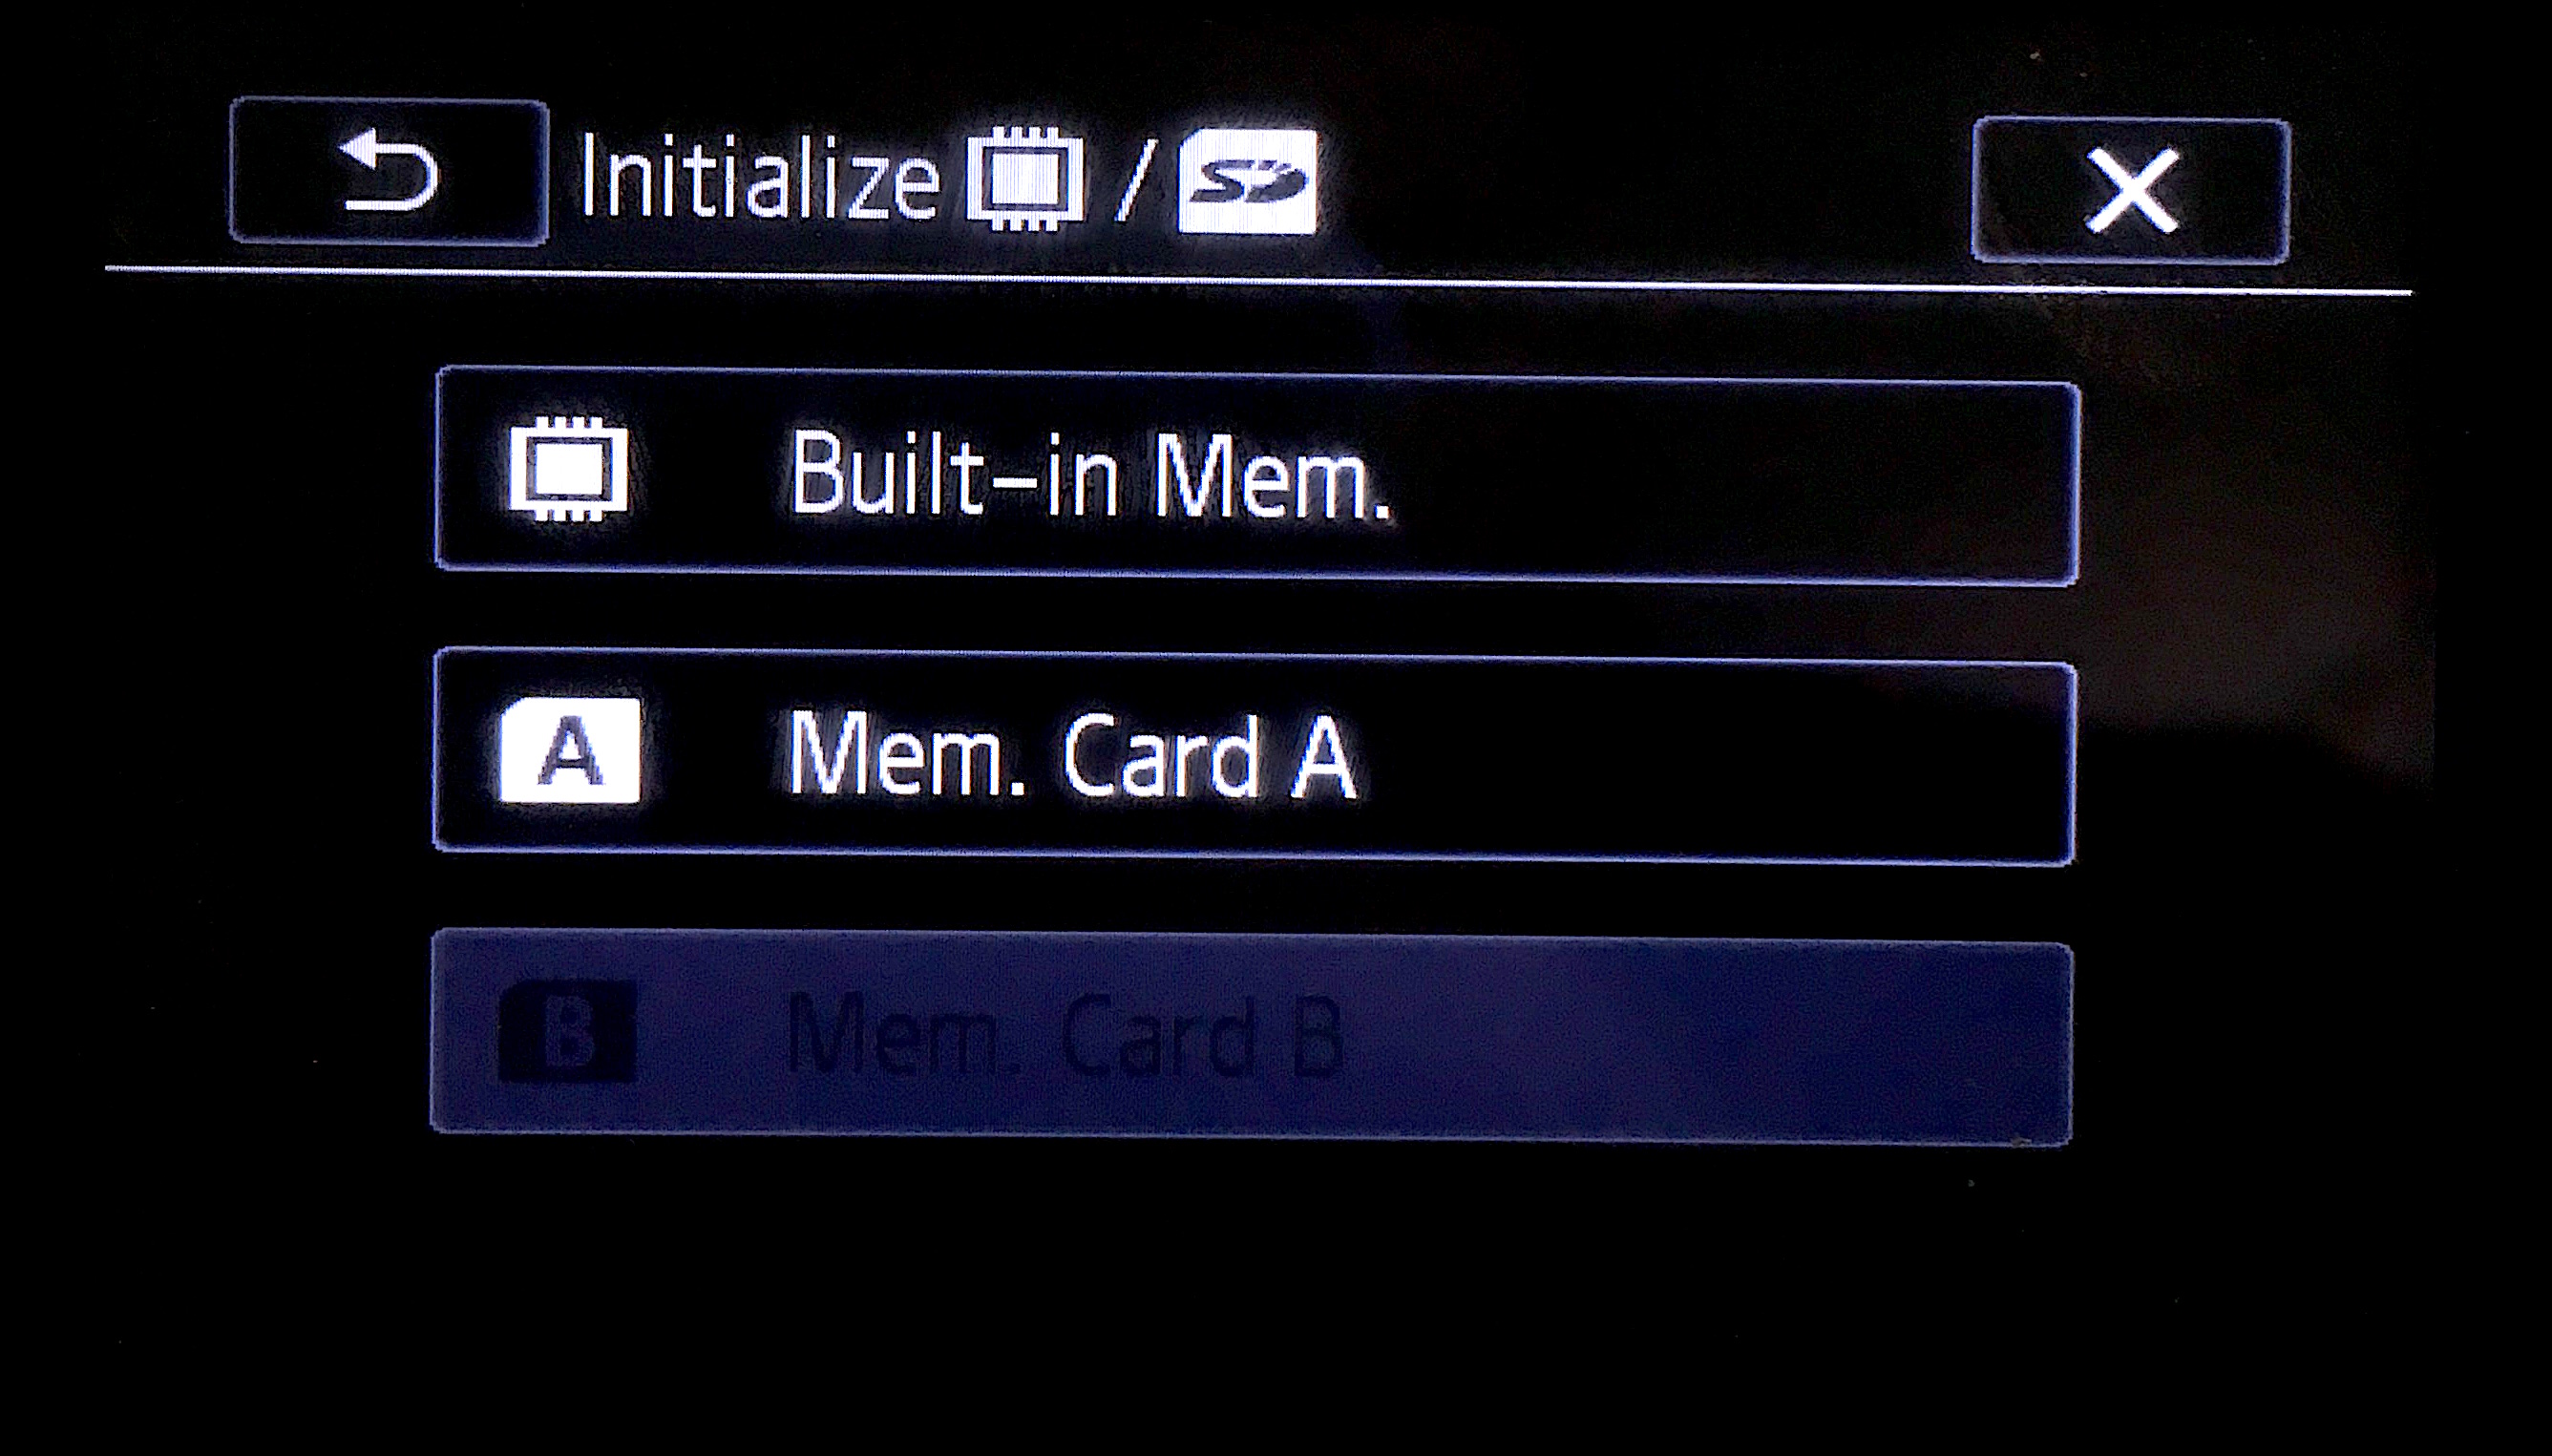
- From here you can choose what you want to format, select the slot your SD card is in.
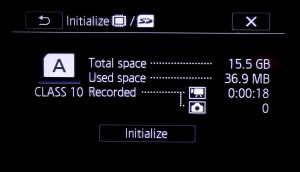
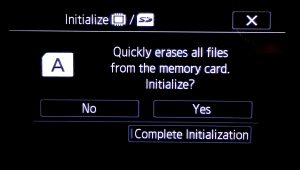
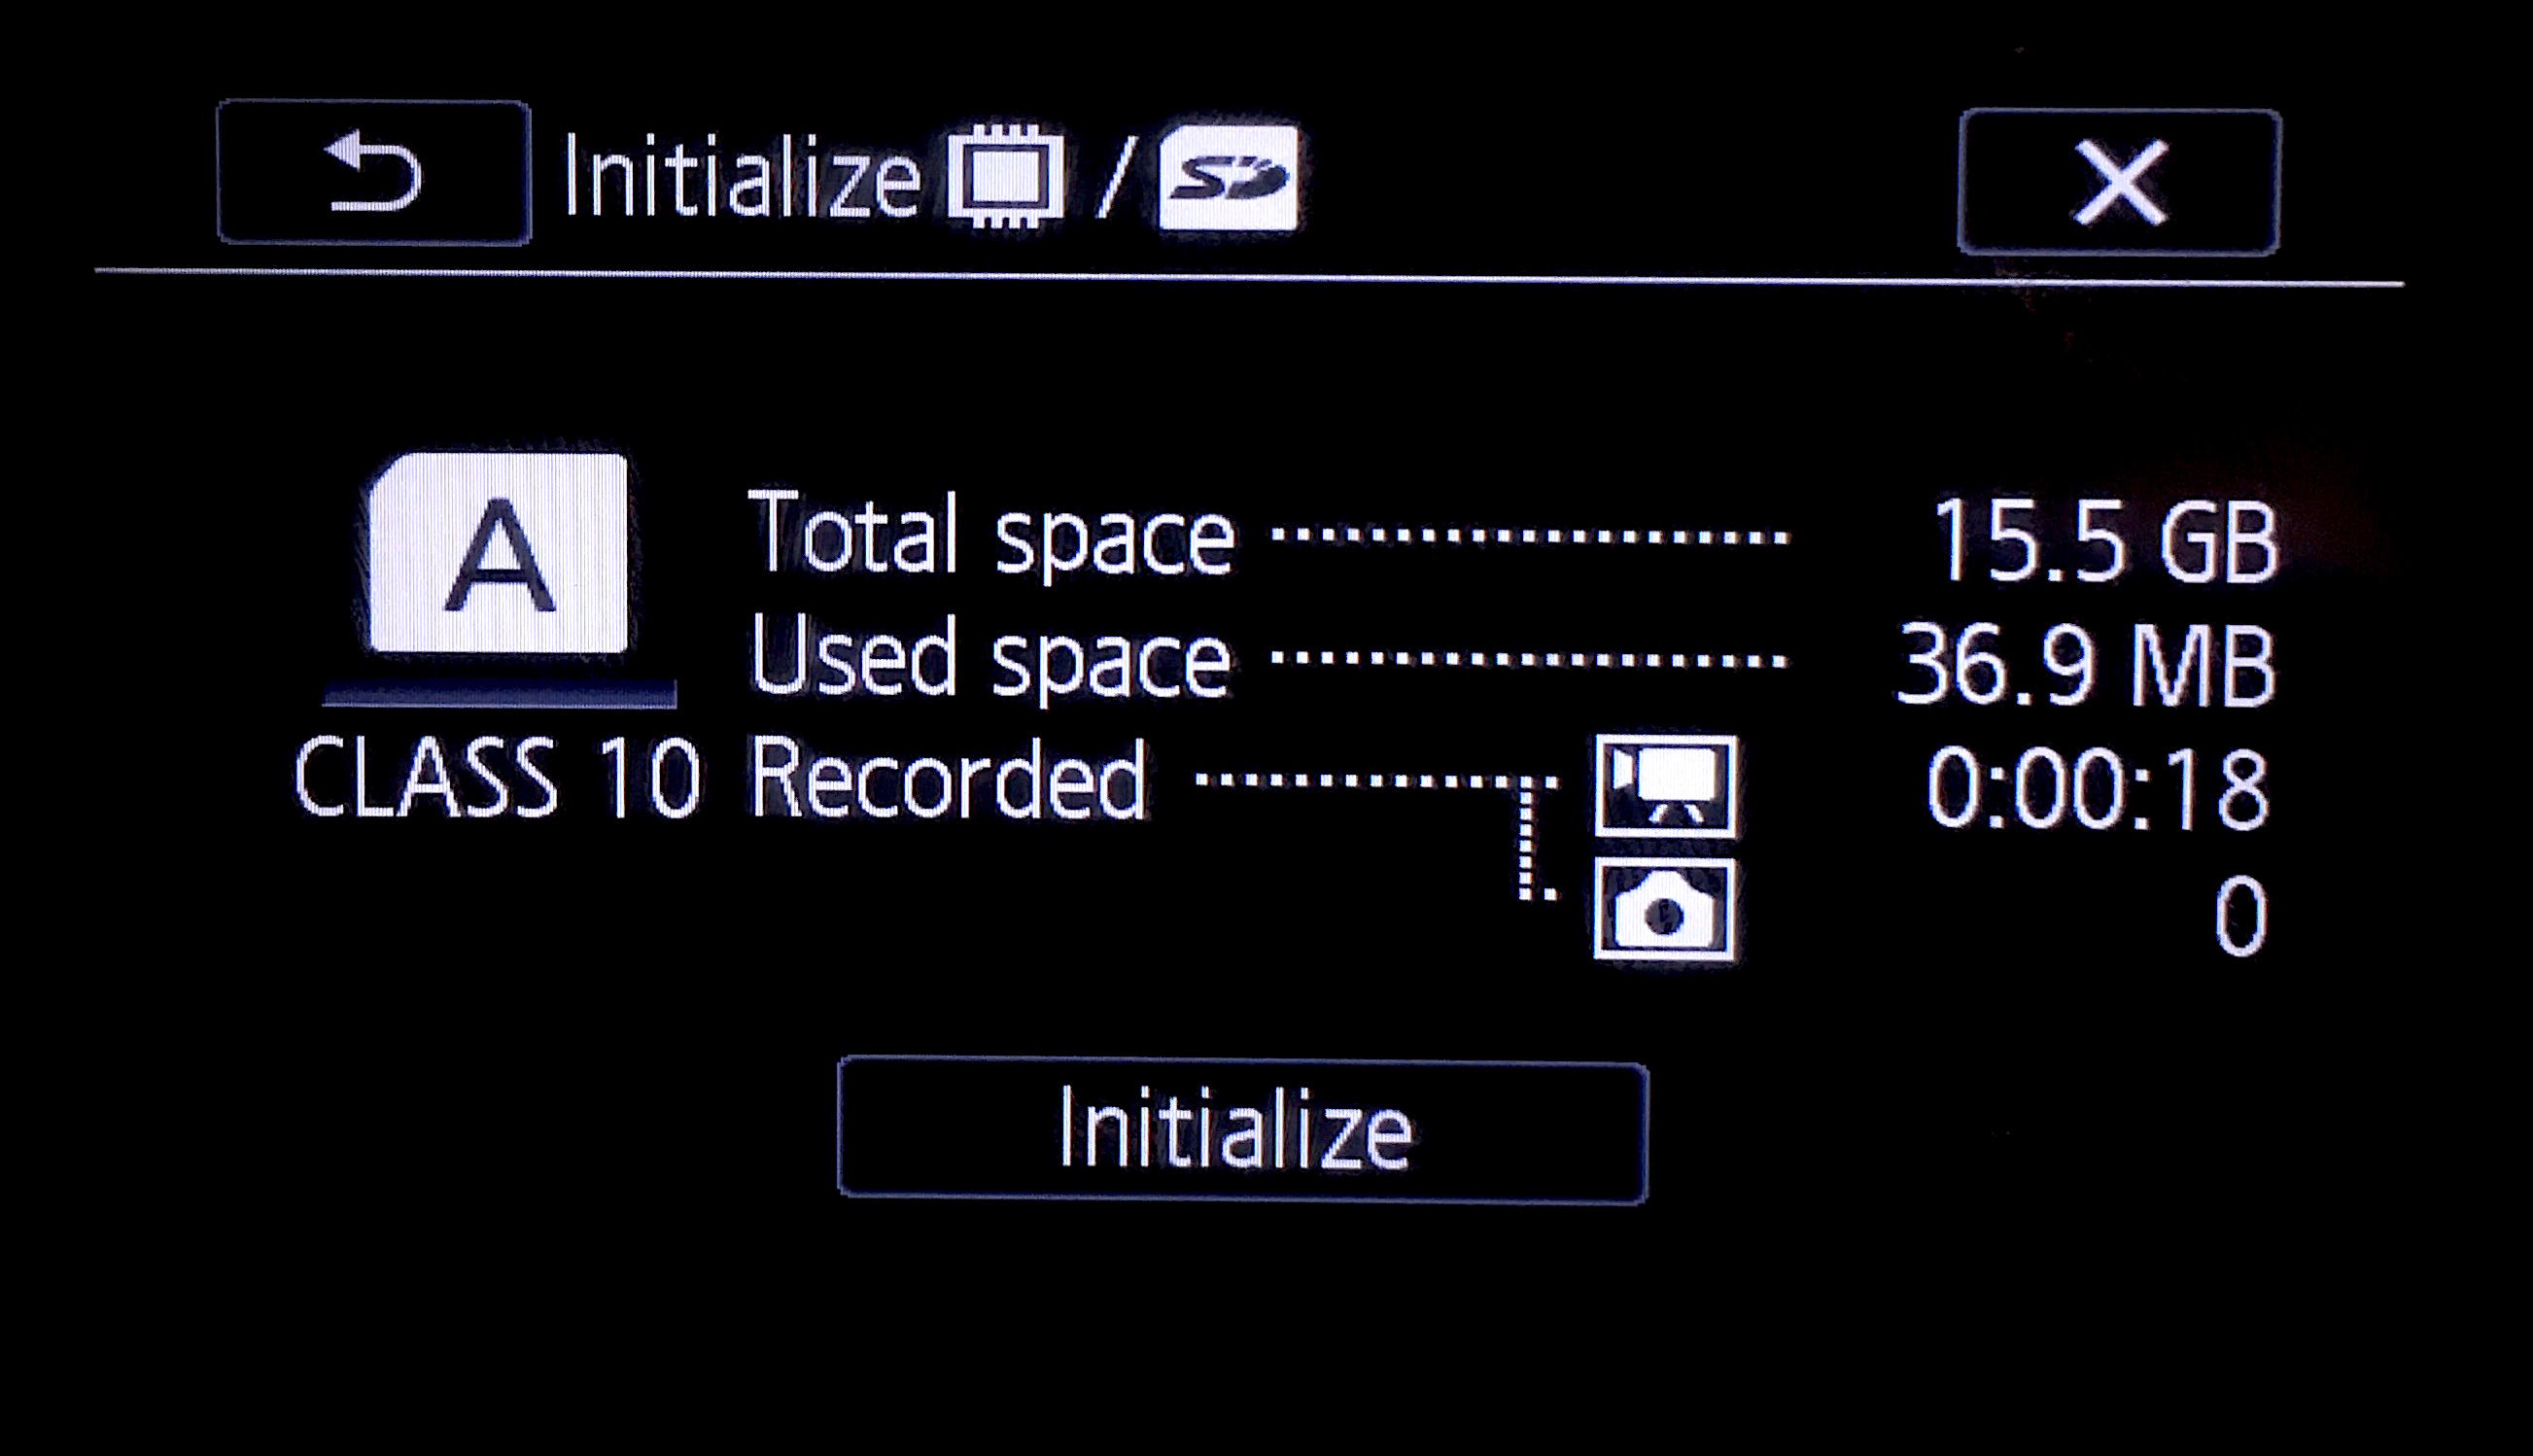
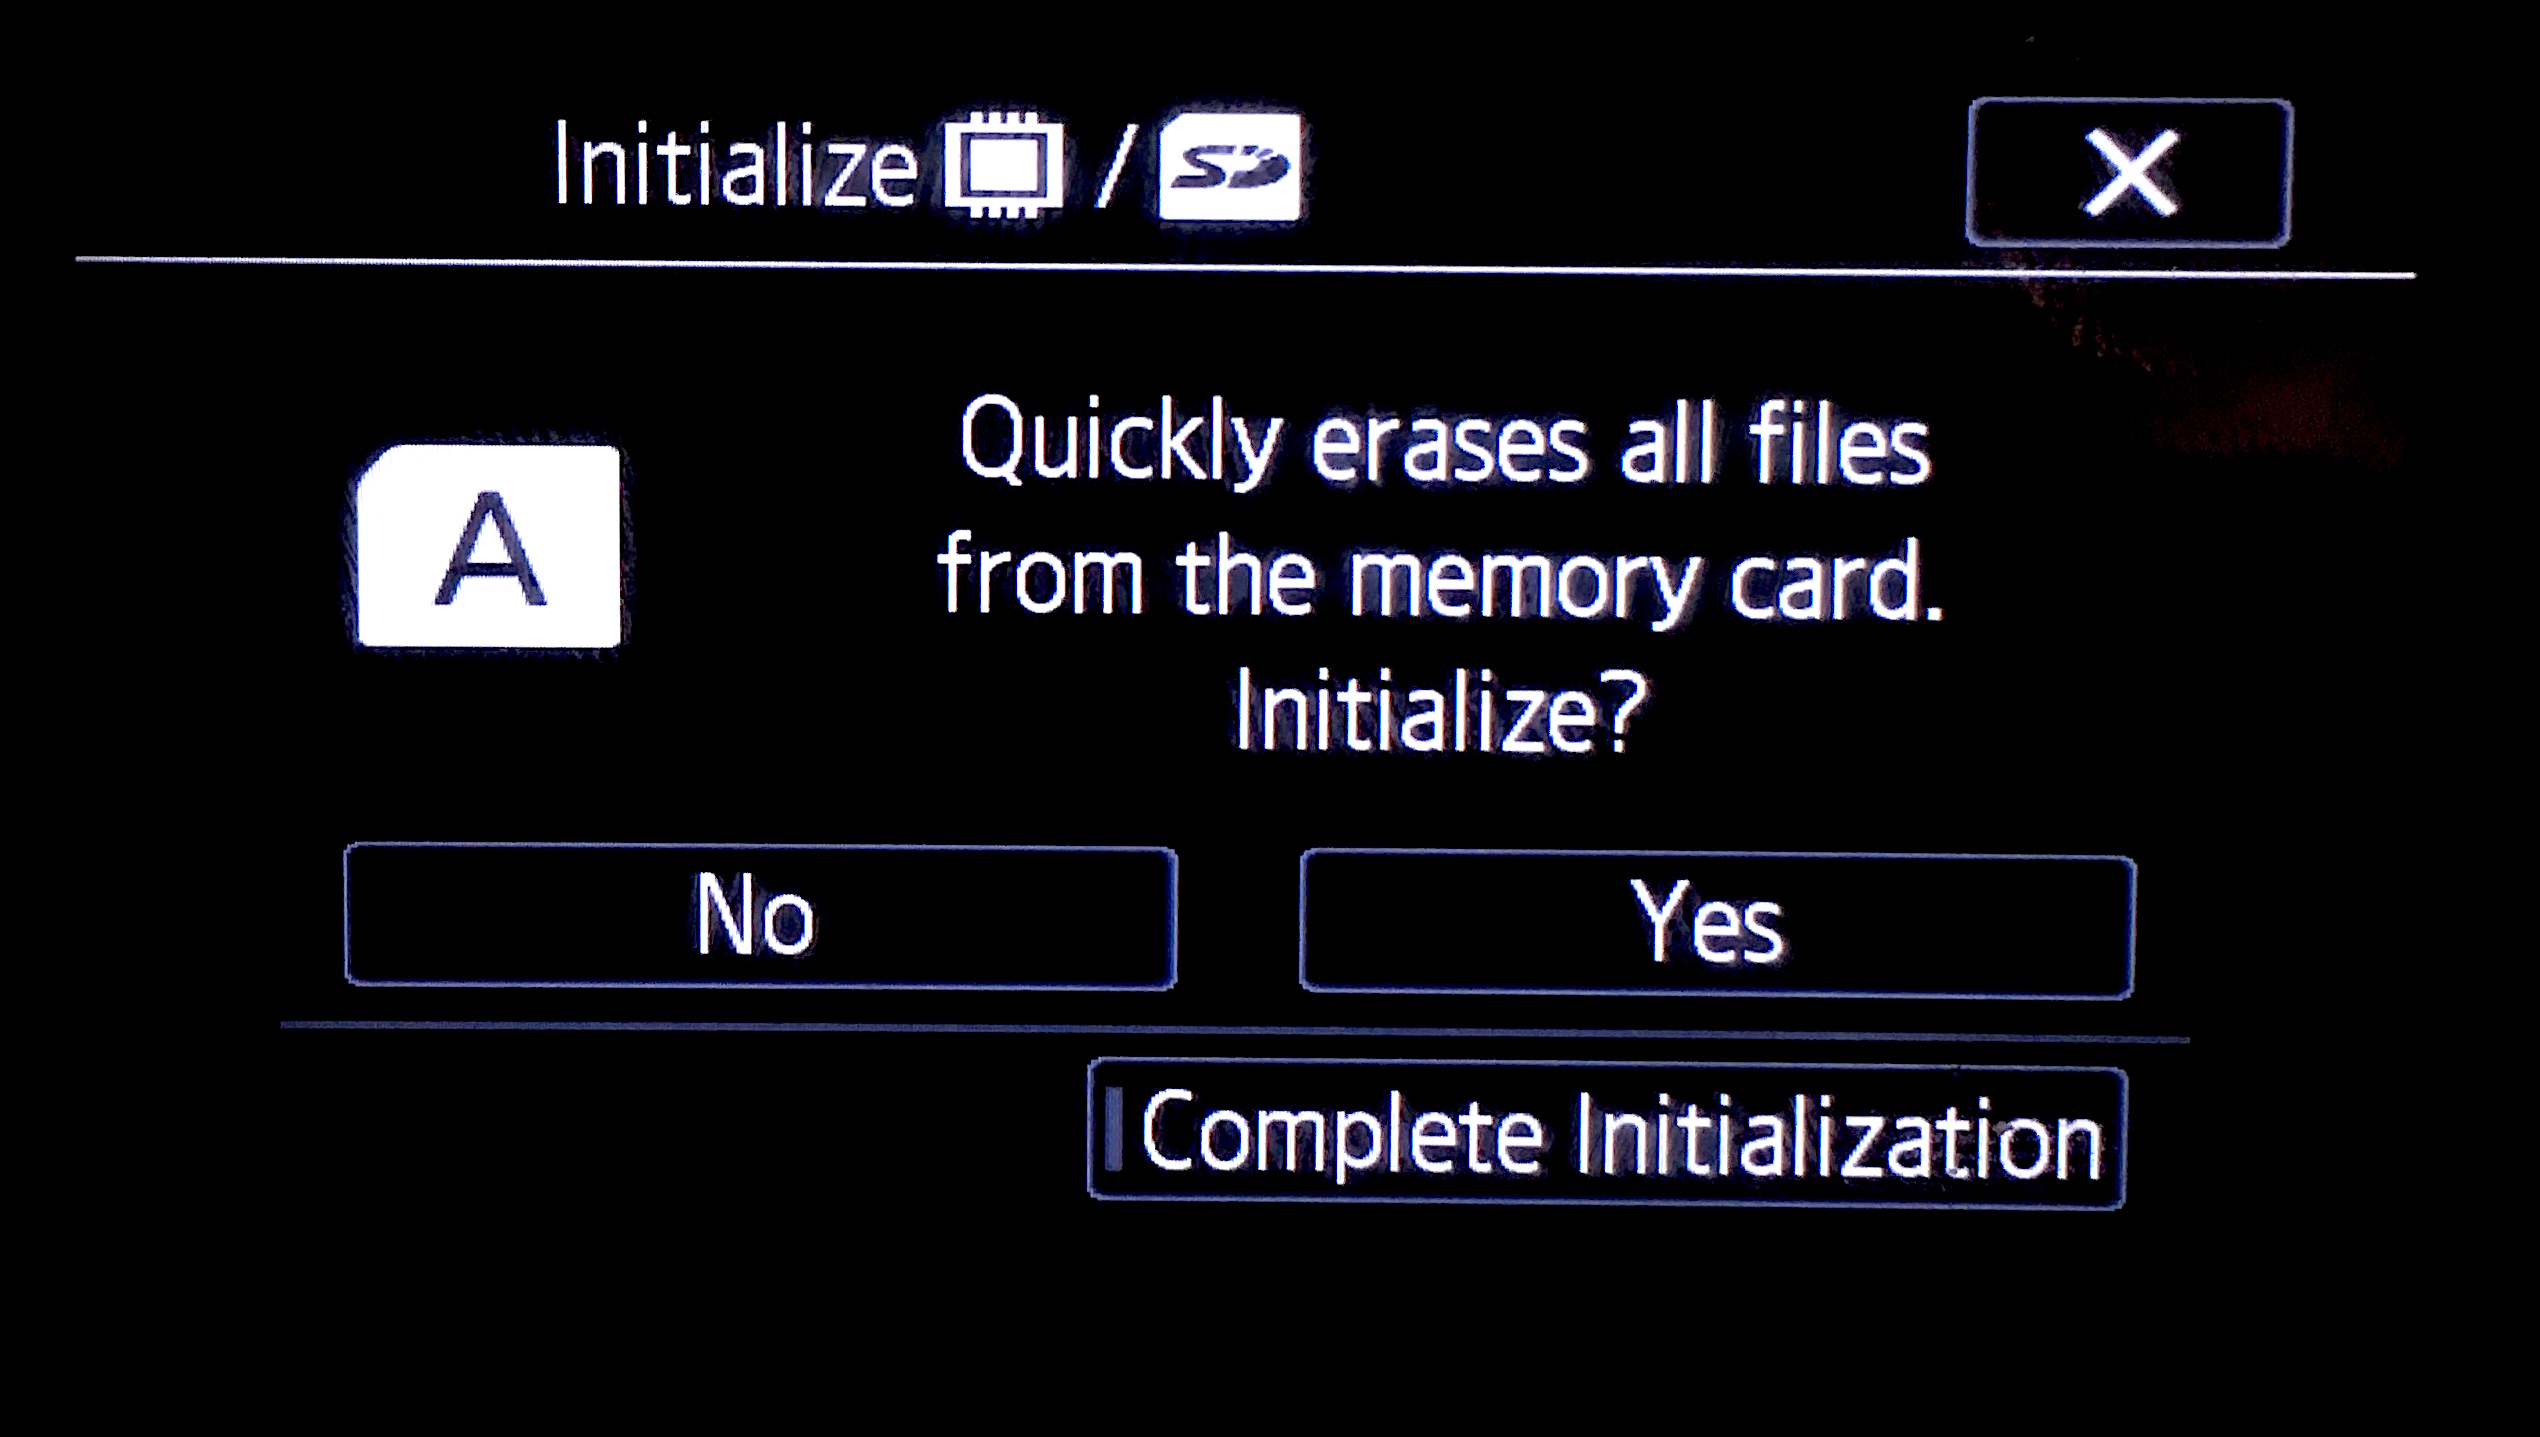
- The screen will display some information on the space used by your SD card. Press ‘Initialize‘ and ‘Yes‘ to the prompt.
Troubleshooting
What SD card do I need?
We do not provide SD Cards to students, so if you would like to use any of the equipment that saves data to SD Cards (Video Cameras, Audio Recorders, Stills Cameras), you must provide your own SD Card.
We would advise that you get a Class 10 SD Card with a minimum read and write speed of 30MB/s. This information is normally clearly written on the SD Card itself.
How to charge the batteries
As the library can issue each camera several times every day, we are unable to guarantee that batteries will be charged.
However, we do provide power supplies with each camera, so that the camera can be powered by the mains power, or the person using the equipment can charge the battery themselves.
Please follow these steps:
- Ensure the supplied battery is situated securely in back of the camera
- Plug the power supply in to the wall
- Open the Camera’s display panel and press the On/Off button. The light at the back of the camera should go solid yellow.
- Press the On/Off button again. The light at the back of the camera will go to solid red – this indicates that the battery is charging.
- Wait for a length of time to give the battery time to charge.