
![]() This content is related to the Faculty of Dance
This content is related to the Faculty of Dance
The Standard stills camera we have is a very cool and easy to use camera for taking photos and short movies. It offers most of the functionality of our more advanced stills camera, whilst being more compact with less buttons and settings to navigate through. Perfect for quick and simple shoots. If you want a more professional shoot with finer control over your image and higher quality images, consider booking the Nikon DSLR camera instead.
Setting up the camera
For stills photography it’s usually a good idea to use a tripod, to enable you to capture the sharpest and clearest quality image. Ensure the tripod clip is secured tightly to the bottom of the camera, and is firmly in place on your tripod.
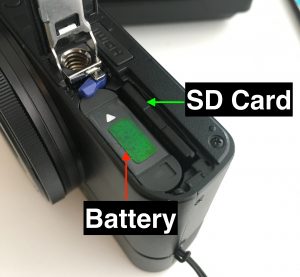
Make sure an SD card is inserted into the camera, the SD card slot is located in the battery compartment underneath the camera.

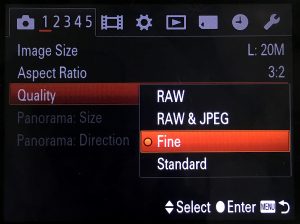
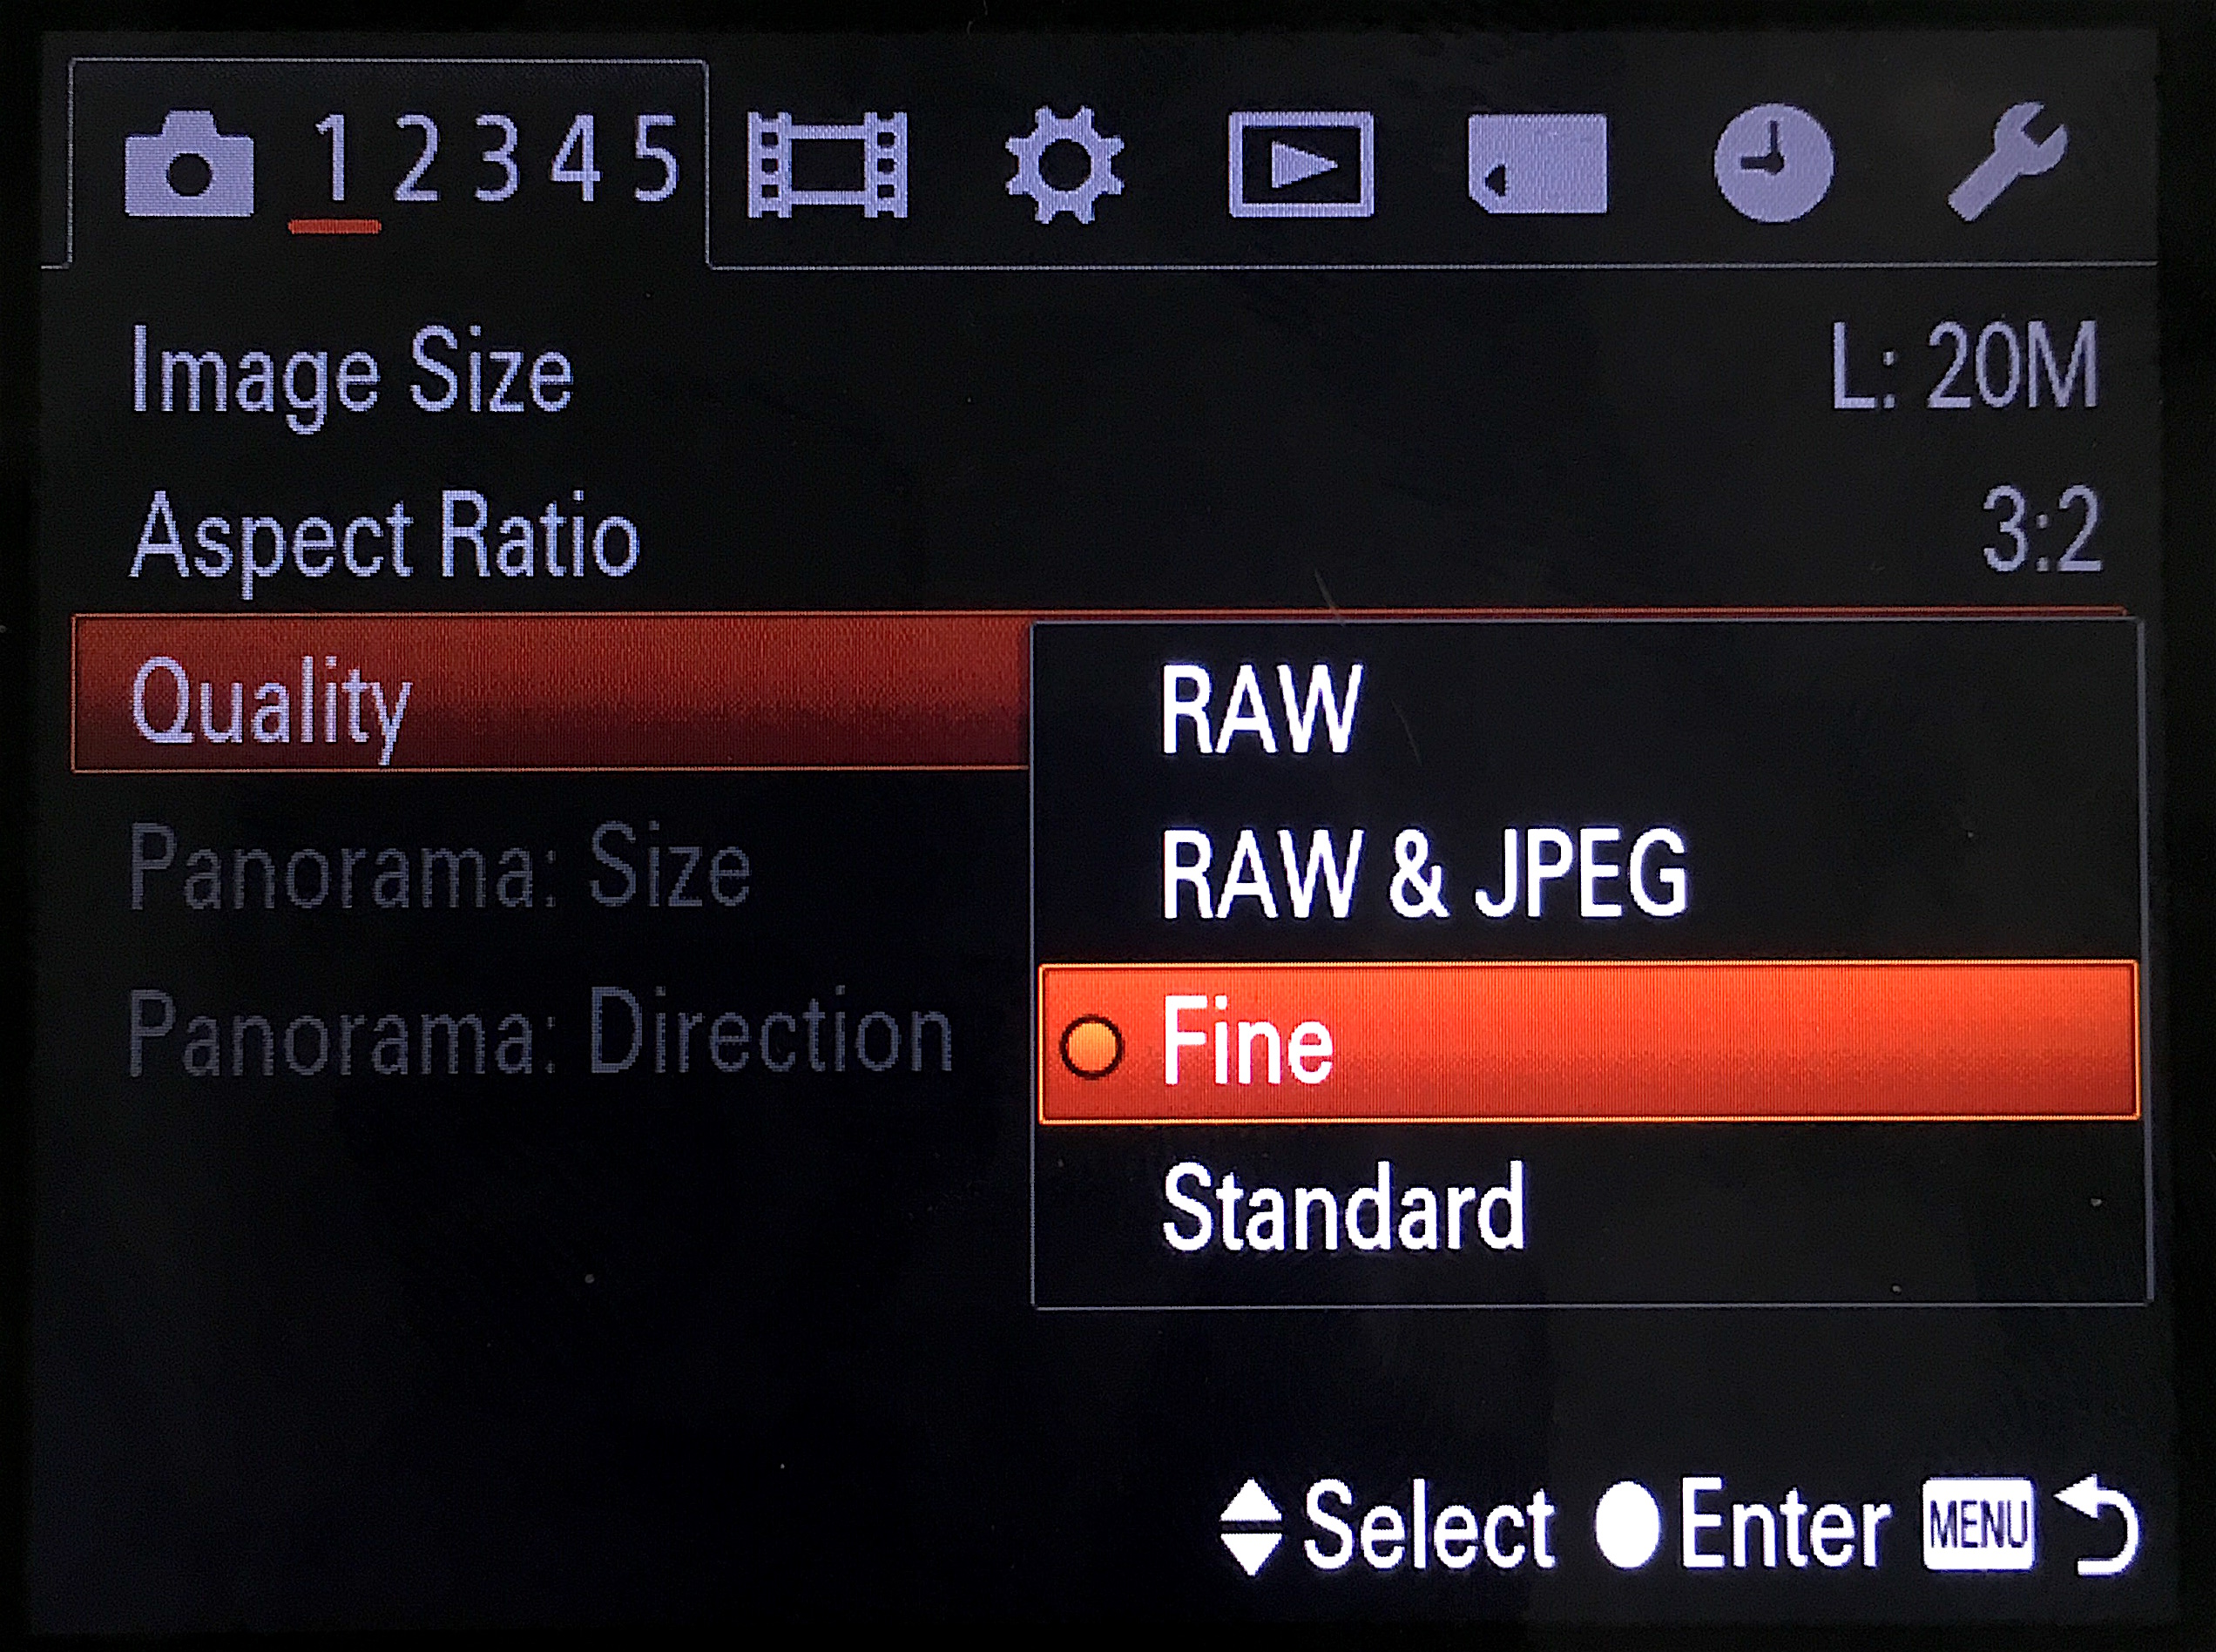
Image Quality
The standard stills camera lets you shoot in Standard JPEG, Fine JPEG, RAW or ‘RAW & JPEG‘, in the order of lowest quality to highest, and largest file size. RAW is an unprocessed format that saves a range of data that can be useful for non-destructive editing. JPEG is a compressed and processed format, and so some quality is lost in exchange for smaller file size. To change the quality settings follow these steps:
- Push the MENU button on the back of the camera
- From here you can modify the Image Size, Aspect Ratio, and Quality.
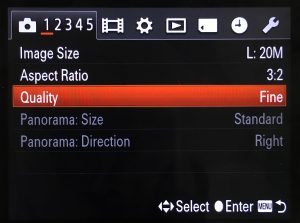
- You can push the top, right, left and bottom of the control ring at the back of the camera to navigate the menu, or scroll by turning it.

- Navigate to Quality and adjust the camera quality here. For basic pictures, you should shoot in Fine, if you wish to further edit your photos later on, you should consider shooting in RAW. ‘RAW & JPEG‘ will take both, but will also fill up your SD card space much faster.

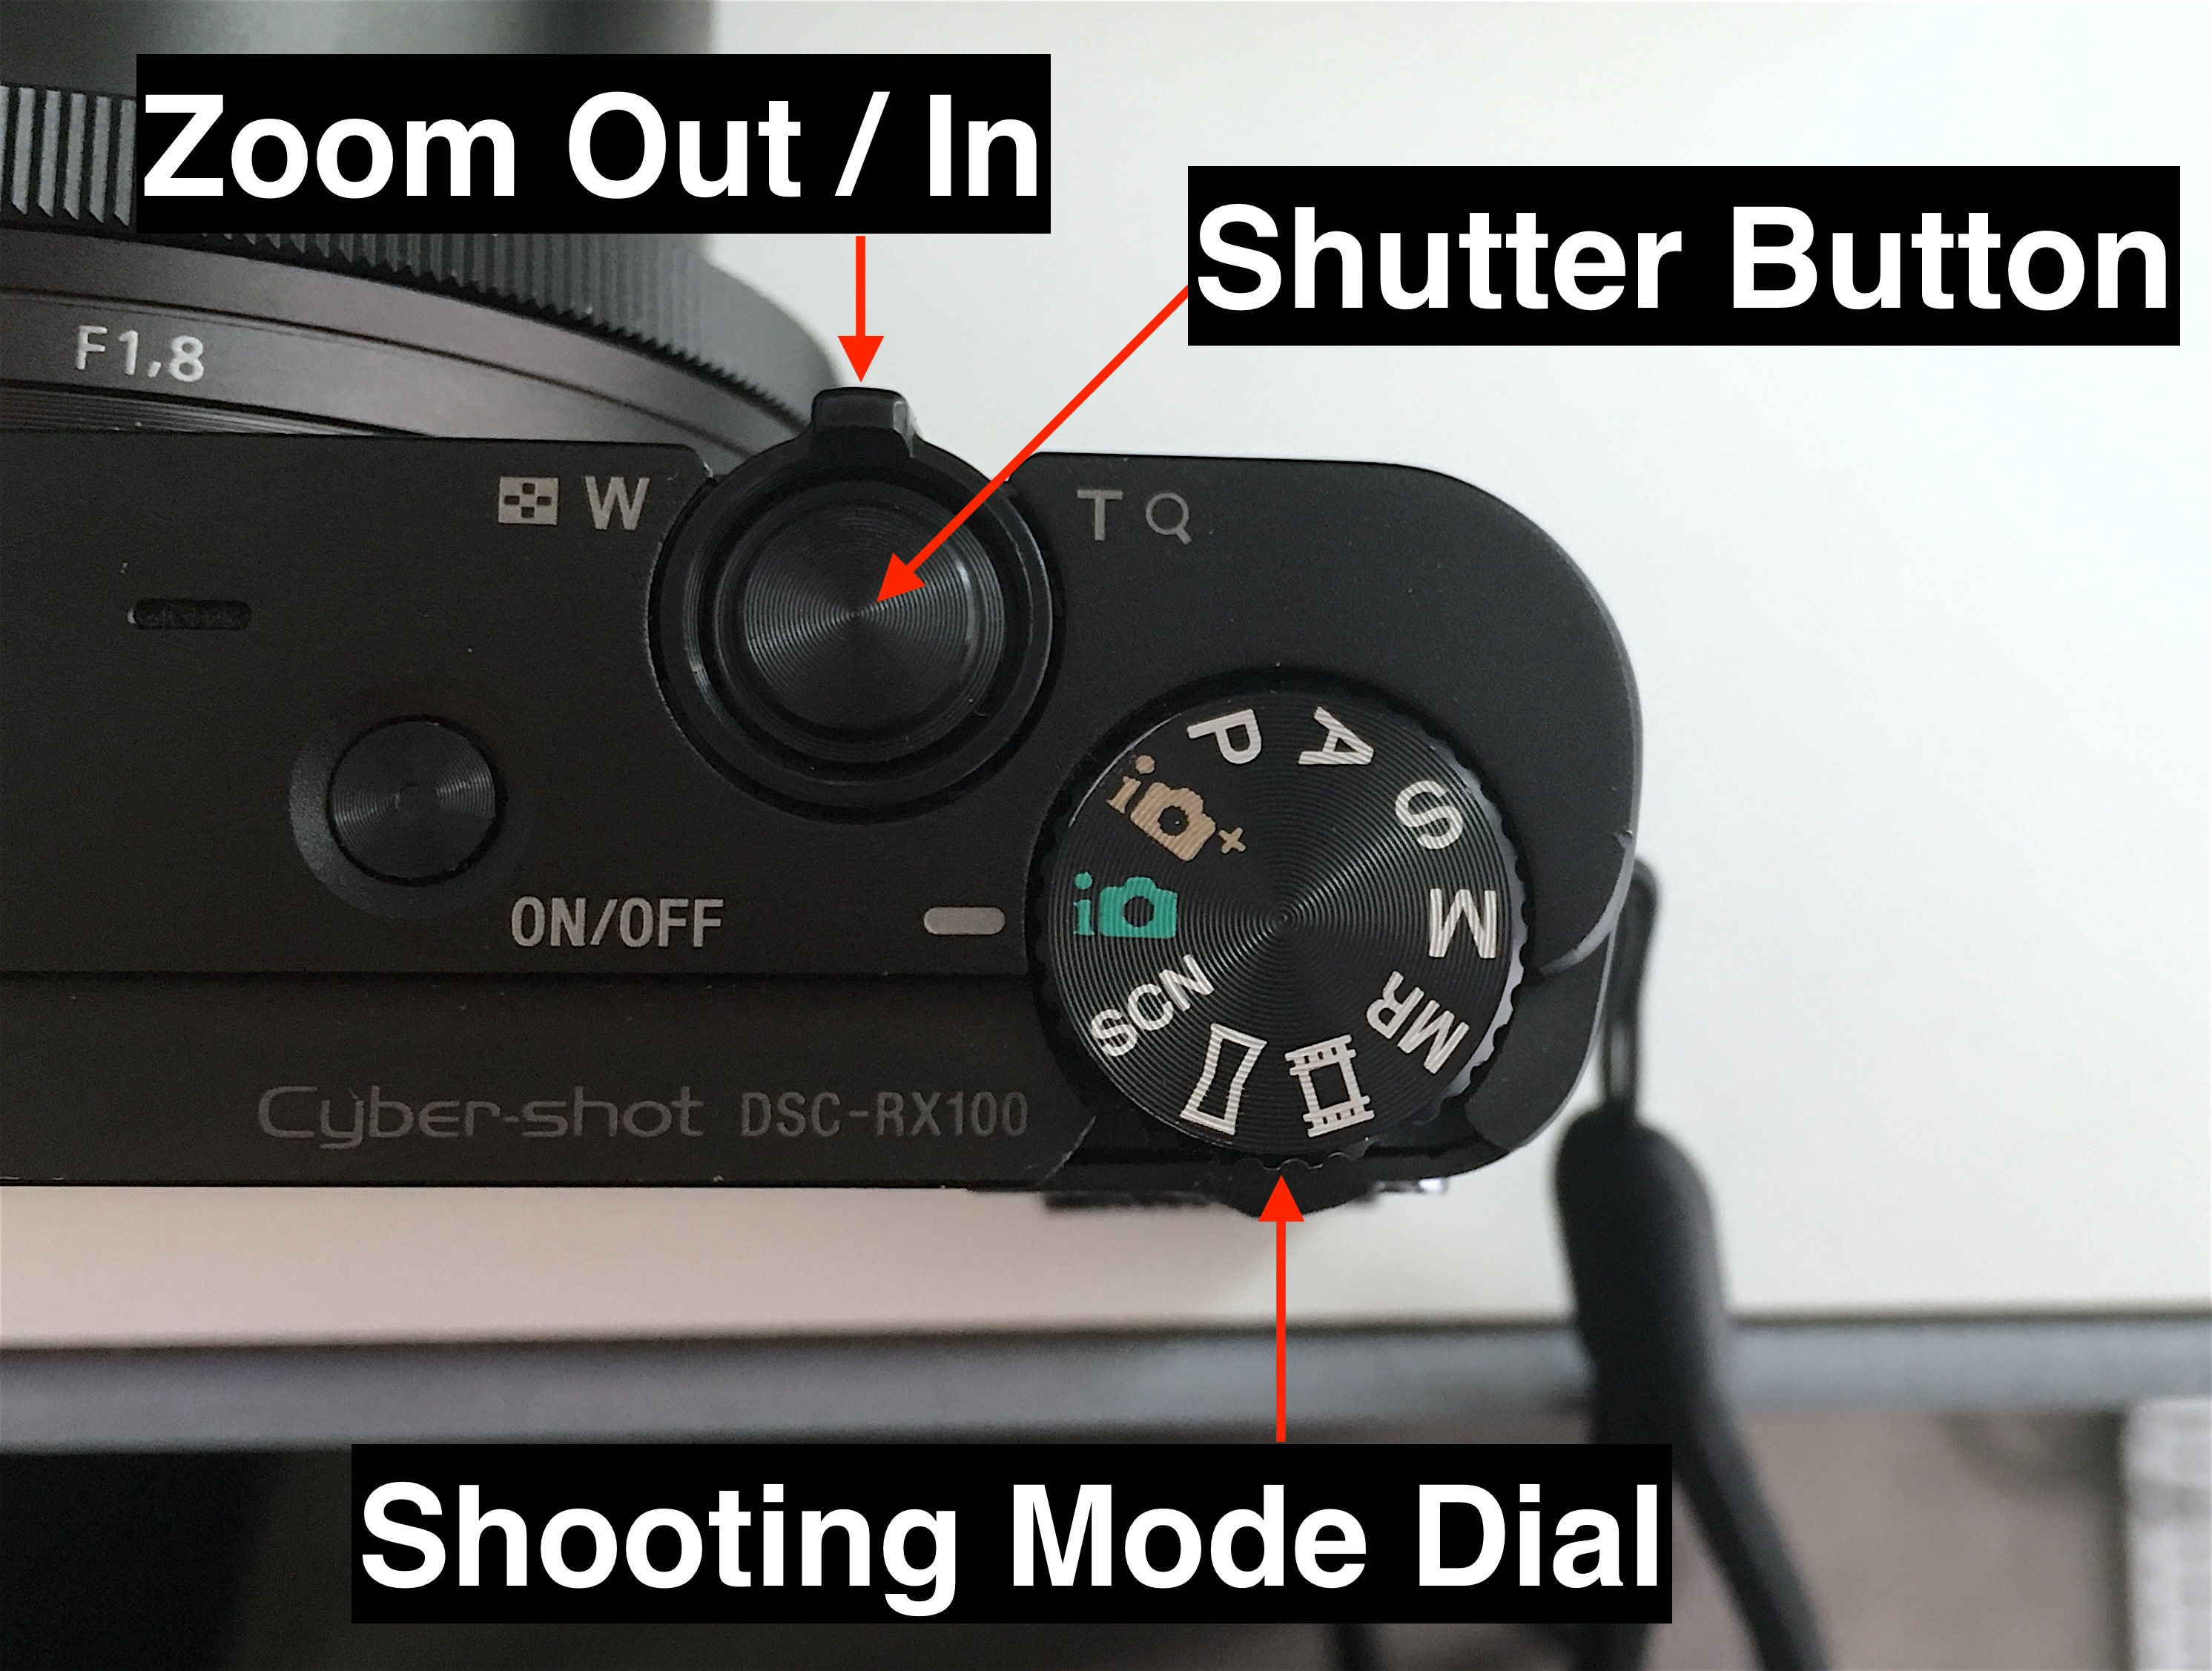
Shooting Modes
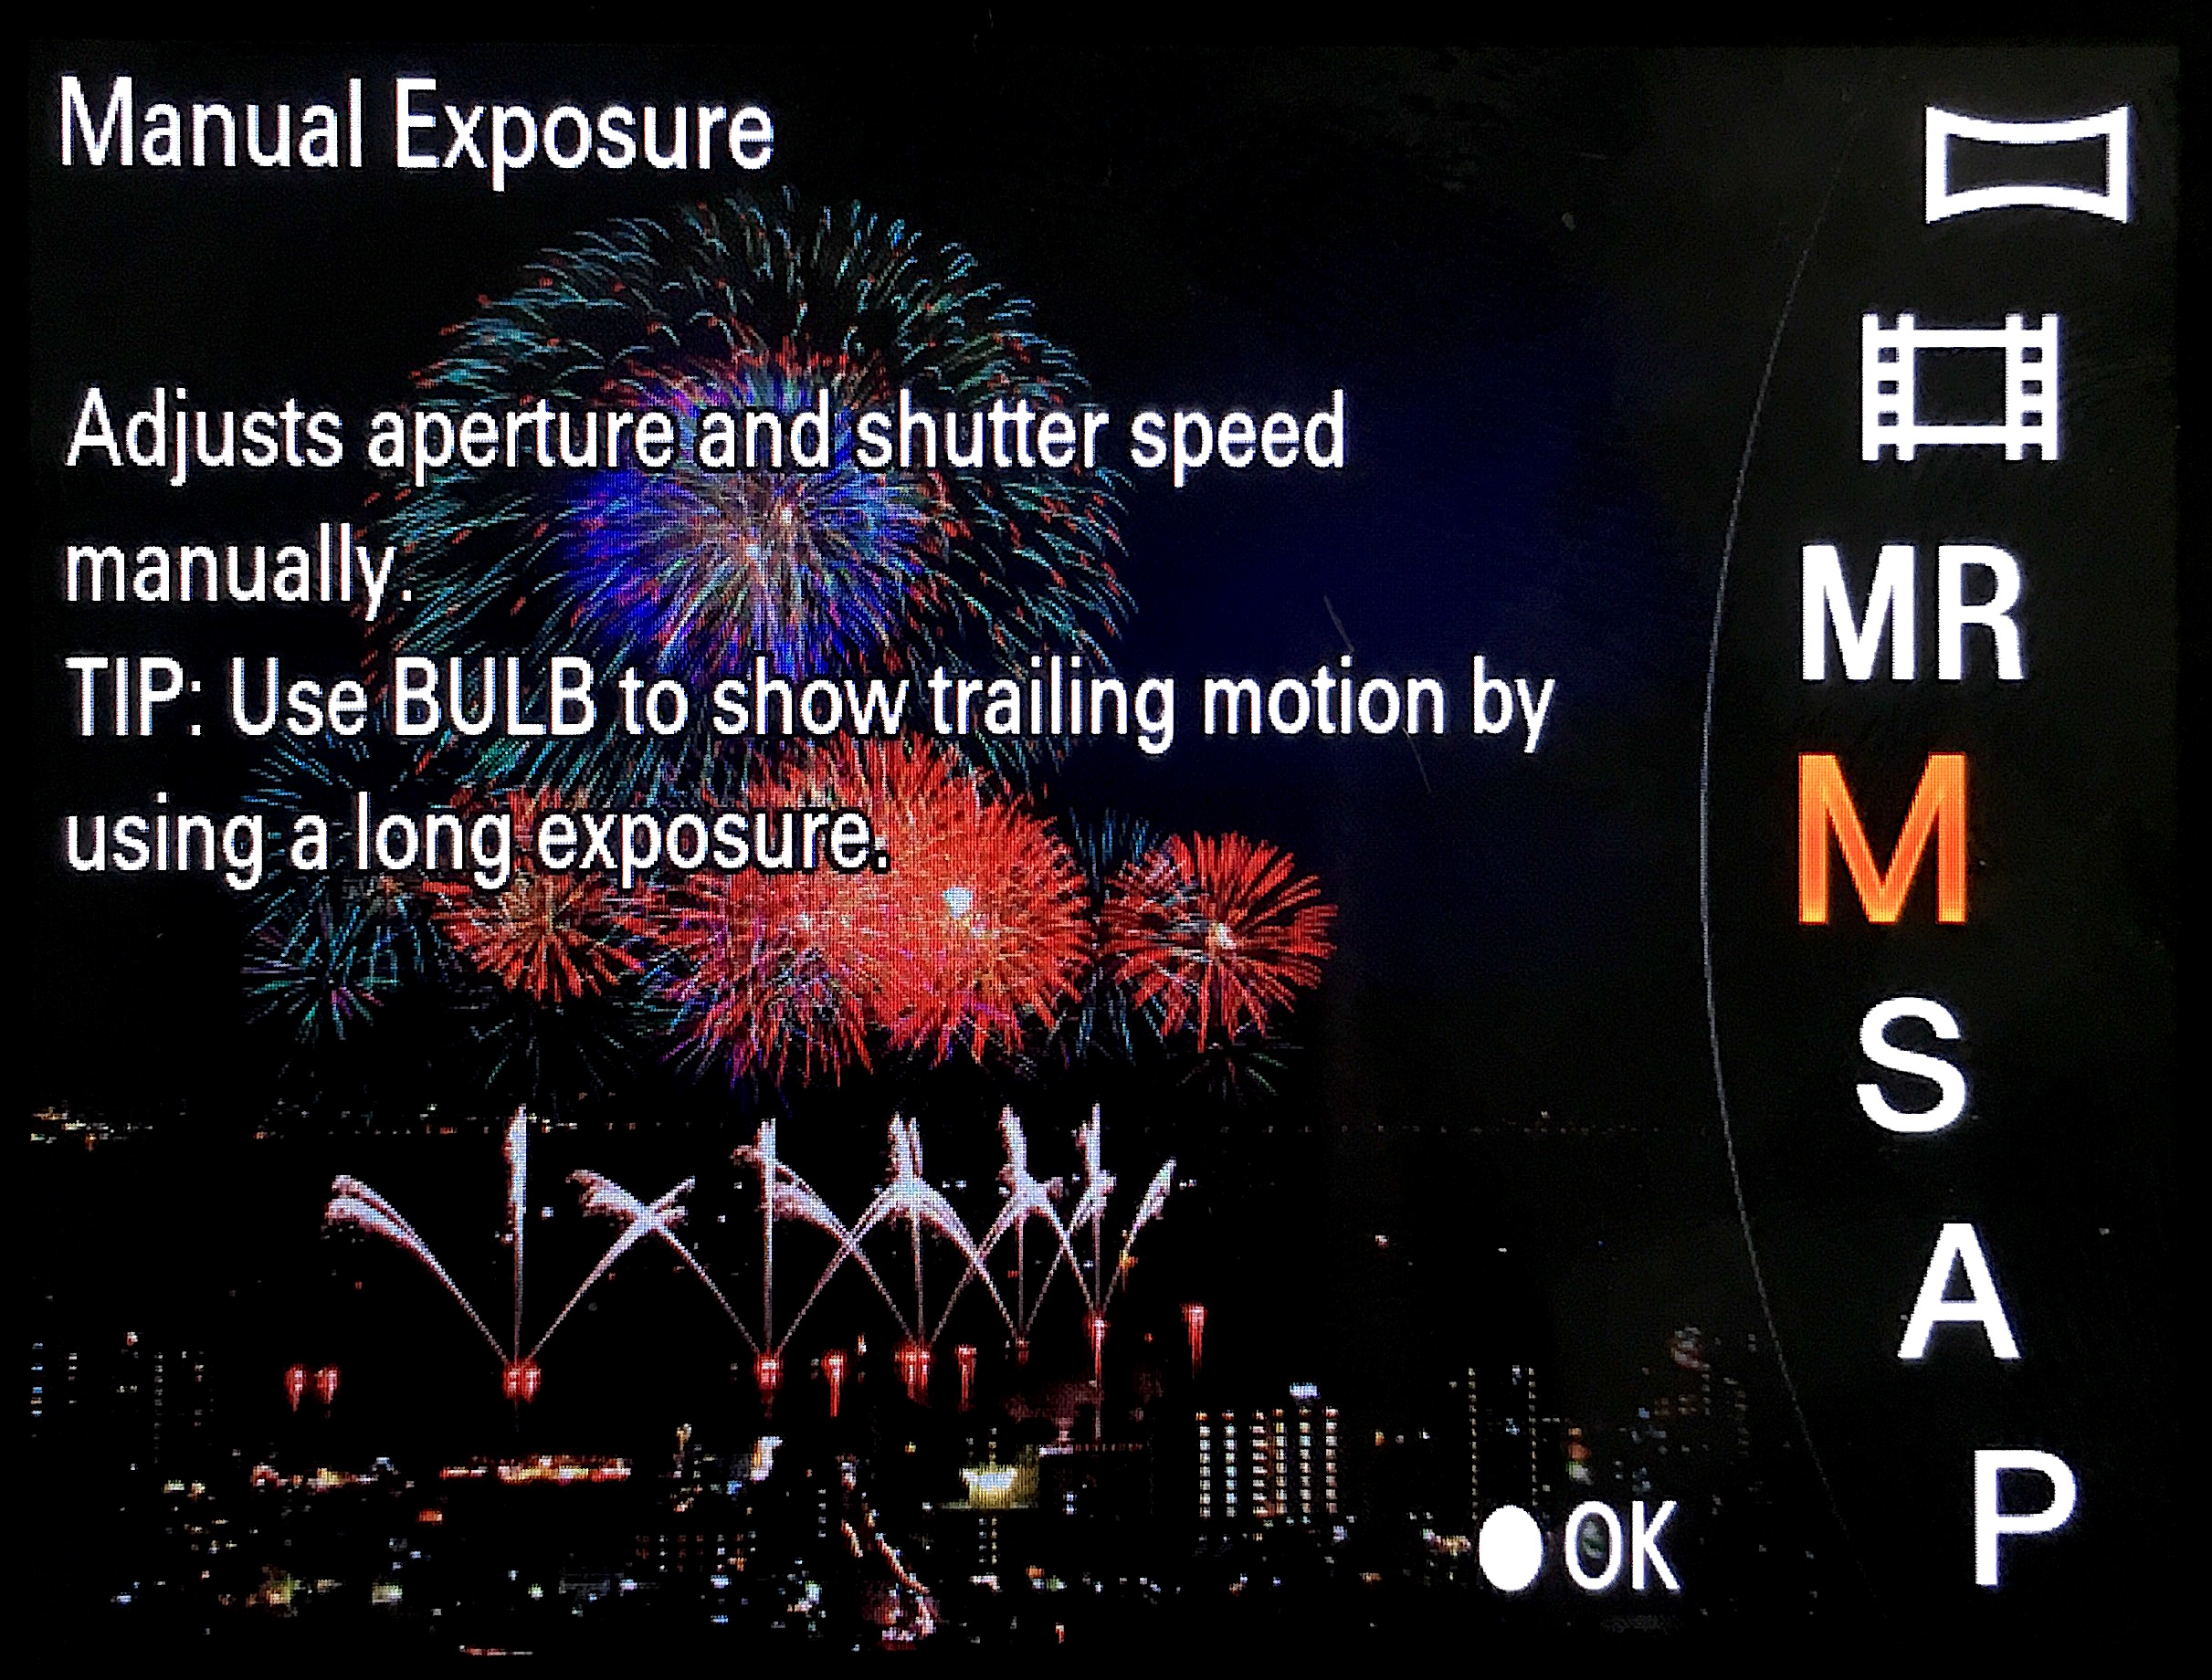
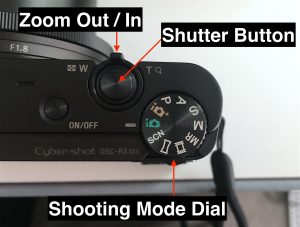
This camera offers a range of shooting modes accessible from the dial at the top of the camera. As you switch between them, information will show on the screen telling you what the function of these modes are. This camera works well in the Auto modes, but is also quite easy to shoot in M(anual) mode for more control over your settings.
Setting up your shot
If shooting in M(anual) mode, please refer to the technique guide on the Nikon DSLR article on how to get the perfect exposure, using aperture, shutter speed and ISO settings.
If shooting in Auto mode, you should just be able to push the shutter button to capture your photo. If you want to adjust the aperture and shutter speed on the camera in Manual shooting mode, follow these steps:
Adjusting the exposure
- Push down on the control ring, this will switch between highlighting the aperture (ex. F9.0), and the shutter speed (ex. 1/30).
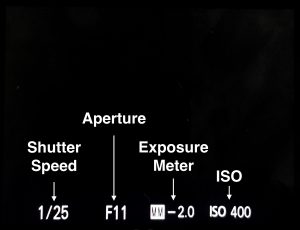
- Turn the control dial to adjust the settings.
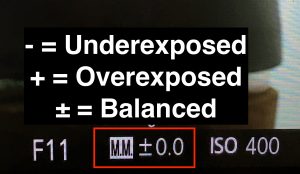
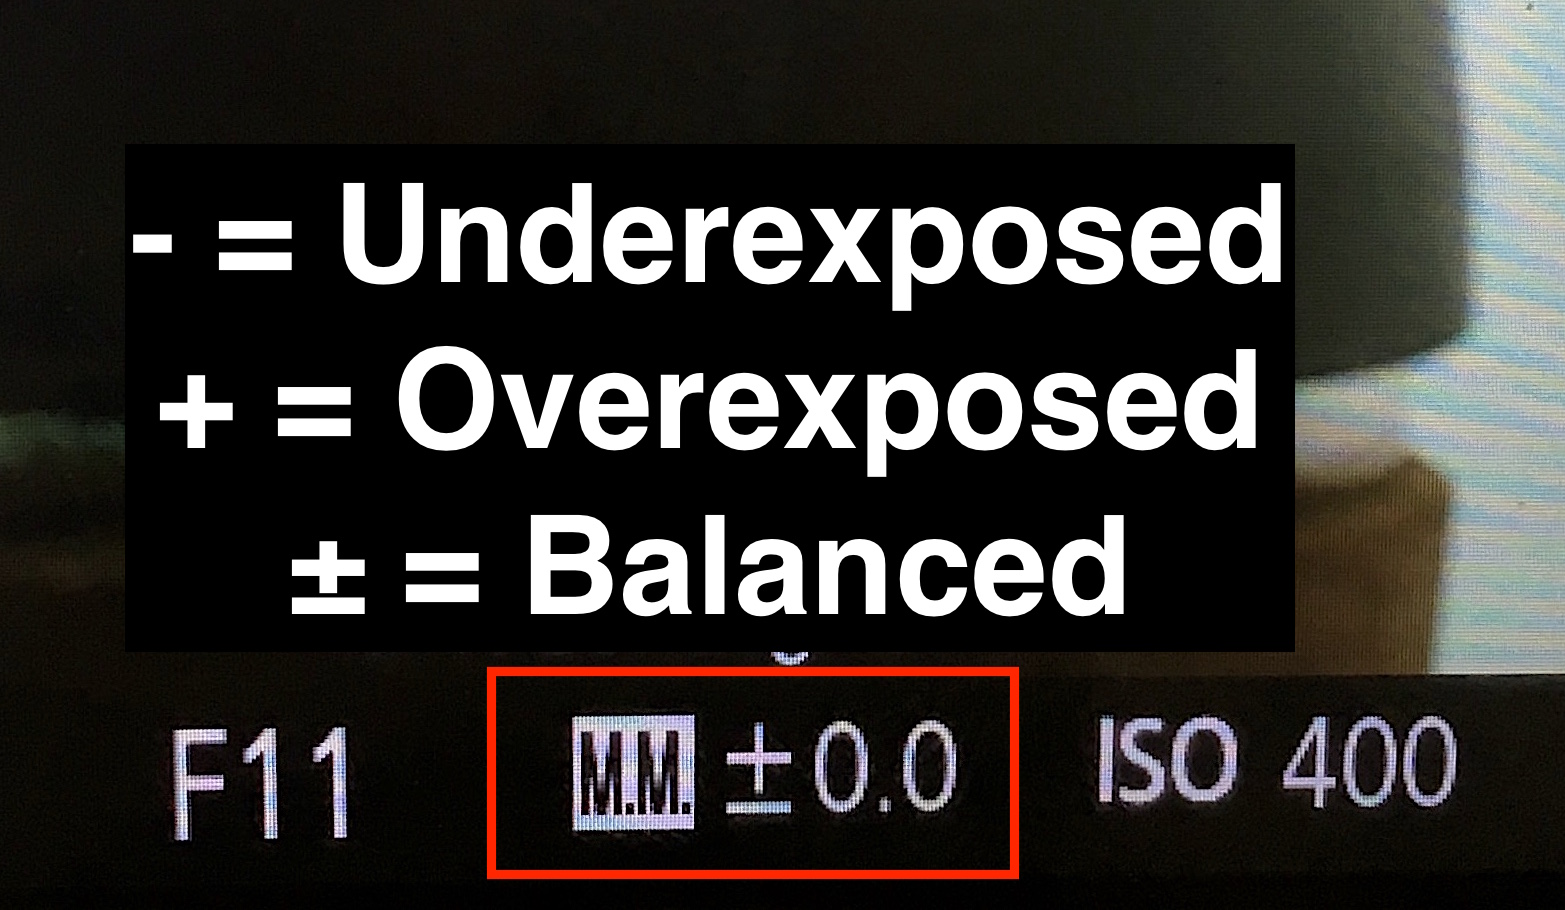
- The ‘M.M‘ icon beside the aperture and shutter speed settings tells you if you are under or over exposed. Adjust your settings and aim for a reading of ‘± 0.0′ for a correctly exposed shot.
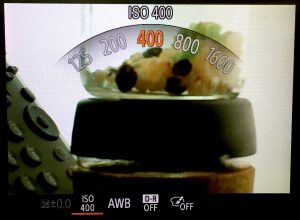
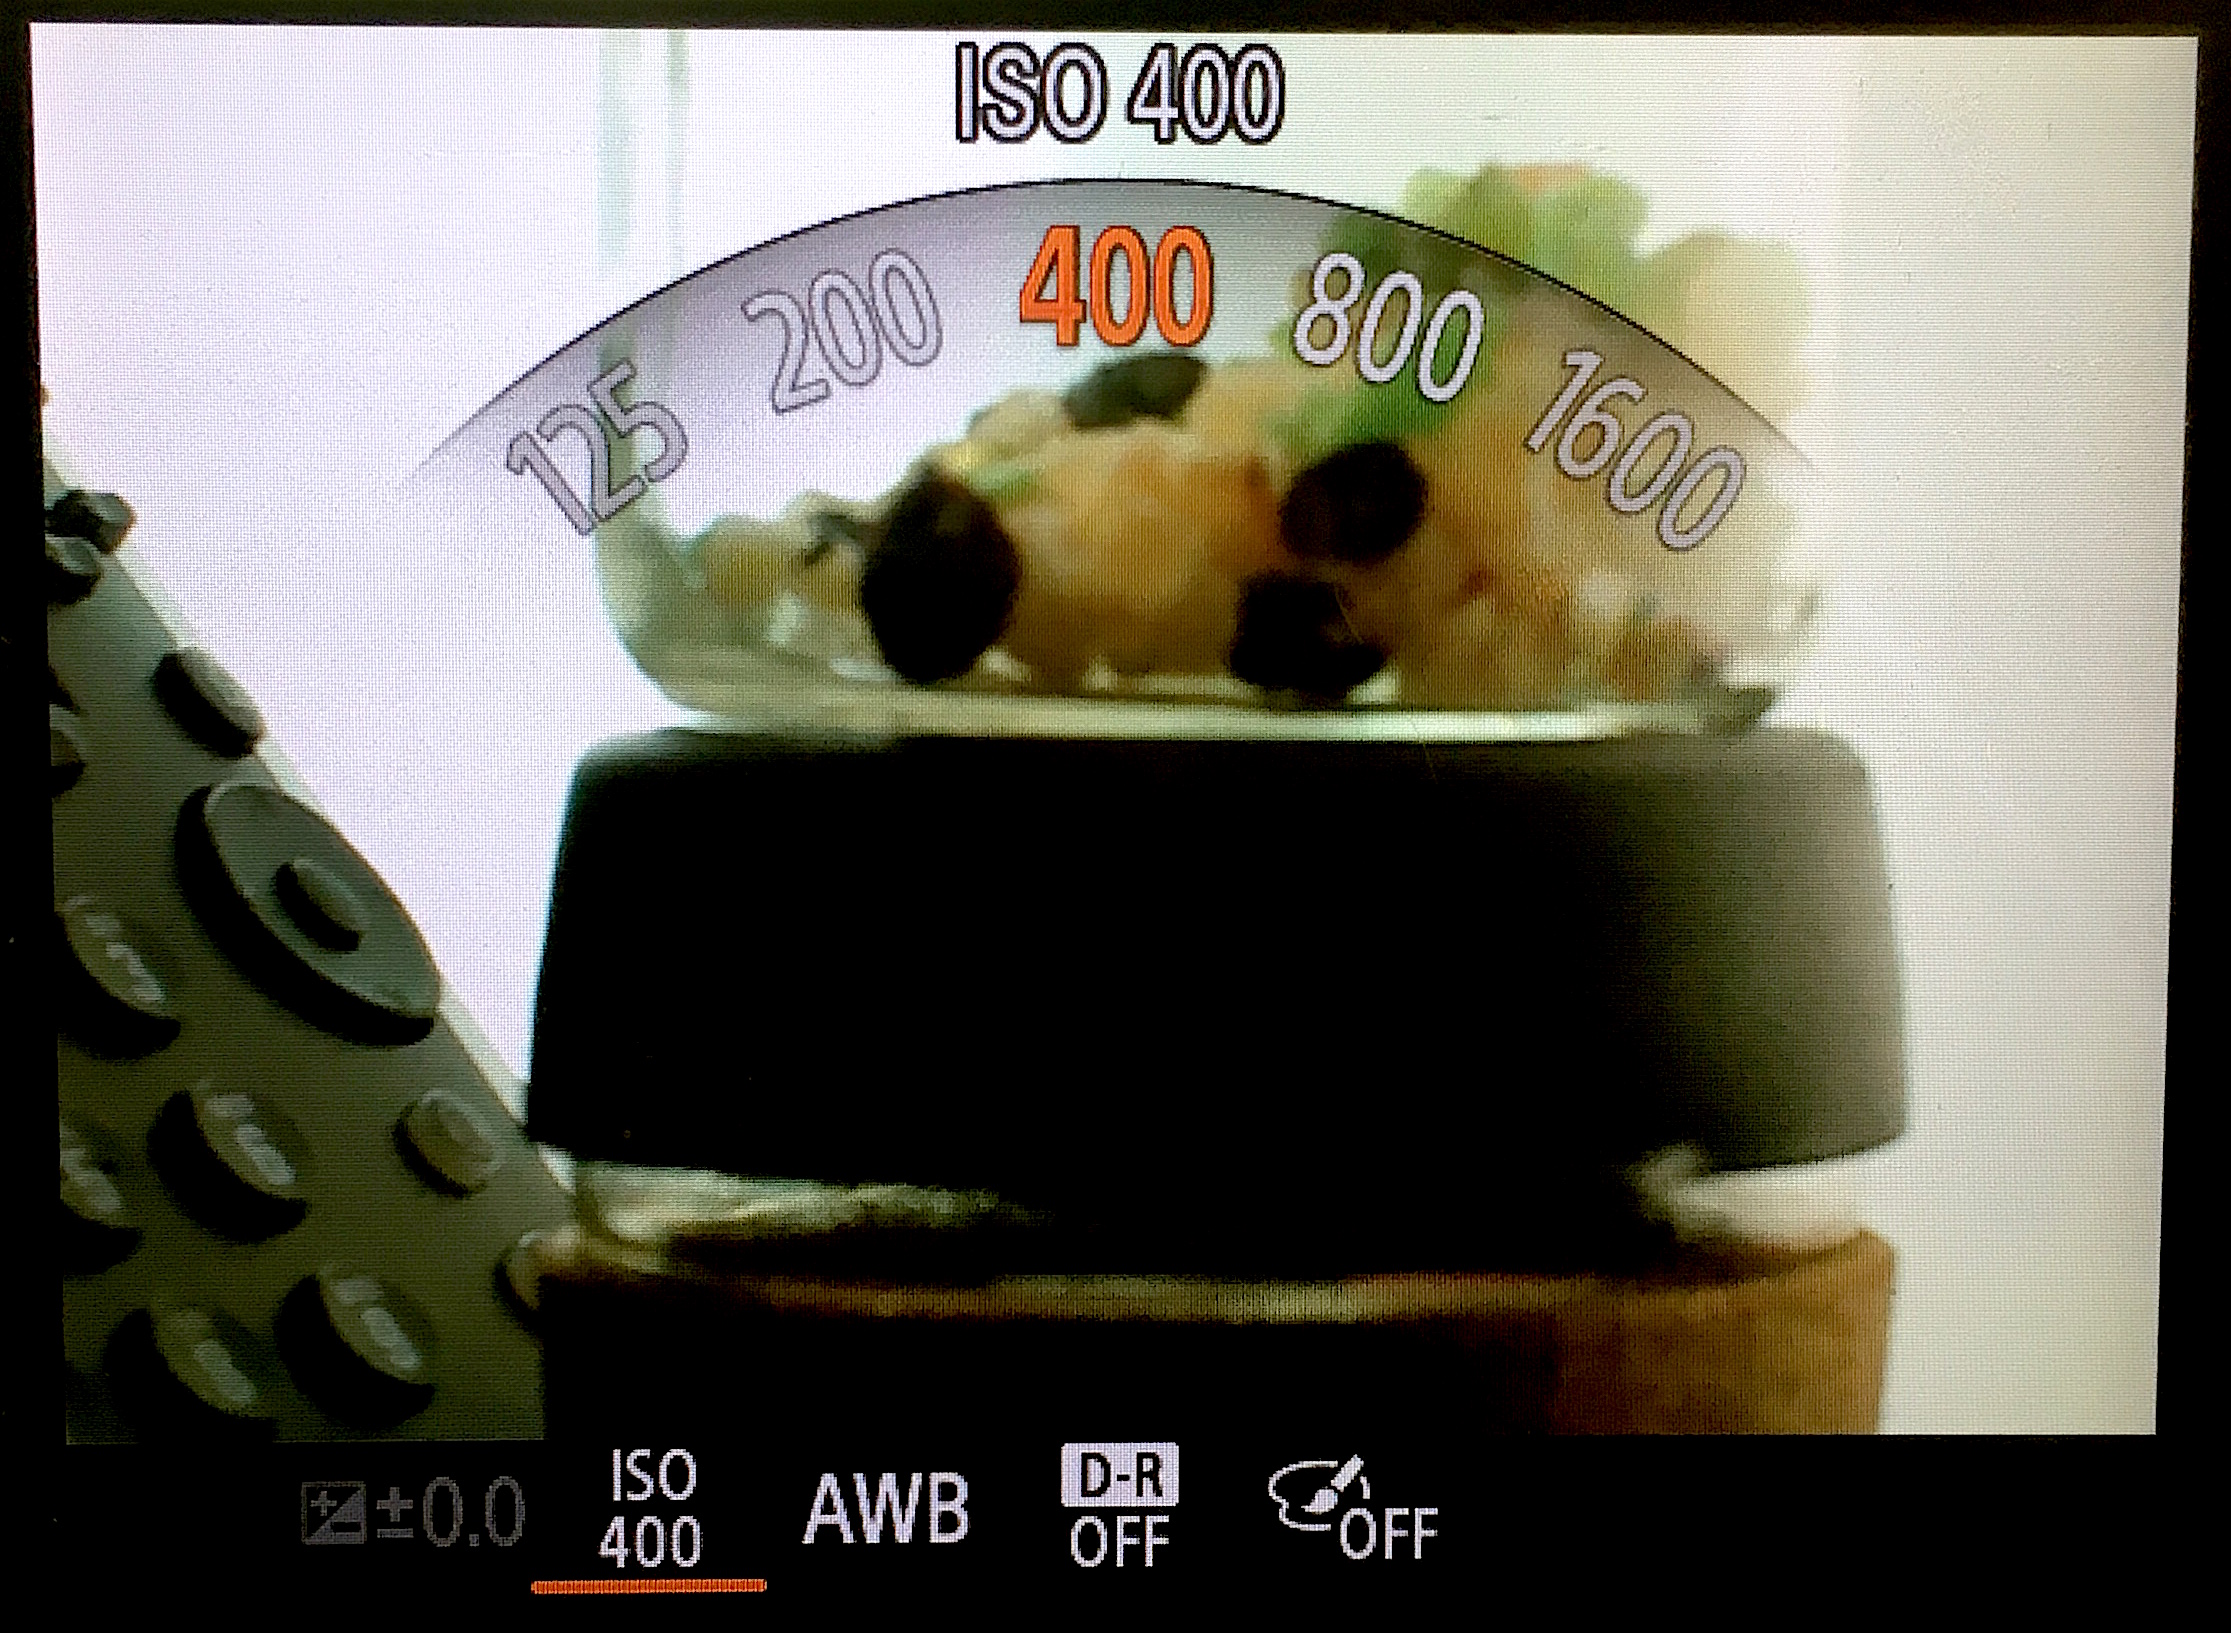
- To adjust your ISO setting, push the Fn button, and push left or right on the control dial to navigate to the ISO setting.

- Turn the control dial to set your ISO. It’s a good idea to keep this within 200 to 800, unless shooting in low light conditions.

Adjusting the focus
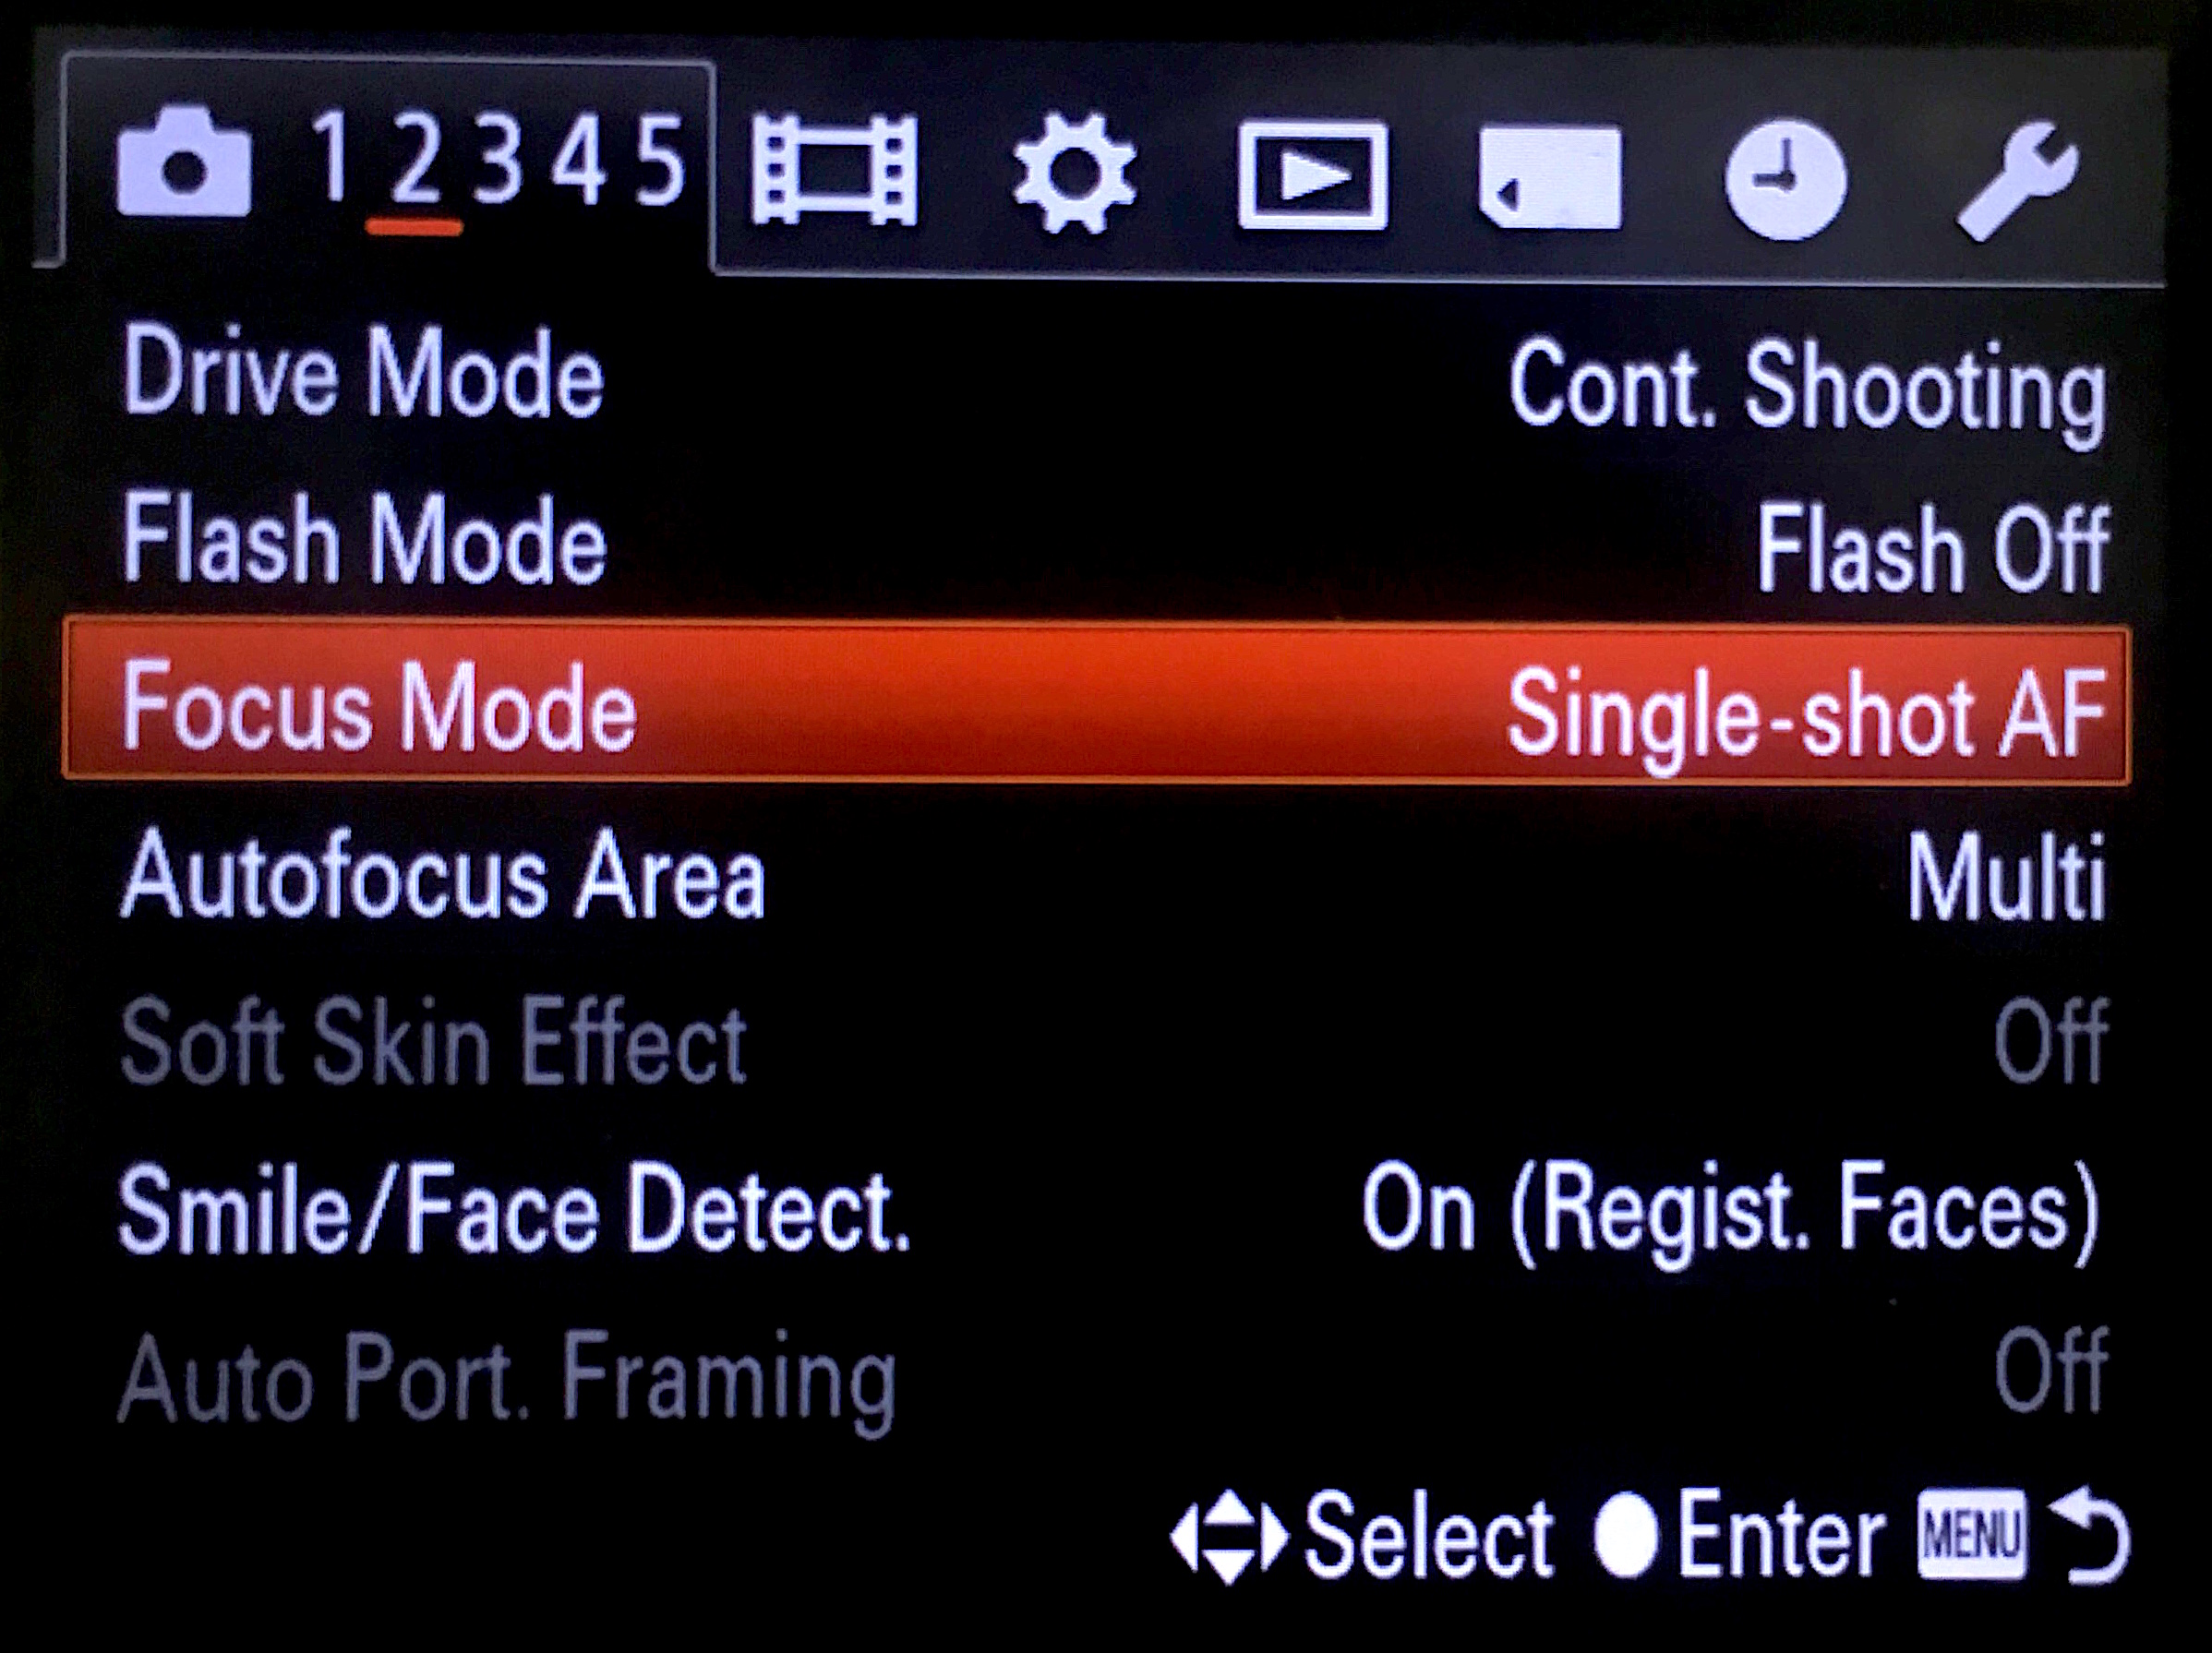
The camera comes with two kinds of focus modes, to adjust your focus setting:
- Push the MENU button.
- Push right on the control dial to navigate to the second page of the camera settings. From here you can select ‘Focus Mode‘
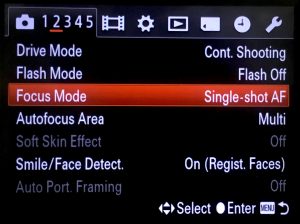
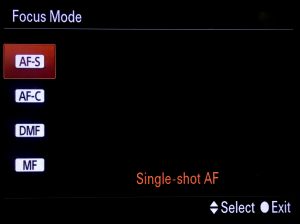
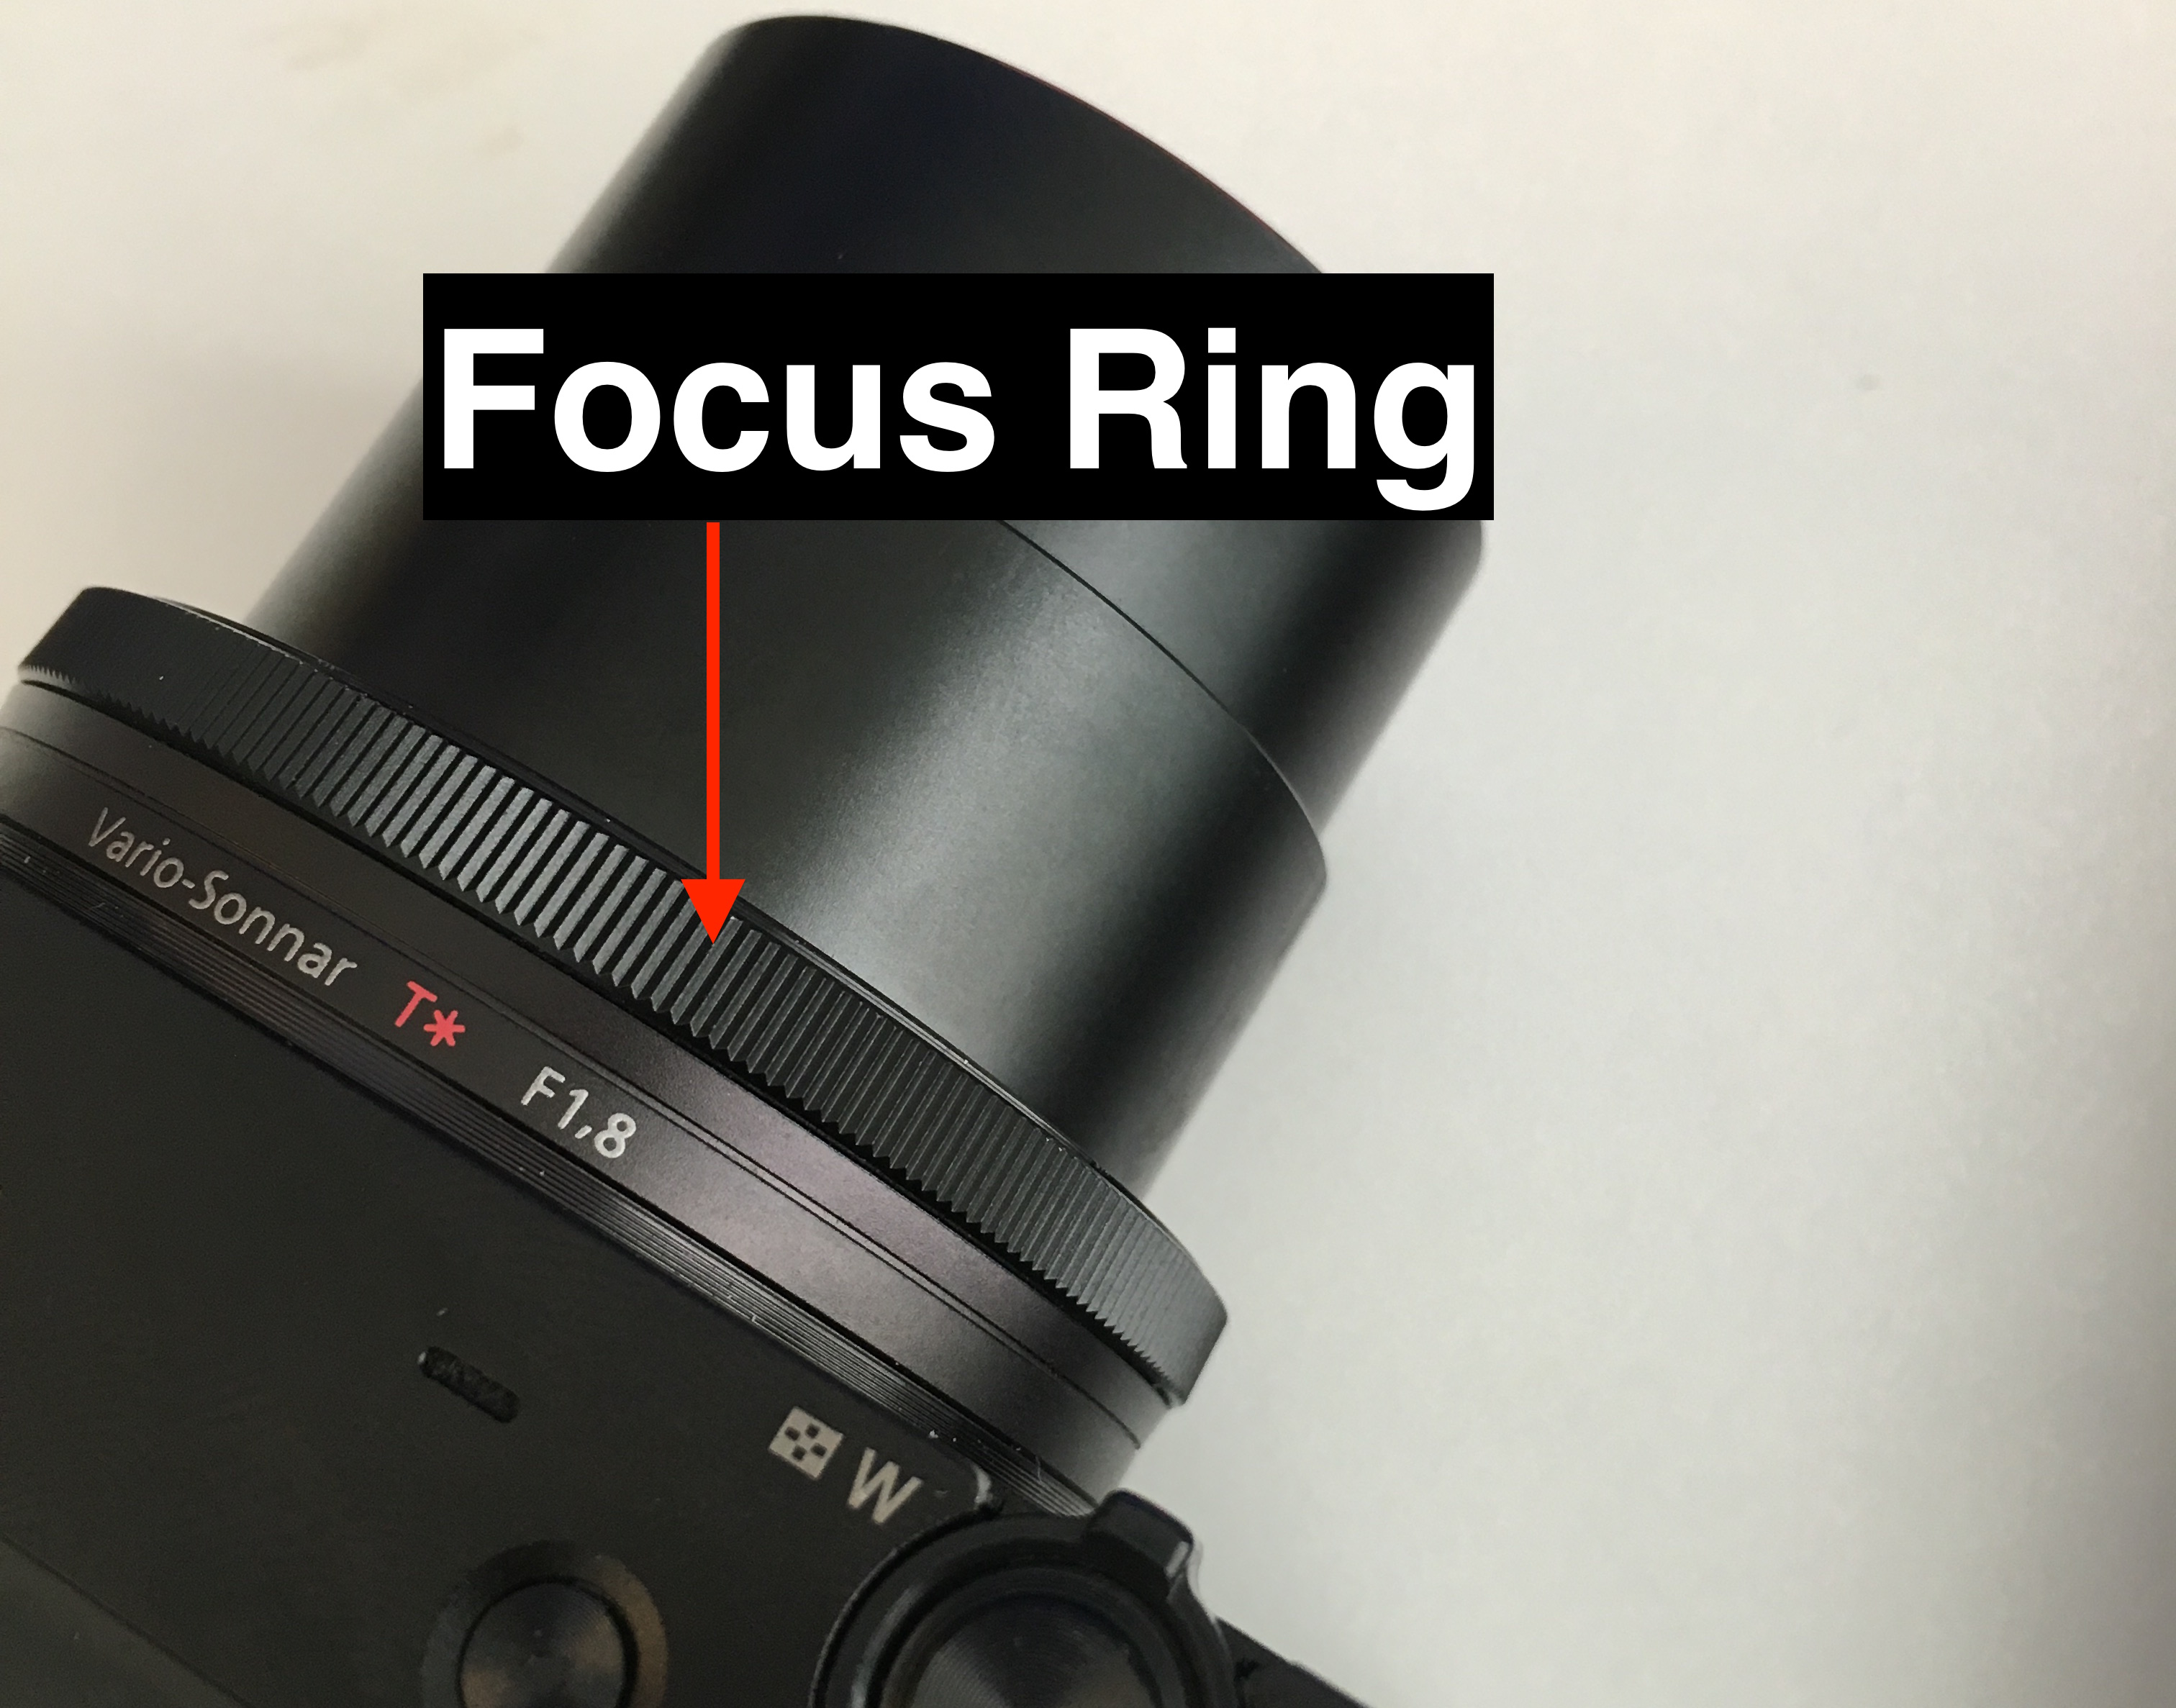
- It’s recommend you choose either AF-S, which will automatically focus for you when you hold the shutter button down half way. Or MF for manual focus, which will let you use the ring at the front of the camera to focus instead.
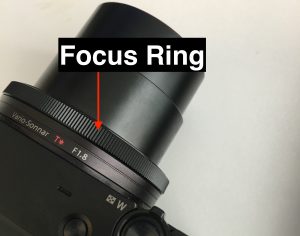
If you have AF-S enabled, the ring at the front of the camera will take on different functions, in auto shooting modes, this will let you zoom in and out, in manual shooting mode, it will change the aperture. - You can zoom in and out by using the slider on the shutter button.

Taking the shot
Once you have adjusted all your settings, gotten a balanced exposure and composed your shot, you’re ready to capture the image:
- Push the shutter button to capture your image.
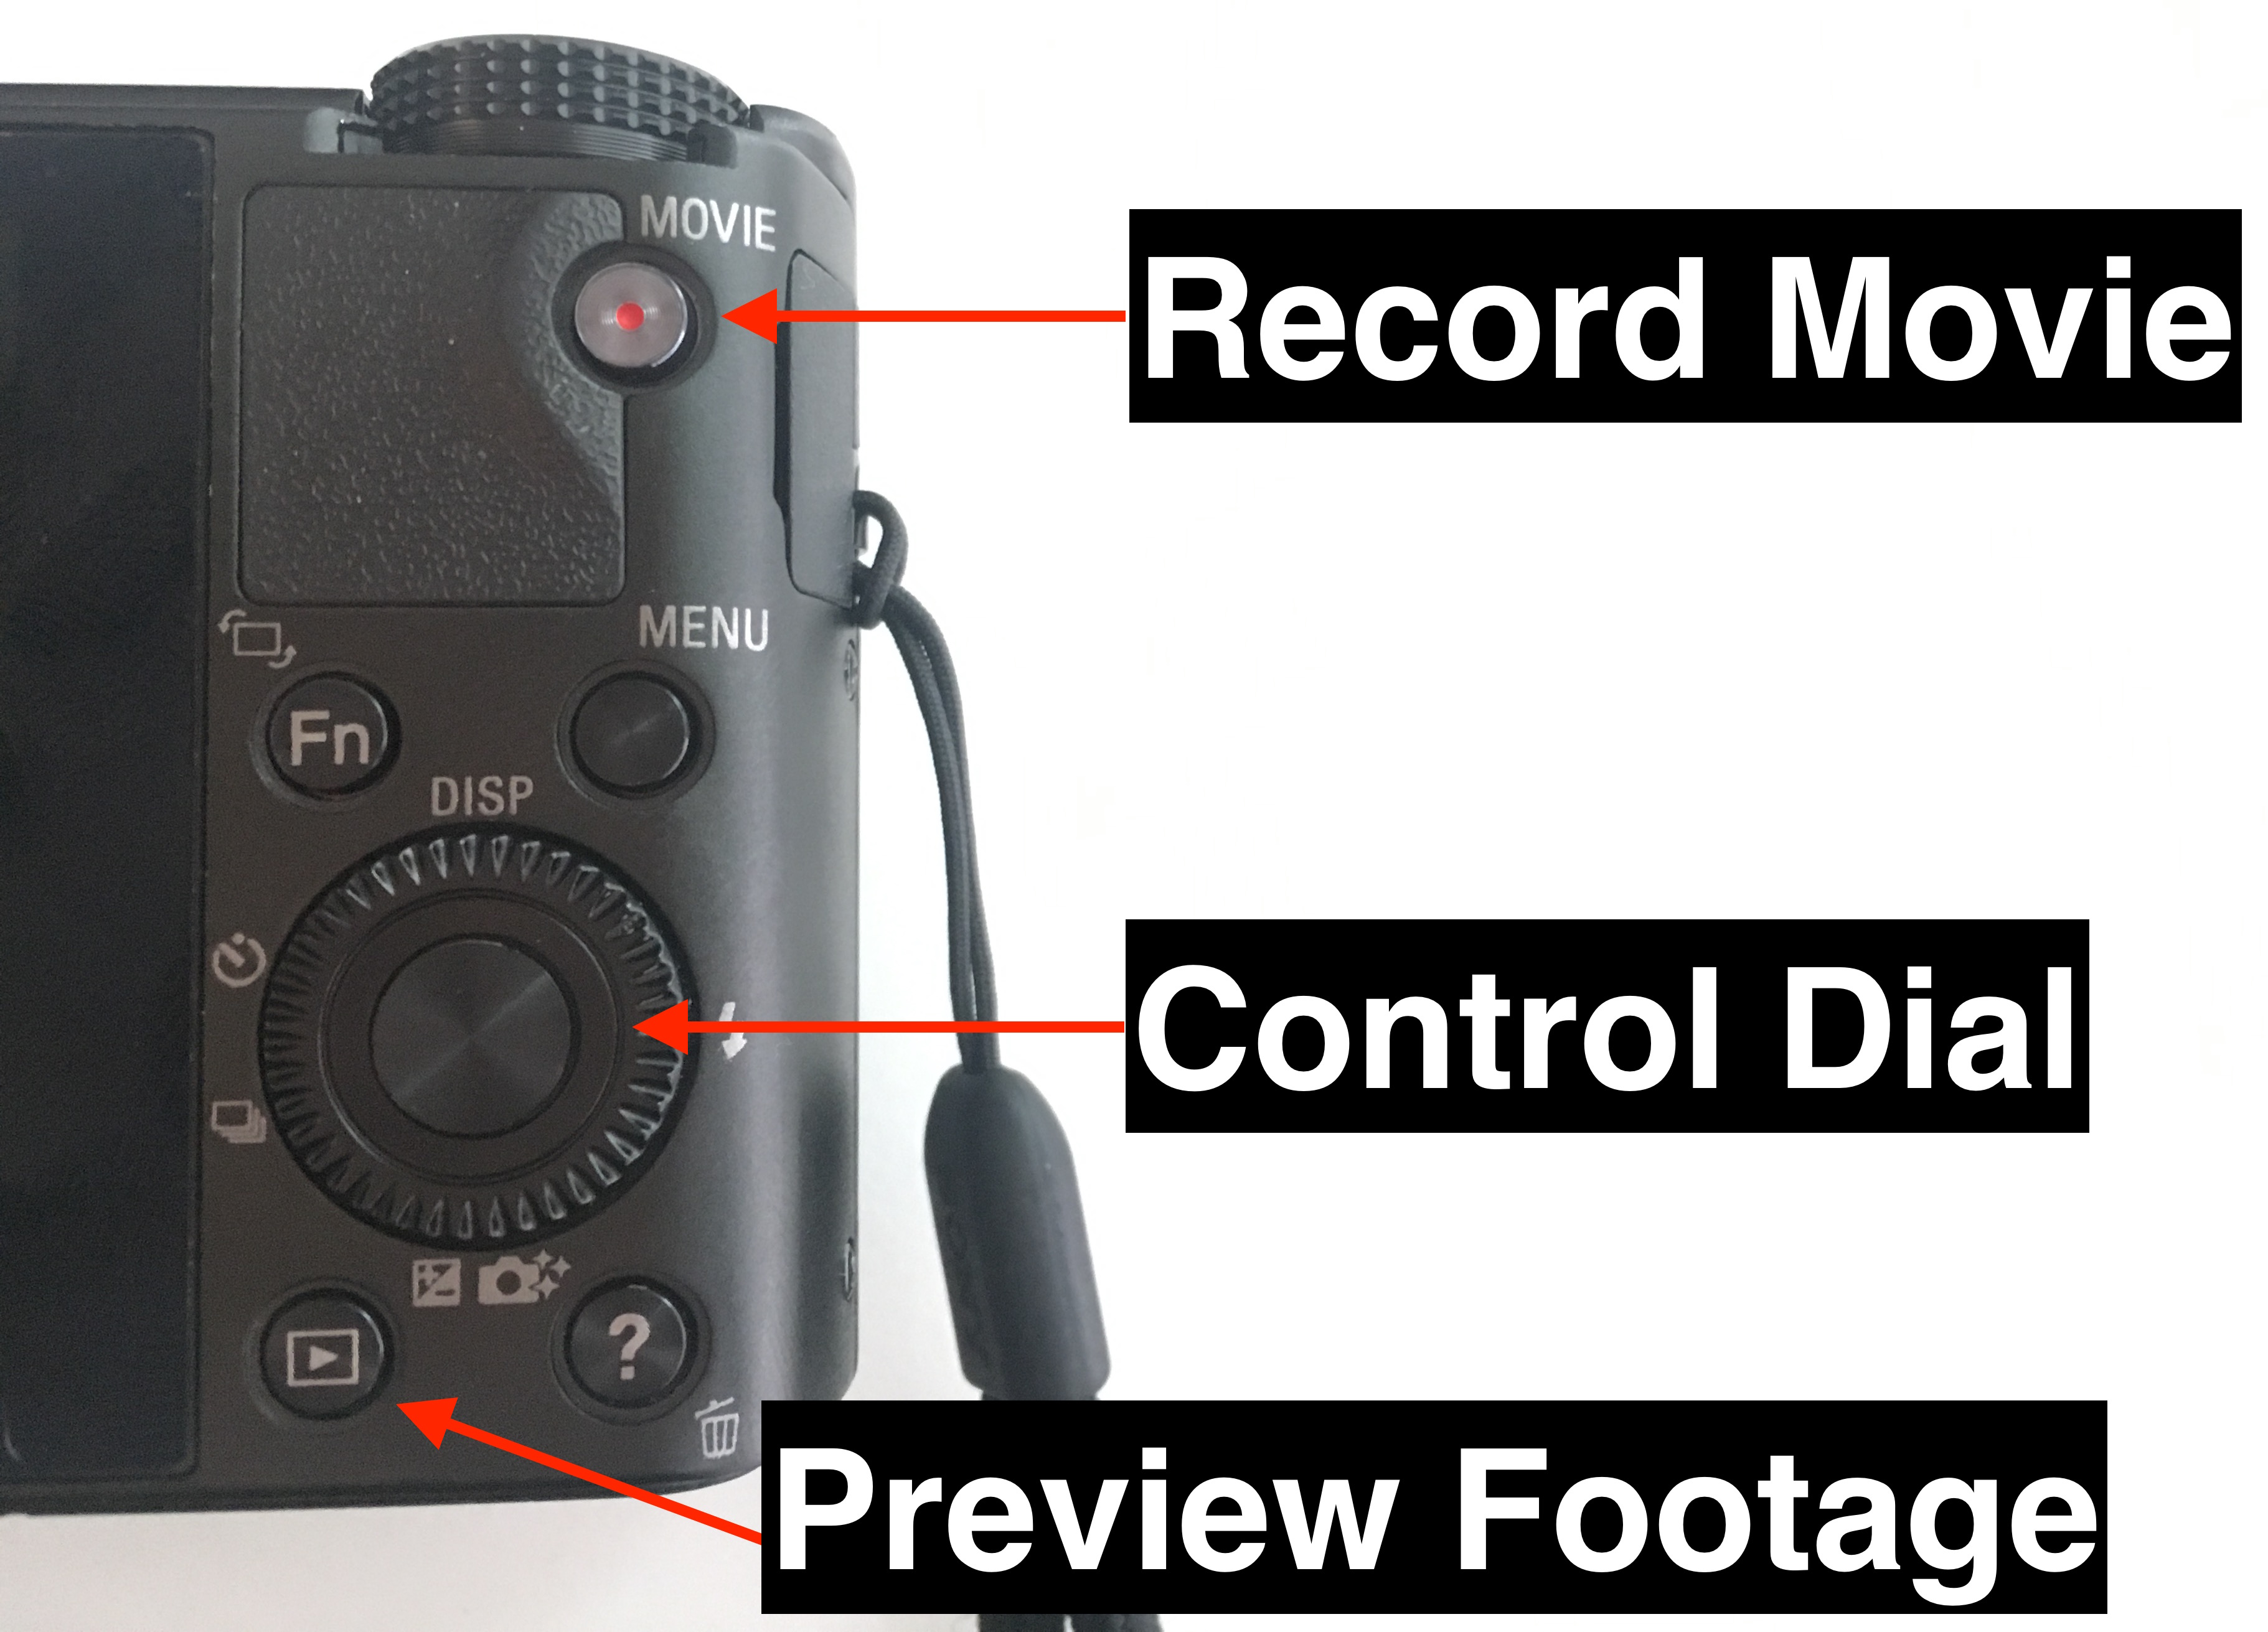
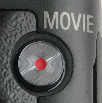
- If you want to record a movie instead, push the MOVIE button to start filming.
- You can find your captured footage by pressing the preview button.

Please refer to the documentation at the end of this article to find the instruction manual for your camera if you need further help. There is also a Help (?) button on the camera which will give you useful information depending on where you use it.

Transferring your files to a computer
- Remove the SD card from your camera and insert it into your computers SD card reader.
- If using a Mac, open Finder, you can find your SD card under ‘Devices’ on the sidebar, open the ‘DCIM’ folder. Your photos should be in a numeric folder where you can transfer them to your computer.
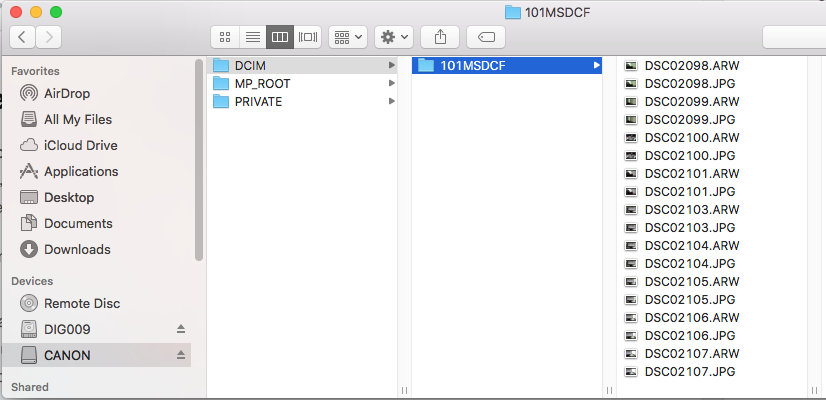
To find your recorded movie files, follow the ‘MP_ROOT‘ folder path instead.
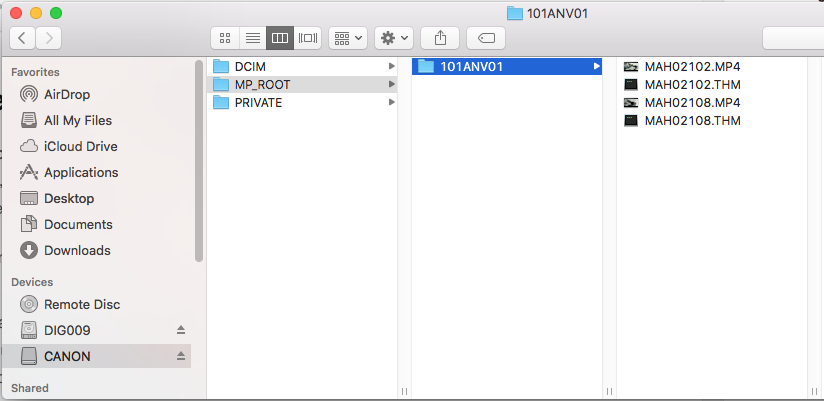
- If using a Windows computer, open File Explorer, click on ‘This PC’ in the sidebar, from here find your SD card and follow the same steps as above to locate the files.
Formatting your SD card
Once you have finished transferring your footage you may want to erase the footage to free up space on the SD card.
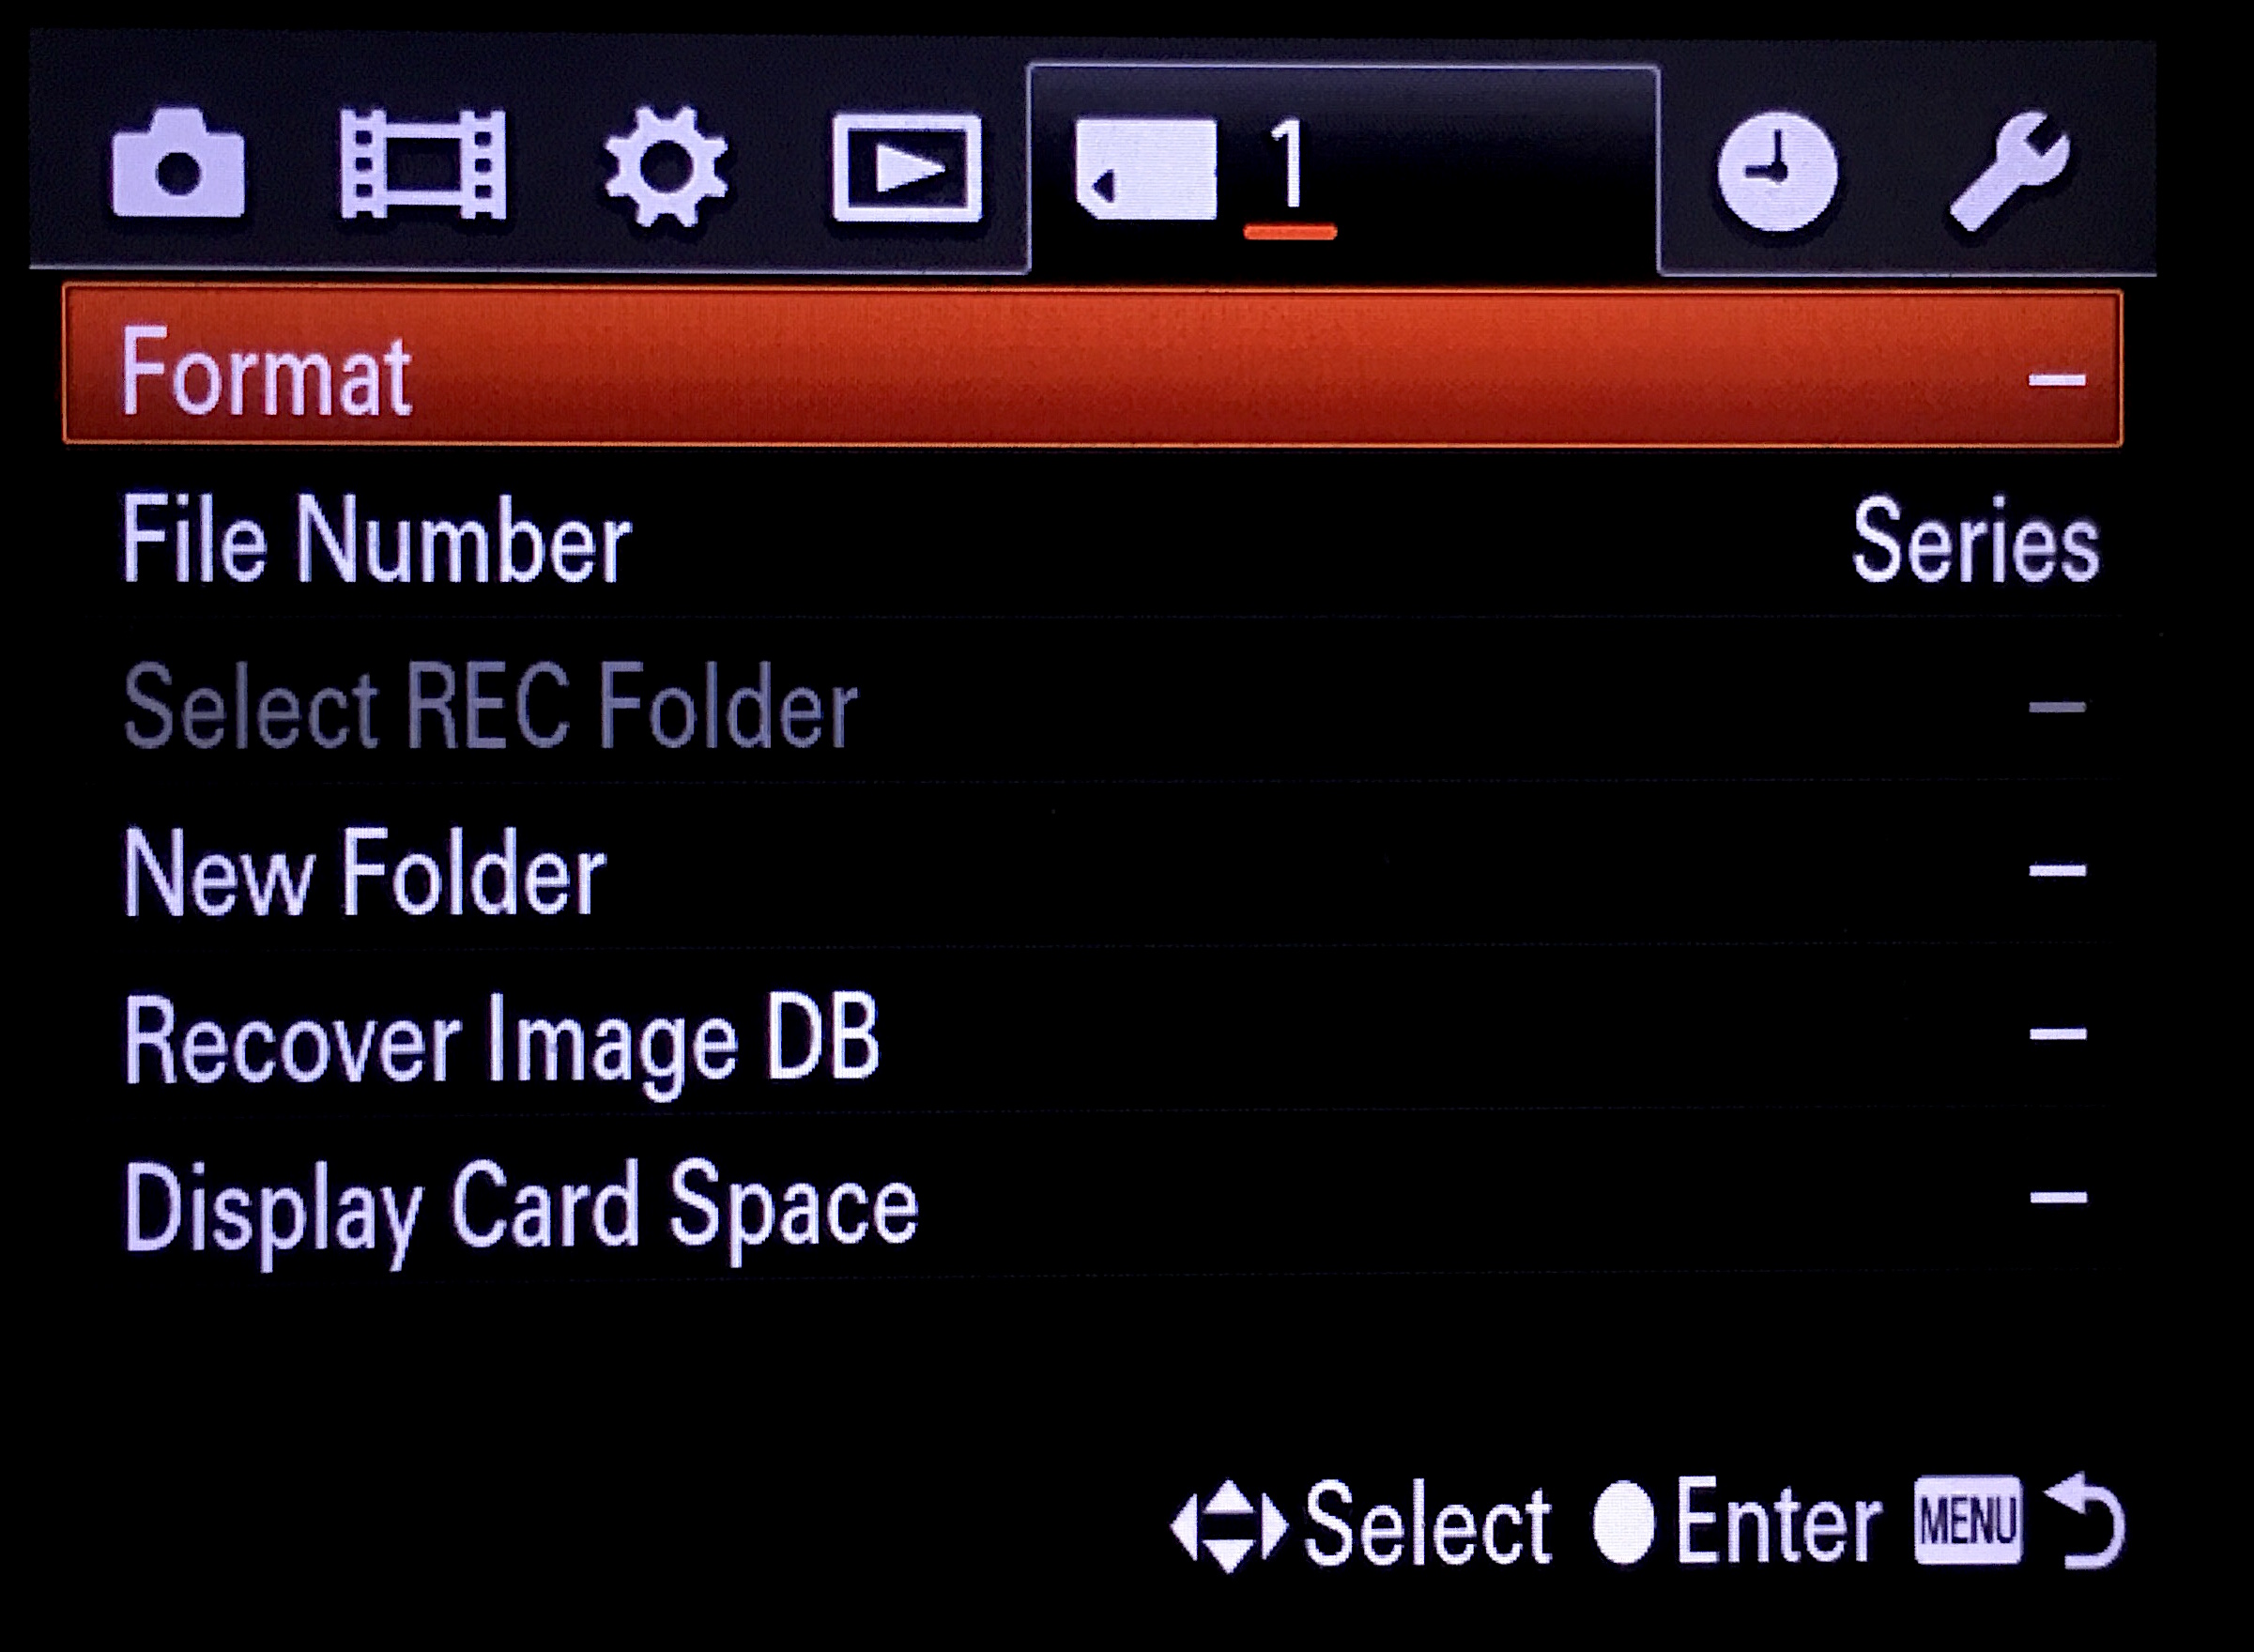
- Insert the SD card into the camera and push the preview button.
- Push the menu button and press right twice on the control dial, to get to the SD card icon menu.

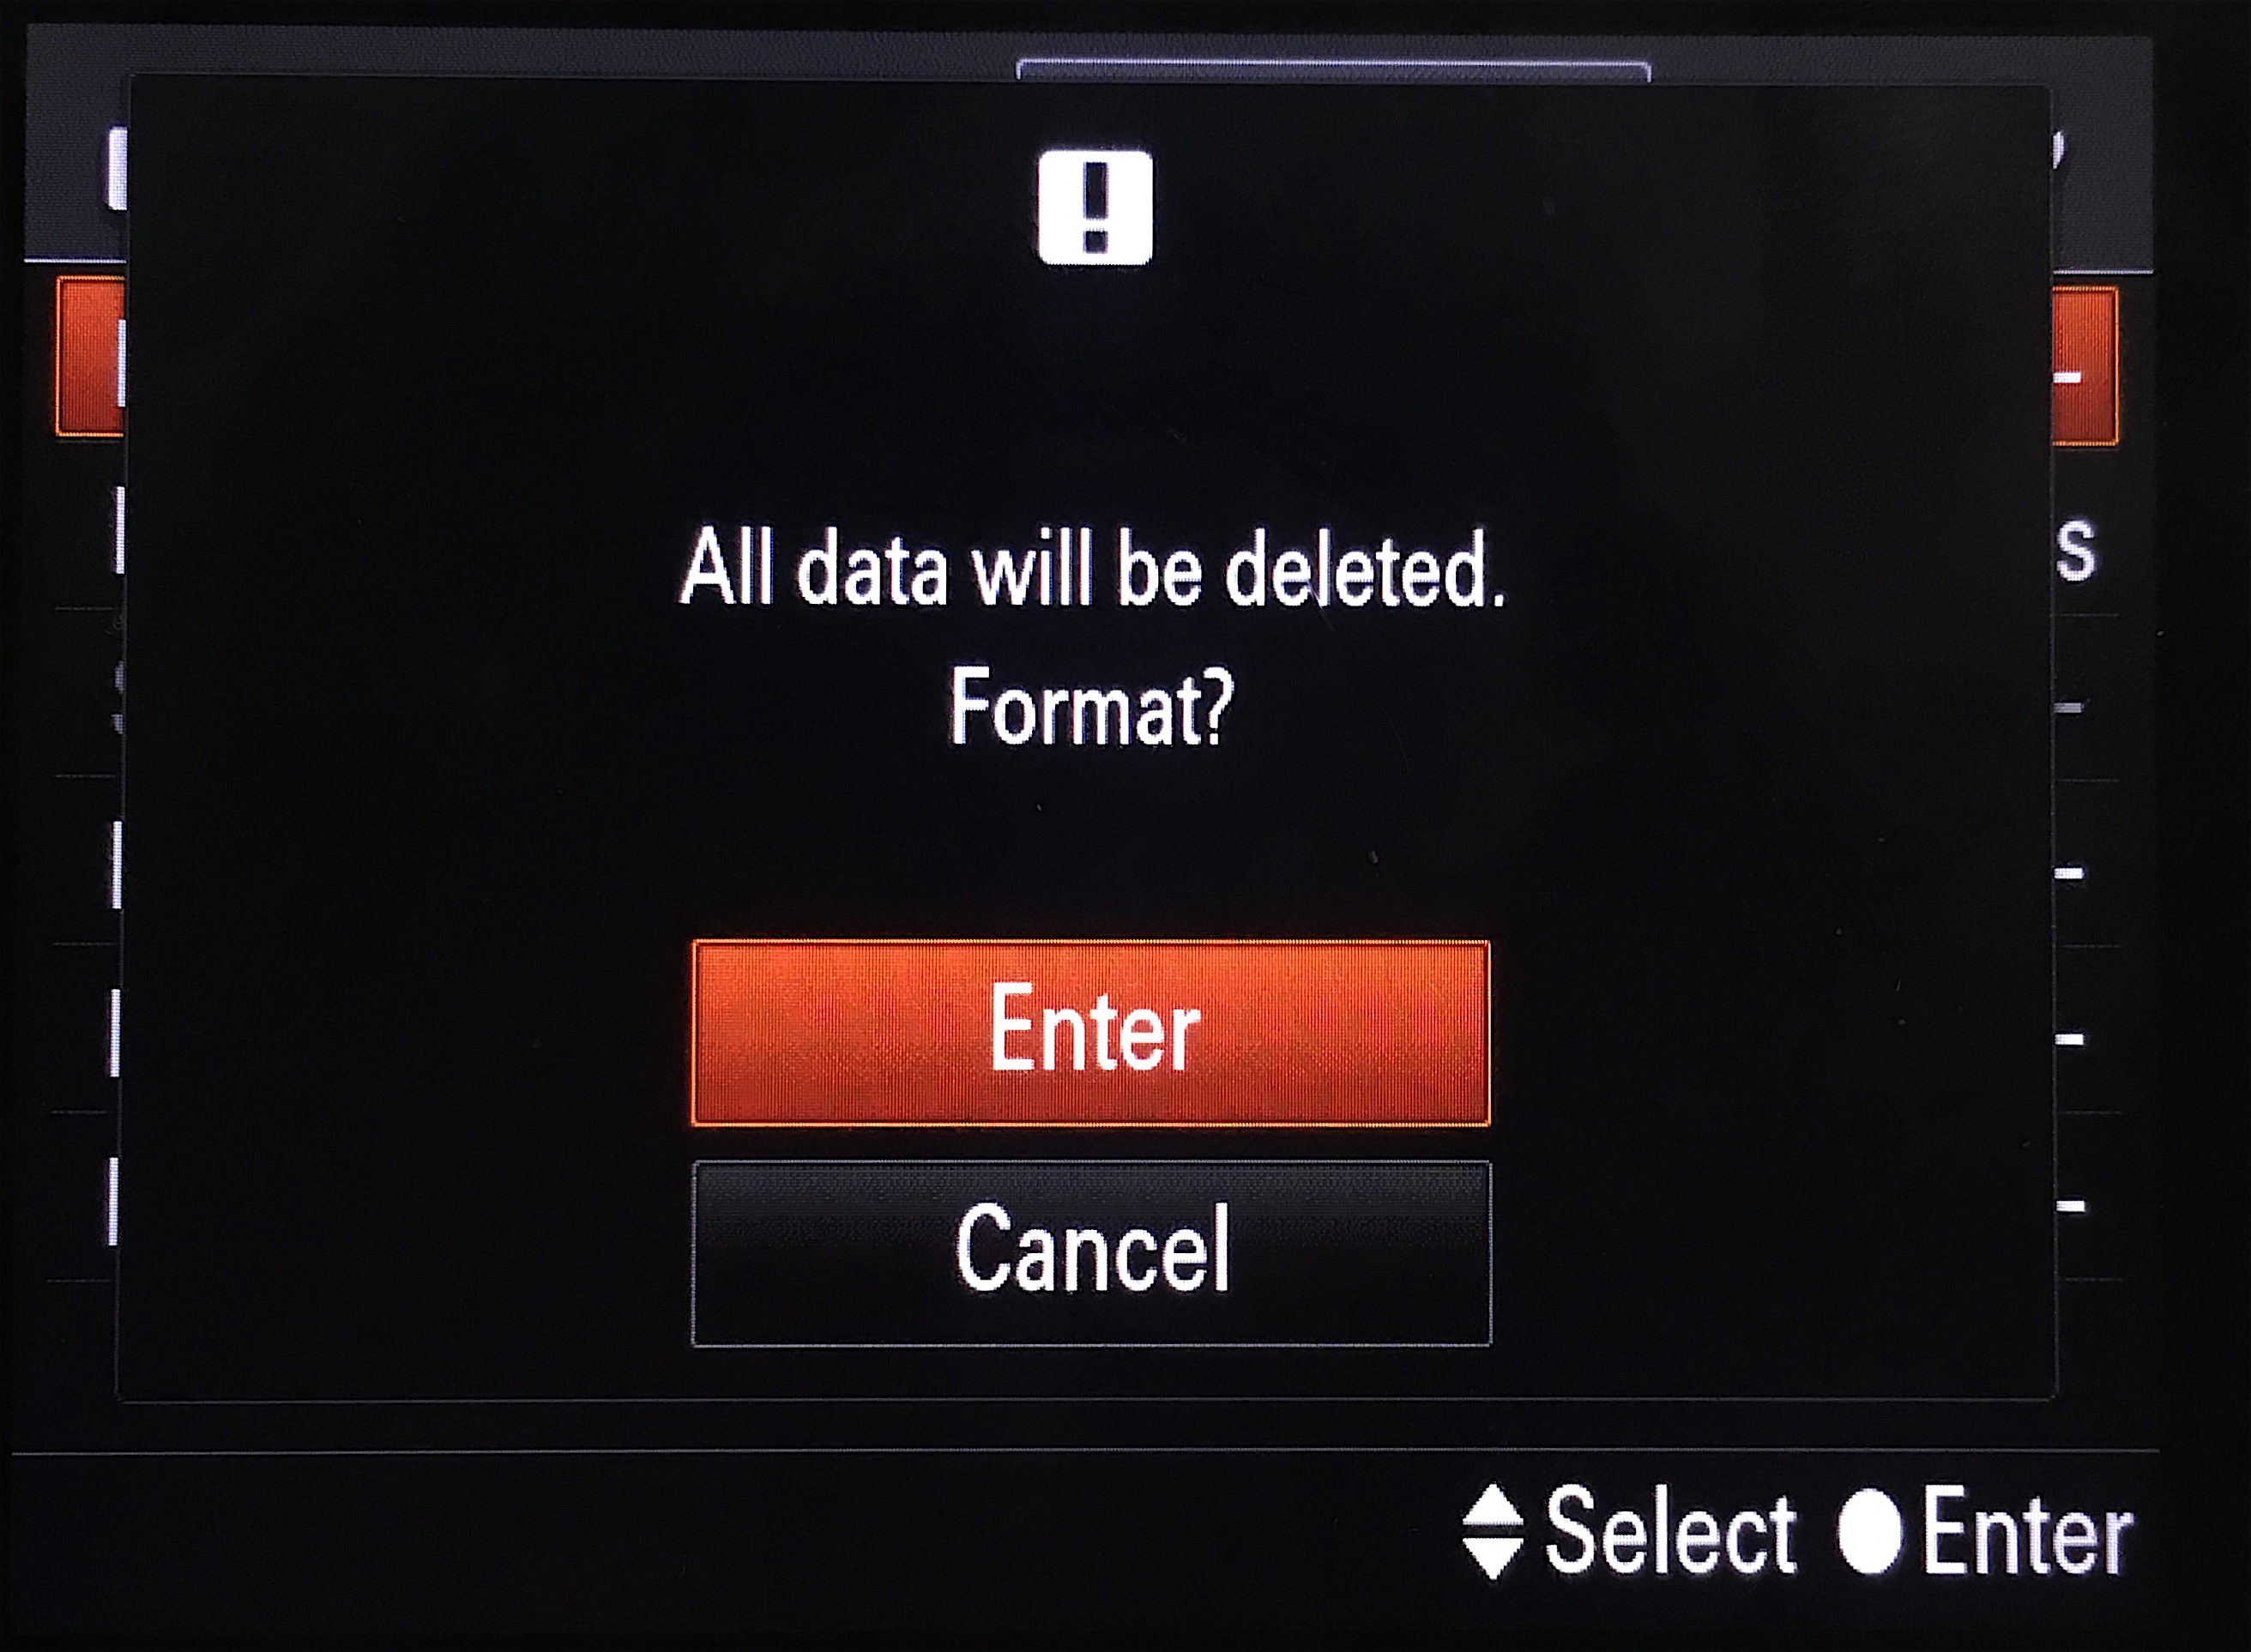
- Select ‘Format‘, and then ‘Enter‘. The data cannot be recovered once the SD card has been formatted.

Troubleshooting
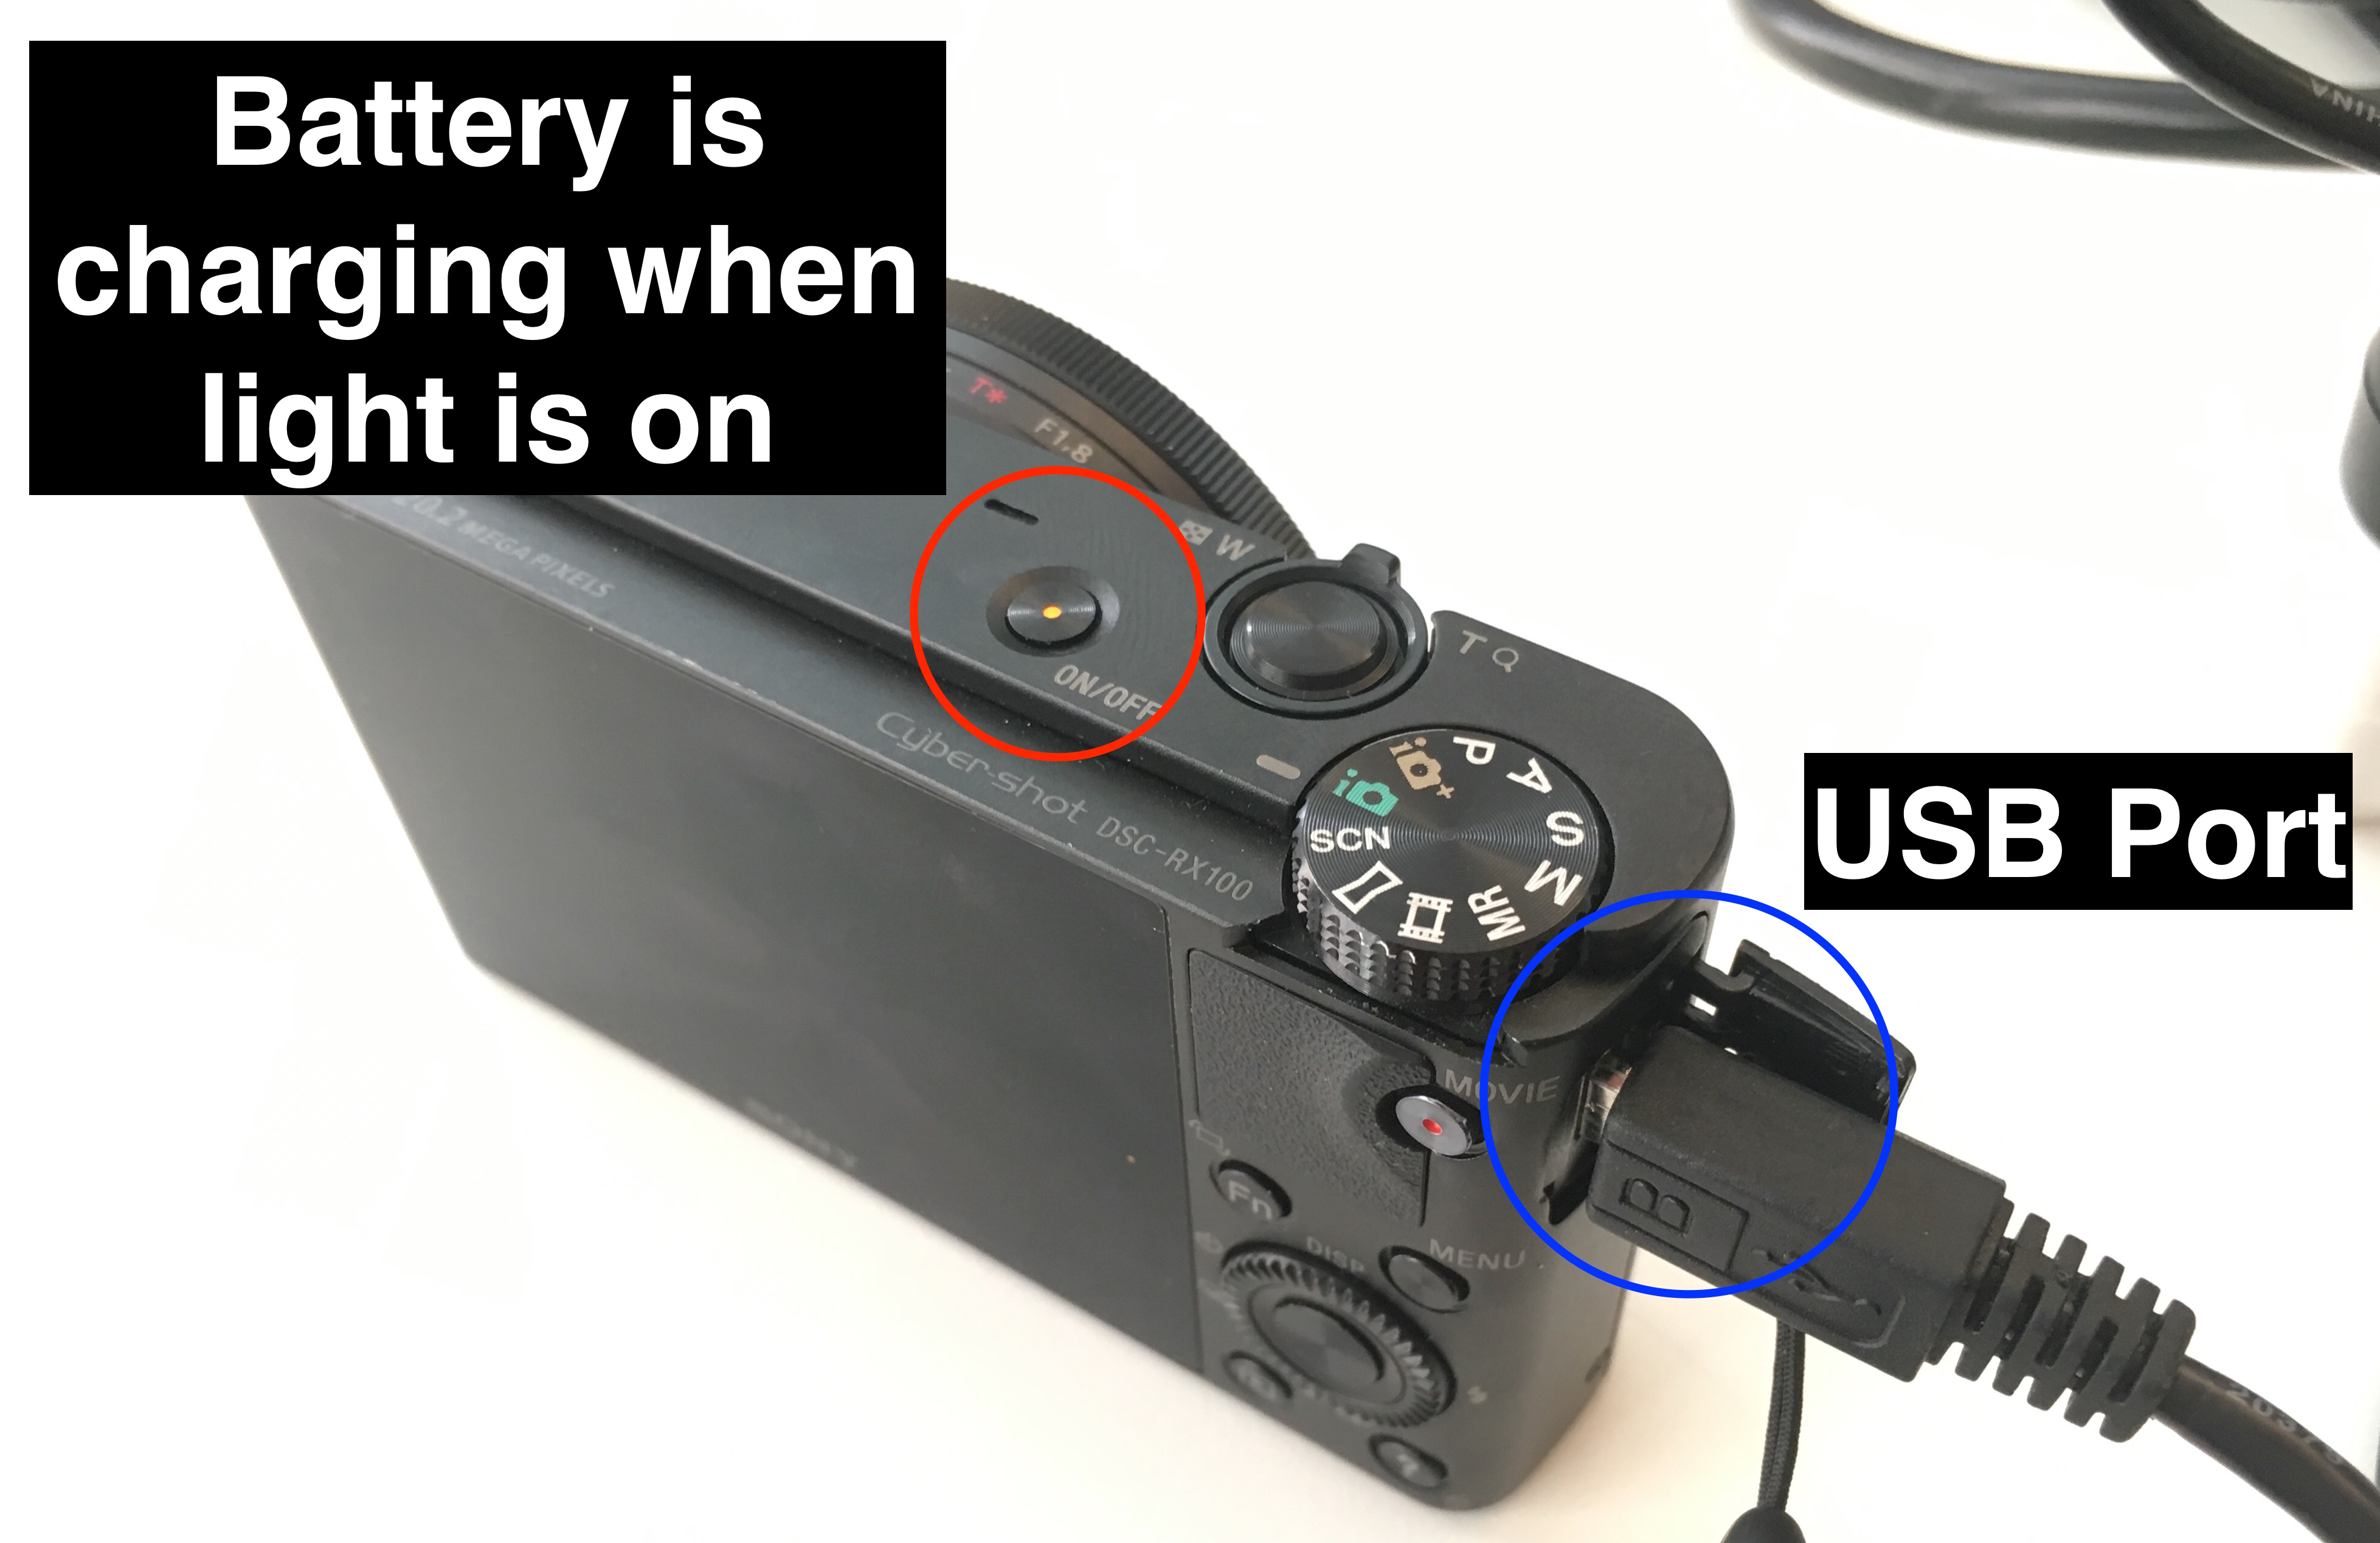
How to charge the batteries
As the library can issue each camera several times every day, we are unable to guarantee that batteries will be charged.
However, we do provide power supplies with each camera, so that the camera can be powered by the mains power, or the person using the equipment can charge the battery themselves.
Please follow these steps:
- Ensure the supplied battery is situated securely in the battery compartment
- Plug the micro USB cable end into the camera and connect this to the USB power supply and power socket, or a computer.
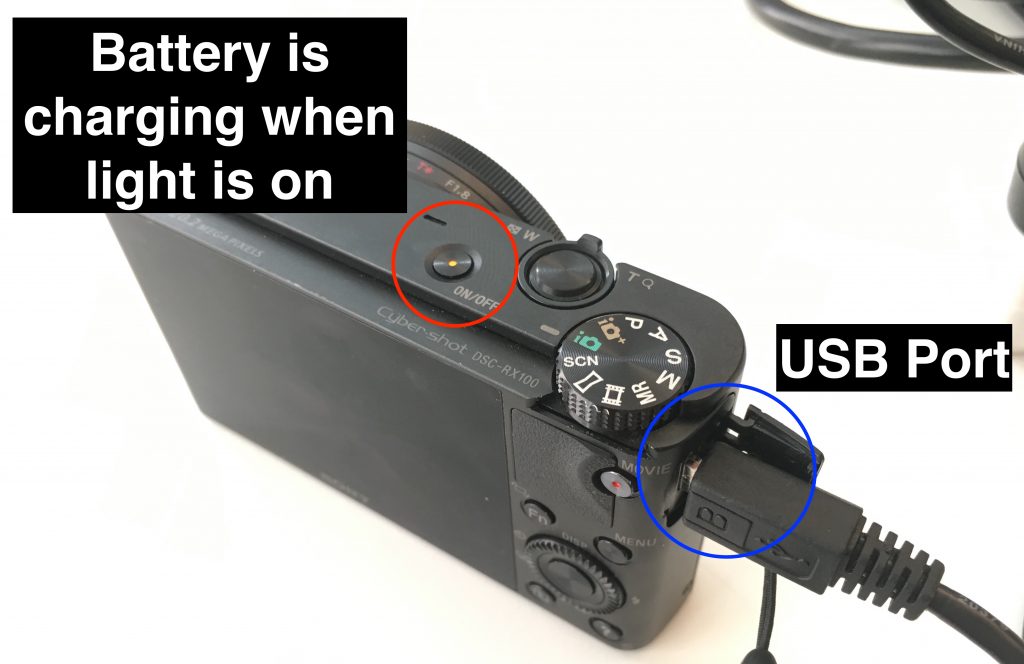
- The ON/OFF switch will be lit up whilst the camera charges. Once this is no longer on your battery has been fully recharged.
Camera keeps going out of focus
Sometimes autofocus can have trouble focusing on certain things. In this case it may be better to use manual focus. See the section on ‘Adjusting the focus‘ for changing to manual focus mode.