This article, the second in a series on post-production, introduces readers to DaVinci Resolve 17’s sound editing features. We will cover how to import audio media to your project, how to monitor and edit volume levels, how to add audio effects to tracks, and how to make use of DaVinci’s free sound library.
Step 1: Adding Audio to your Project
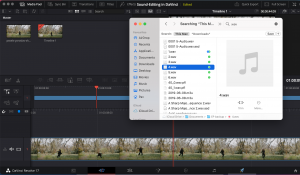
Adding audio to your media pool is done in the same way as adding visual media. Simply locate the audio you would like to use in your system folders, and drag them into DaVinci, as shown. In my case, I have an old song I’d like to use as a backing track for my showreel.
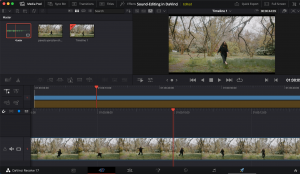
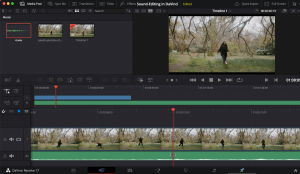
Once you have added audio to your media pool, placing it in your project timeline works in a similar way to adding visual media. Simply drag the audio clip into the smaller timeline (shown). Audio will appear in green, visual media in blue.
Step 2: Editing your Audio
As mentioned in the previous section of this series, DaVinci is divided into seven different workspaces, designed to aid you in different elements of your project. So far, all the editing we have done has been in the ‘Cut’ workspace. For audio-editing, we will be using the ‘Fairlight’ workspace, denoted by the musical notes symbol on the bottom task bar. Fairlight is DaVinci’s built-in DAW software, and is notable for its low-latency, which means that audio will remain clear and unbroken while you work with it.
![]()
Once you’ve navigated to Fairlight, you’ll see all the audio tracks in your timeline displayed at the bottom. In stereo files the audio will be split into an ‘Audio-L’ track and ‘Audio-R’ track, denoting separate left and right channels. For the most-part however, these channels are just treated as one track, and clicking on either one will select both of them.
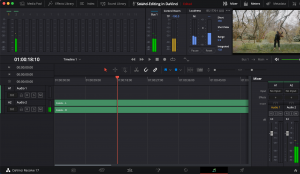
Dragging the red playback arrow across the audio track, you will be able to hear snippets of sound at specific points in your timeline. Audio for different tracks is represented at the top of the screen in the horizontal channel list. This tool is very useful if your video has multiple audio tracks playing concurrently, as you will be able to track where the audio overlaps. To the right, you can see ‘Bus’, ‘Control Room’ and ‘Loudness’ devices. Simply put, a Bus is a point in a signal flow where multiple channels are routed into the same output. In other words, all the audio from multiple tracks wills be routed into the Bus.

If we add more tracks to our timeline and play them at the same time, we will increase the overall volume as shown in the Bus. In the provided example, the overall volume has become too loud, and the Bus’s green bar has tipped over from yellow into red. When working with audio, you almost always want to avoid doing this, and should aim for your audio to remain mostly in the green, occasionally tipping into yellow at loud moments. Fortunately, DaVinci has an in-built compressor, ‘Loudness’, which will prevent the audio from getting too loud. This has a number of built-in pre-sets designed to industry standards, and it’s worth trying out a few and listening to the effect this has on your audio.

Step 3: Adding Audio Effects
Fairlight comes with a number of different effects which you can use for all kinds of purposes. Listing them here would be exhaustive, but DaVinci have developed tutorials of their own to demonstrate how to use them. For the sake of this tutorial, we will show you how to add an effect to a track and some simple steps in working with editing tools.
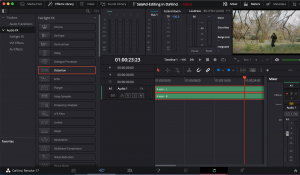
To begin, open the Effects Library on the top left of the workspace. This will display a list of effects on the left and a Mixer on the right-hand-side. The Mixer is a very useful tool, as it allows you to monitor the volume levels of all your channels and the keep track of their different effects at the same time.
To add an effect to a track, simply click on the effect you want to use and drag it to the ‘Effects’ box in the Mixer. Make sure you’re adding the effect to the right channel, in this example ‘Audio 1’.

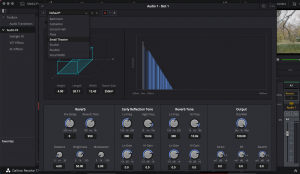
In my case, I’ve decided I want my audio track to have a bit of reverb. Dragging the effect over into the Effects box will immediately open the effect window, as shown. DaVinci’s Reverb comes with many different internal settings which will allow you to work with the effect very precisely, but there are also a number of pre-sets you can use. I’ve used ‘Small Theatre’, as I don’t want the reverb effect to become too overwhelming, and just want to add some ambience to the music.
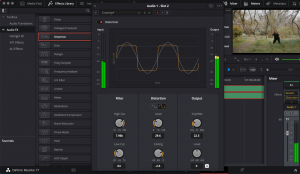
Once you’ve applied the effect, you’ll be able to hit it just by clicking play. If you want to add more effects to the same track, you can just drag them over to the Effects box, where they’ll appear together in a list. Note: sometimes the order of this list is important. For example, you might want to apply a de-humming effect before you apply EQ. For a full list of DaVinci audio effects and how to use them, take a look at DaVinci’s own video on how to use Fairlight, here: https://www.blackmagicdesign.com/uk/products/davinciresolve/training.
You can also add audio transitions to your tracks in a similar manner to video transitions. This can be useful to fade your sound in and out at the start and end of your showreel. To access transitions, click on ‘Audio Transitions’ to the left of the Effects Library. To add a specific transition, highlight the specified track, right-click the transition and click ‘Add to Selected Edit Points and Clips’.
Step 4: DaVinci’s free Sound Library
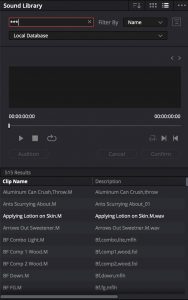
If you want audio to accompany your showreel, but you’re not sure what audio to use or whether you have the rights to use it, DaVinci have developed a Sound Library for precisely this purpose. To use it, click on ‘Sound Library’ at the top of the Fairlight workspace. To save space, it doesn’t come pre-installed with DaVinci, so you’ll have to download it separately from the DaVinci website by following their link, as shown.
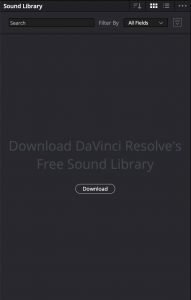
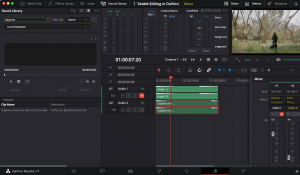
Once you’ve installed it, you may need to locate it within DaVinci in order for it to appear. To do this, click on the ellipses at the top right of the Sound Library tab and click ‘Add Library…’ to locate the files in your system folders. Once you’ve installed it, you can browse through all the sounds by typing ‘***’ in the search field. I’ve located a daytime ambient sound which I think might go with this clip, so I’ve dragged it over to my timeline. Lowering the volume and adding a minor echo effect draws it back from the location, making it seem more like natural background noise.
The DaVinci sound library is very useful, but you may want more sounds than it offers. There are a number of resources available online for this purpose. We have some recommended sites listed here: https://avsupport.trinitylaban.ac.uk/kb/help/free-music-and-video-resources-to-use-when-creating-content/
Review
Let’s see how our clip looks with two sounds applied to it: a musical track and an ambient background noise.
