![]() This content is related to the Faculty of Dance
This content is related to the Faculty of Dance
The Nikon DSLR camera is a more advanced stills camera that is great for taking high quality photographs with a lot of control over setting up your image, and can even be used to record short movies.
Setting up the camera
For stills photography it’s usually a good idea to use a tripod, to enable you to capture the sharpest and clearest quality image. Ensure the tripod clip is secured tightly to the bottom of the camera, and is firmly in place on your tripod.
Make sure an SD card is inserted into the camera.
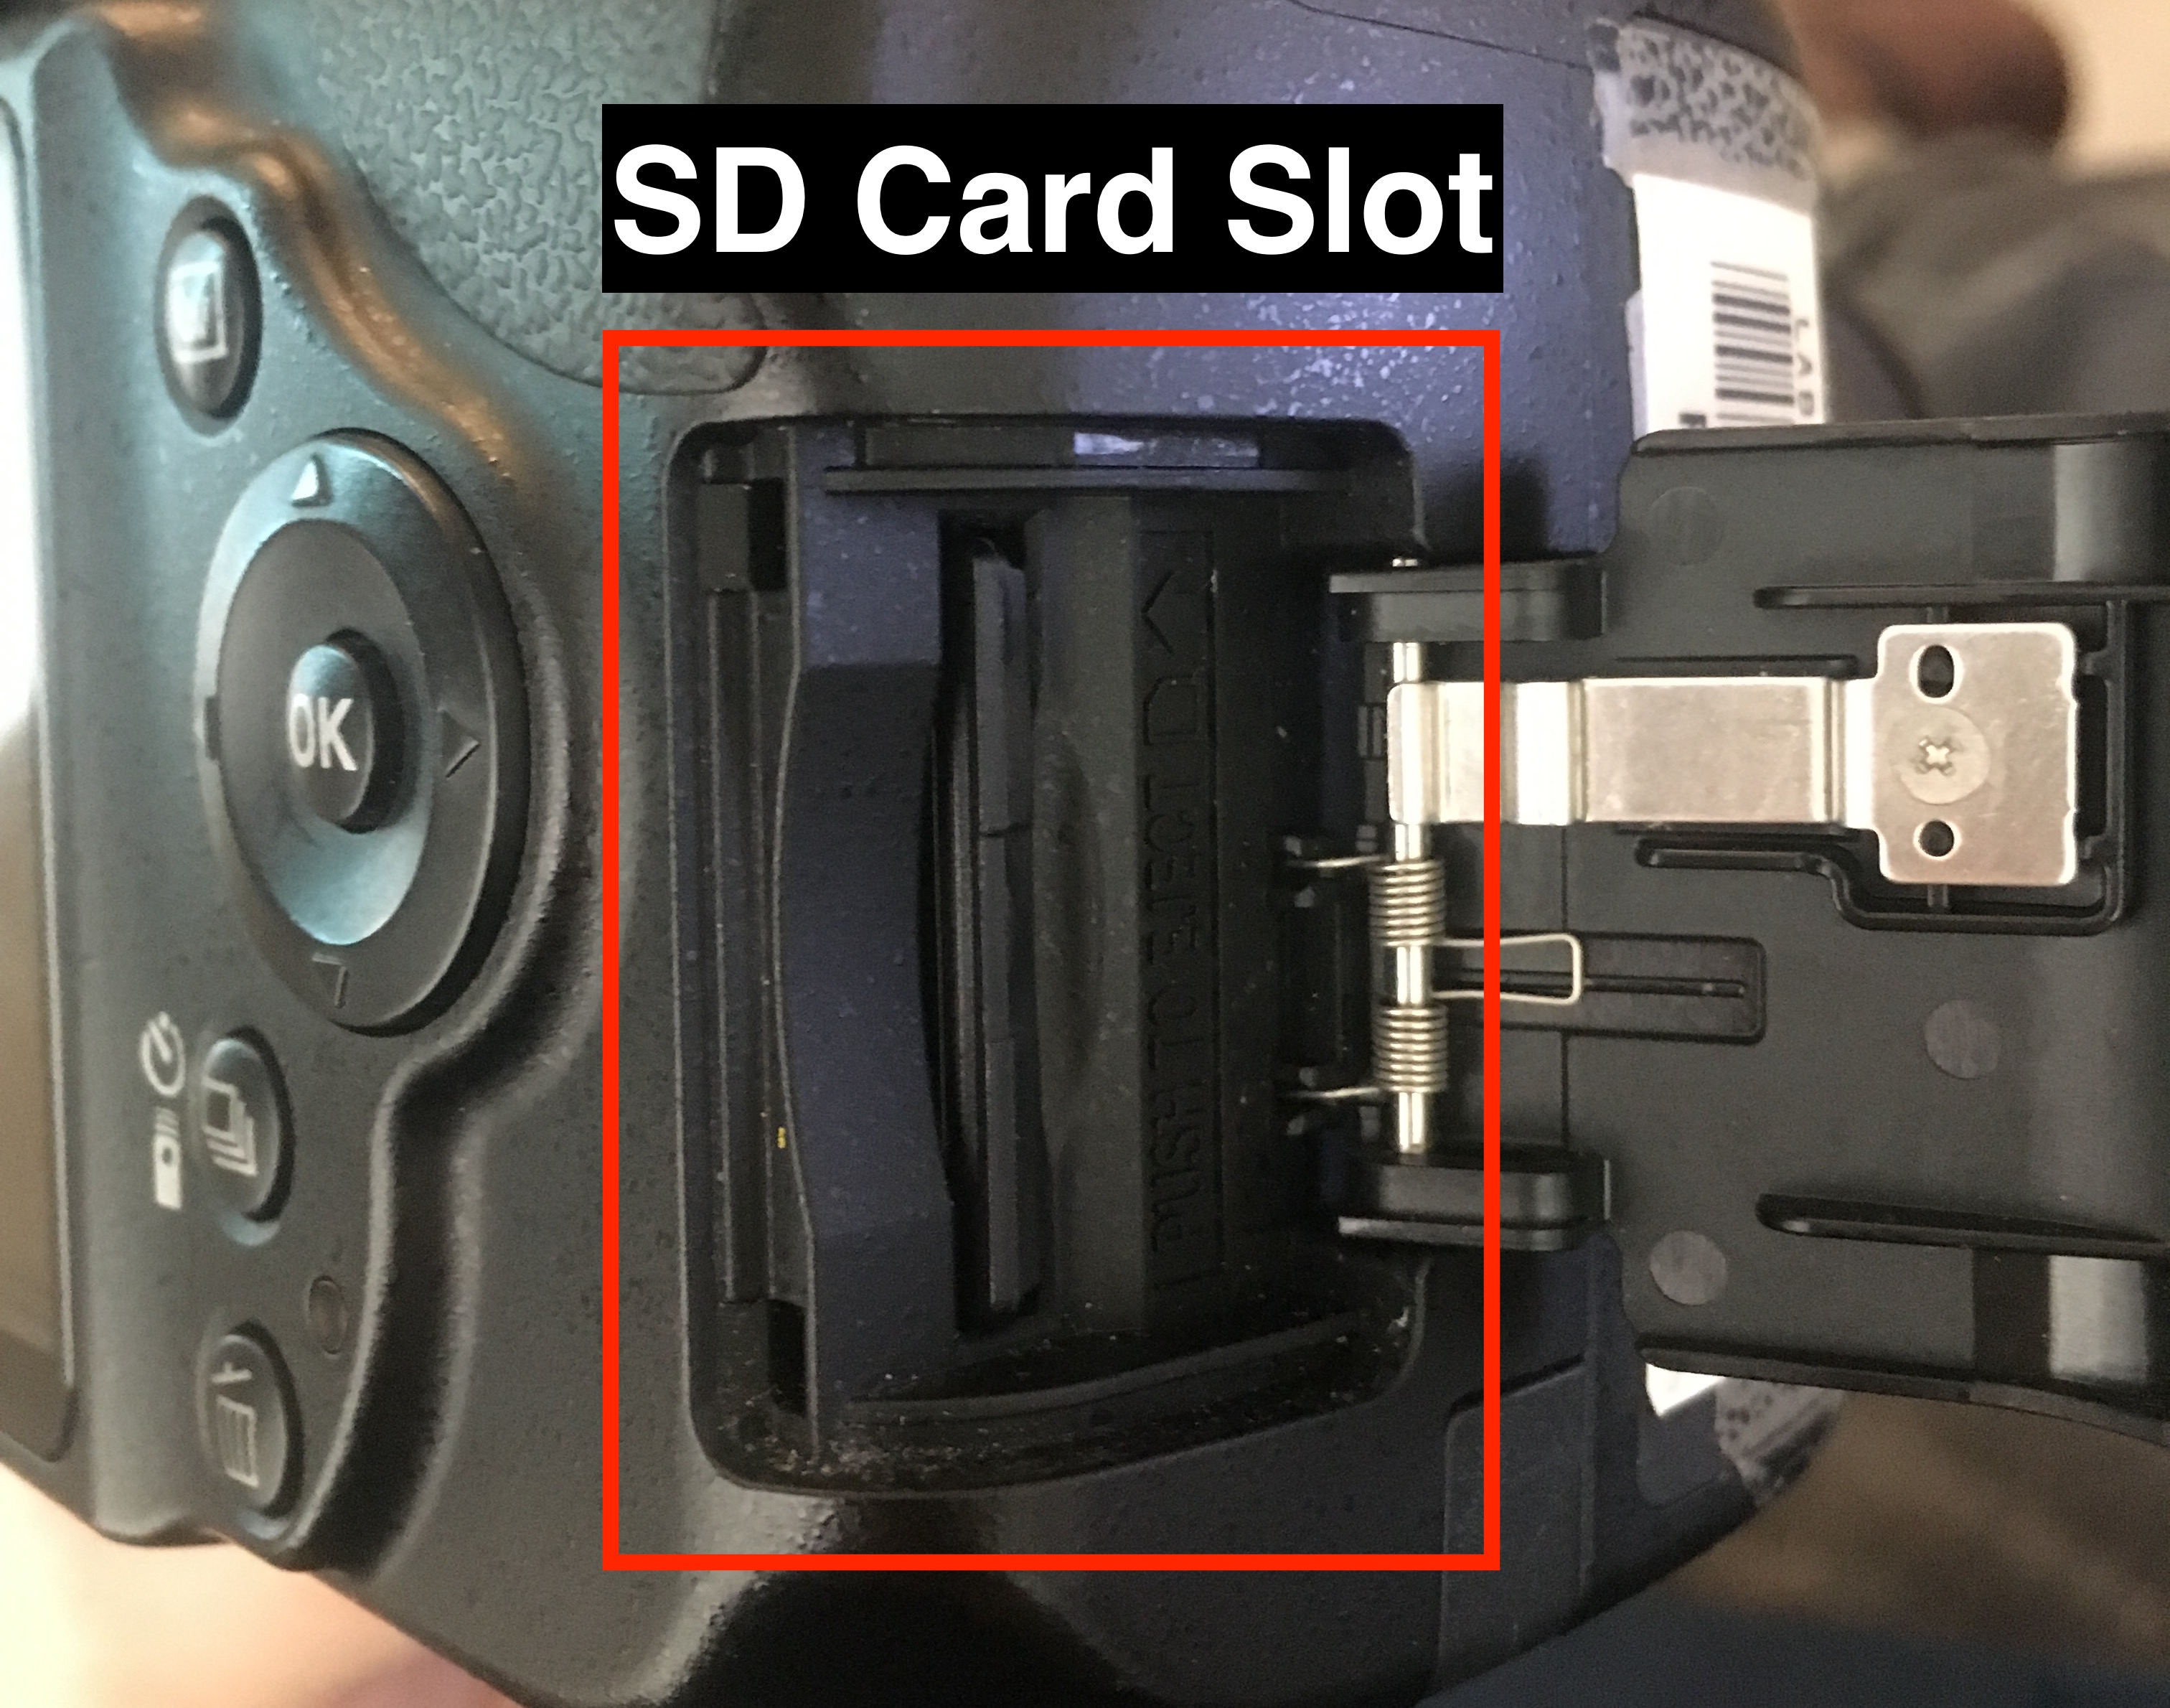
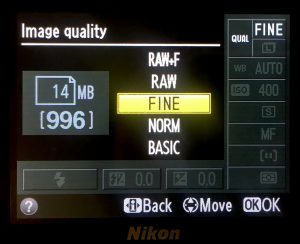
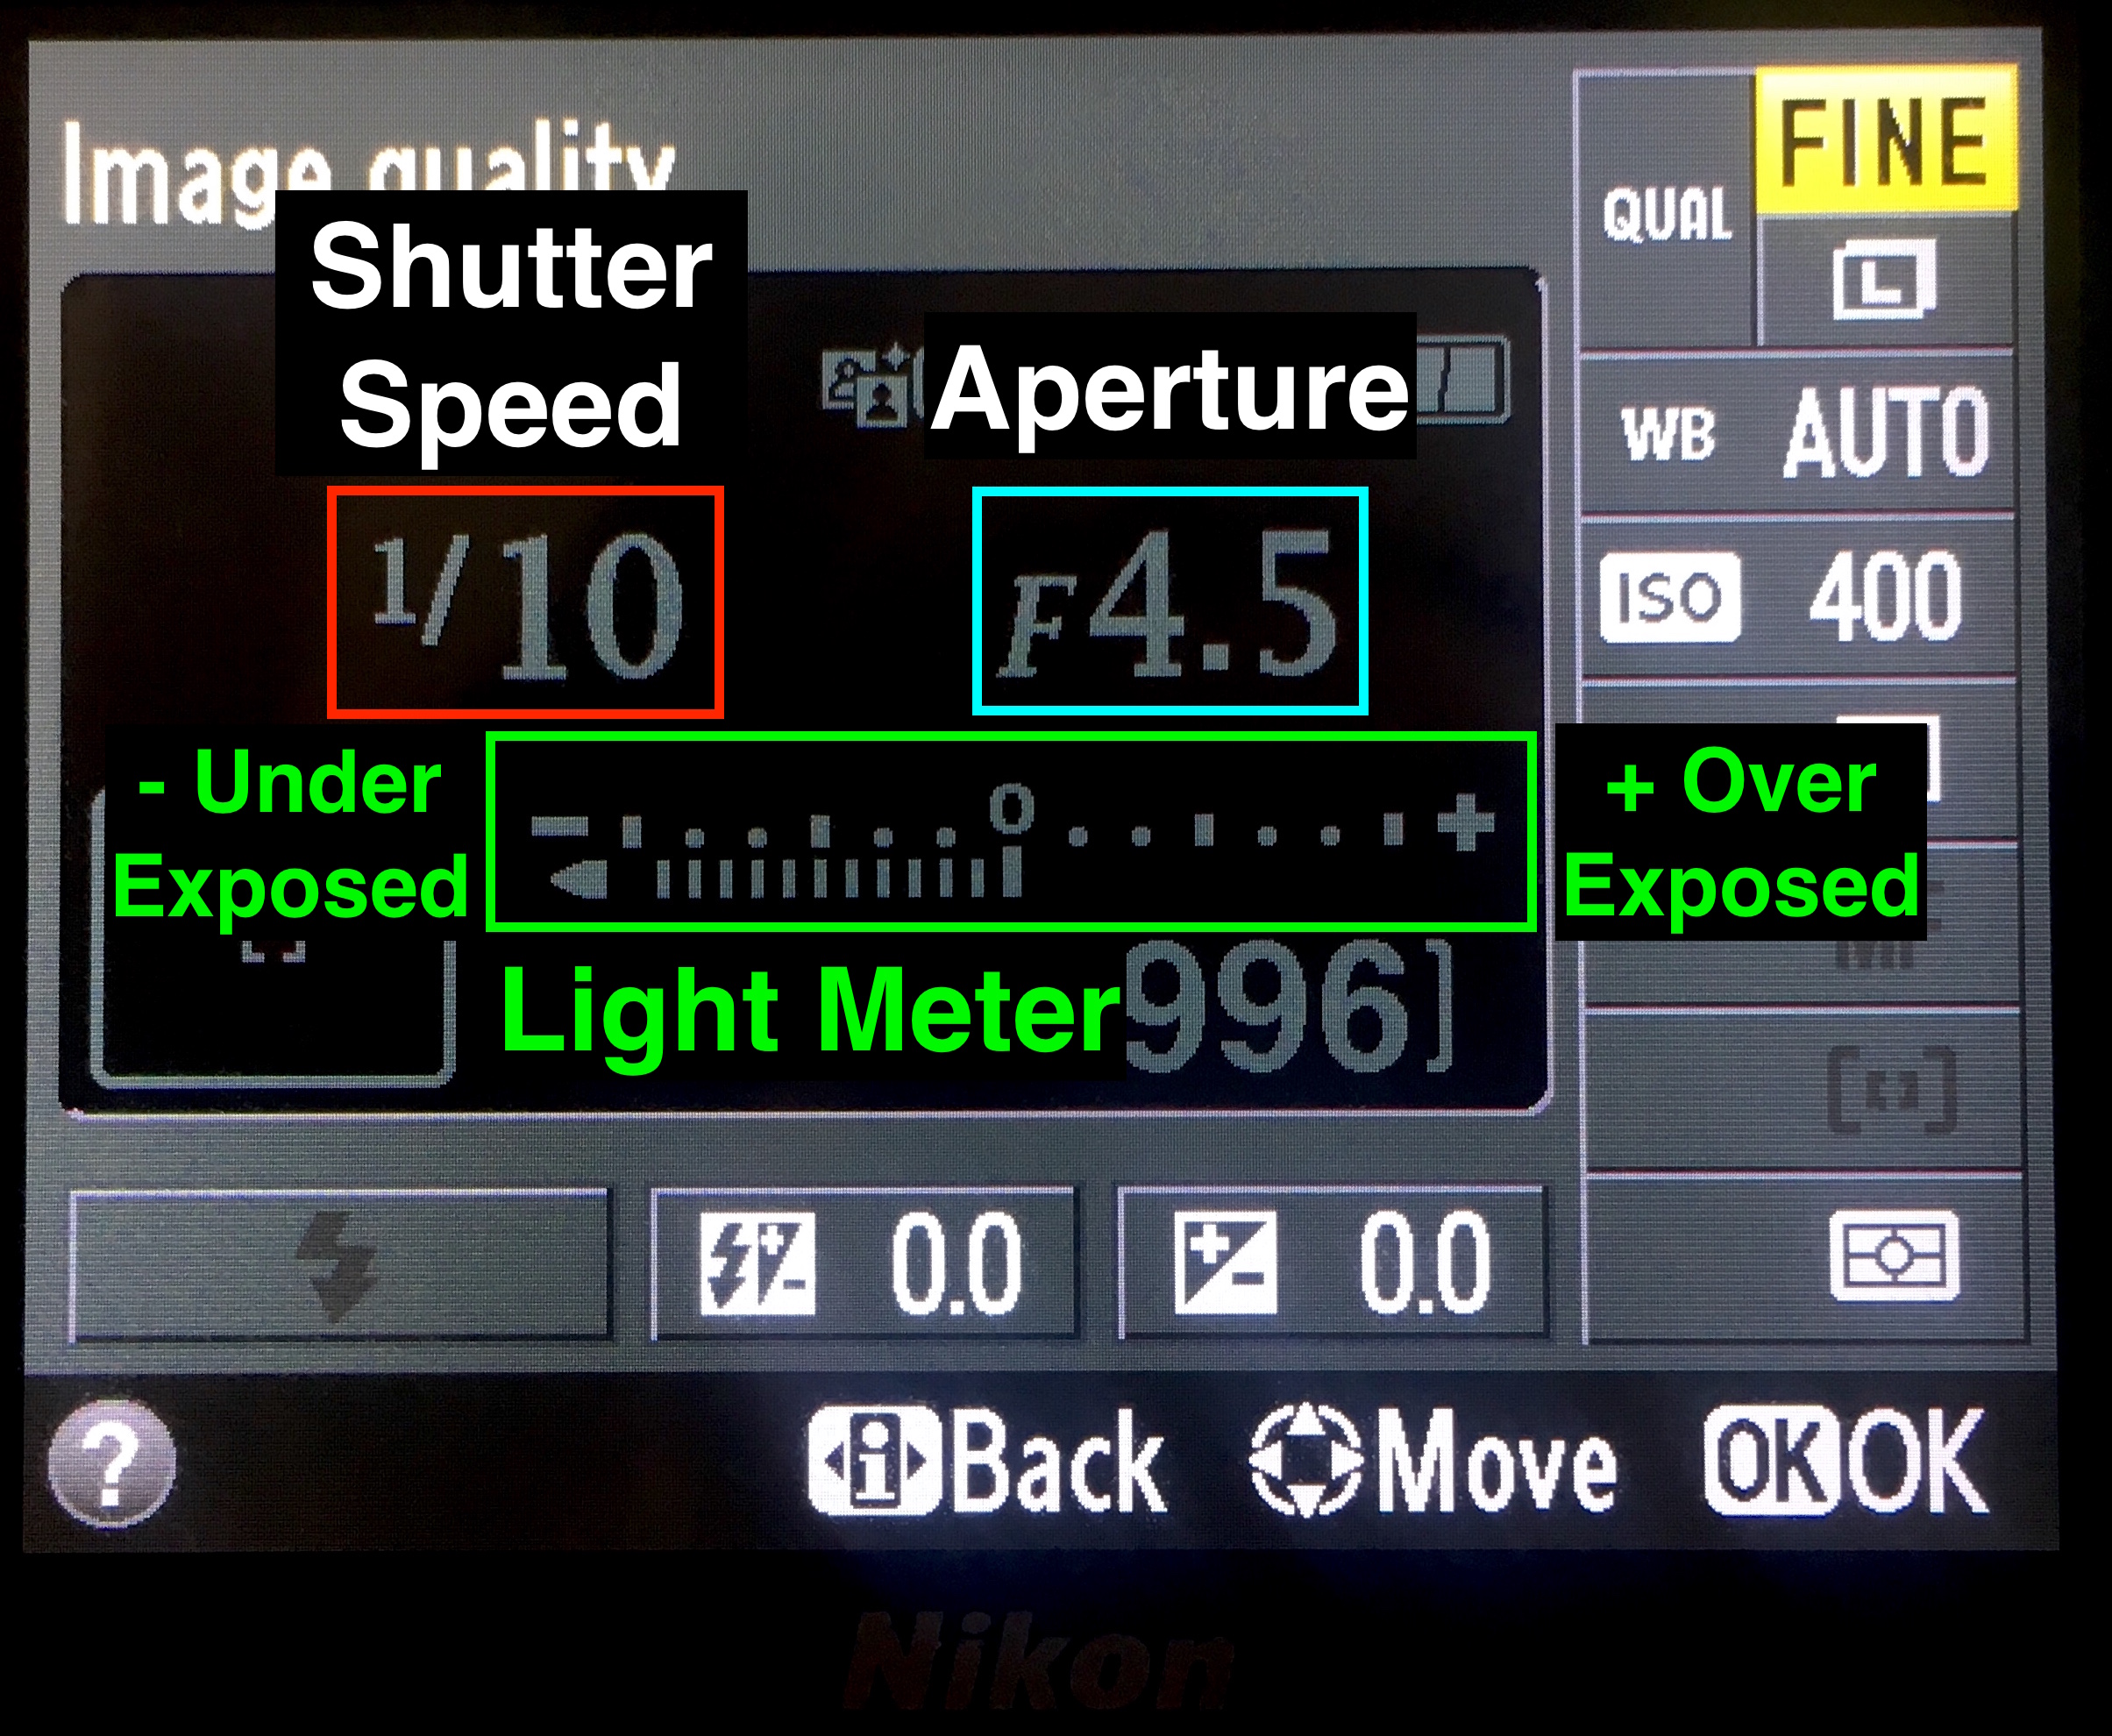
Image Quality
The Nikon DSLR offers a few quality settings, primarily RAW and JPEG. RAW is an unprocessed format that saves a range of data that can be useful for non-destructive editing. JPEG is a compressed and processed format, and so some quality is lost in exchange for smaller file size. To change the quality settings follow these steps:
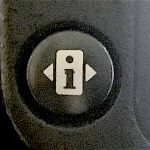
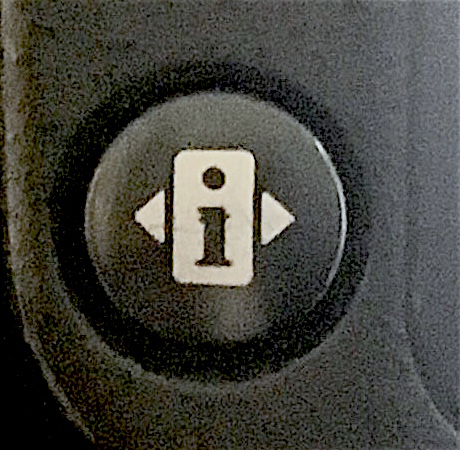
- Press the ‘< i >’ button on the bottom left side of the back of the camera to navigate the display screen.
- Use the arrow keys to select the ‘Image quality‘ setting beside QUAL at the top right of the display screen.
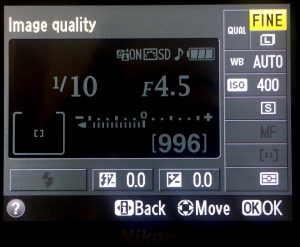
- Select between RAW+F, RAW and FINE, NORM, BASIC (Jpeg)
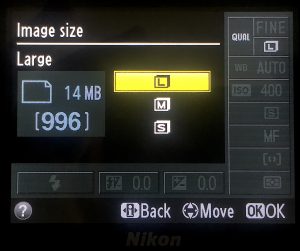
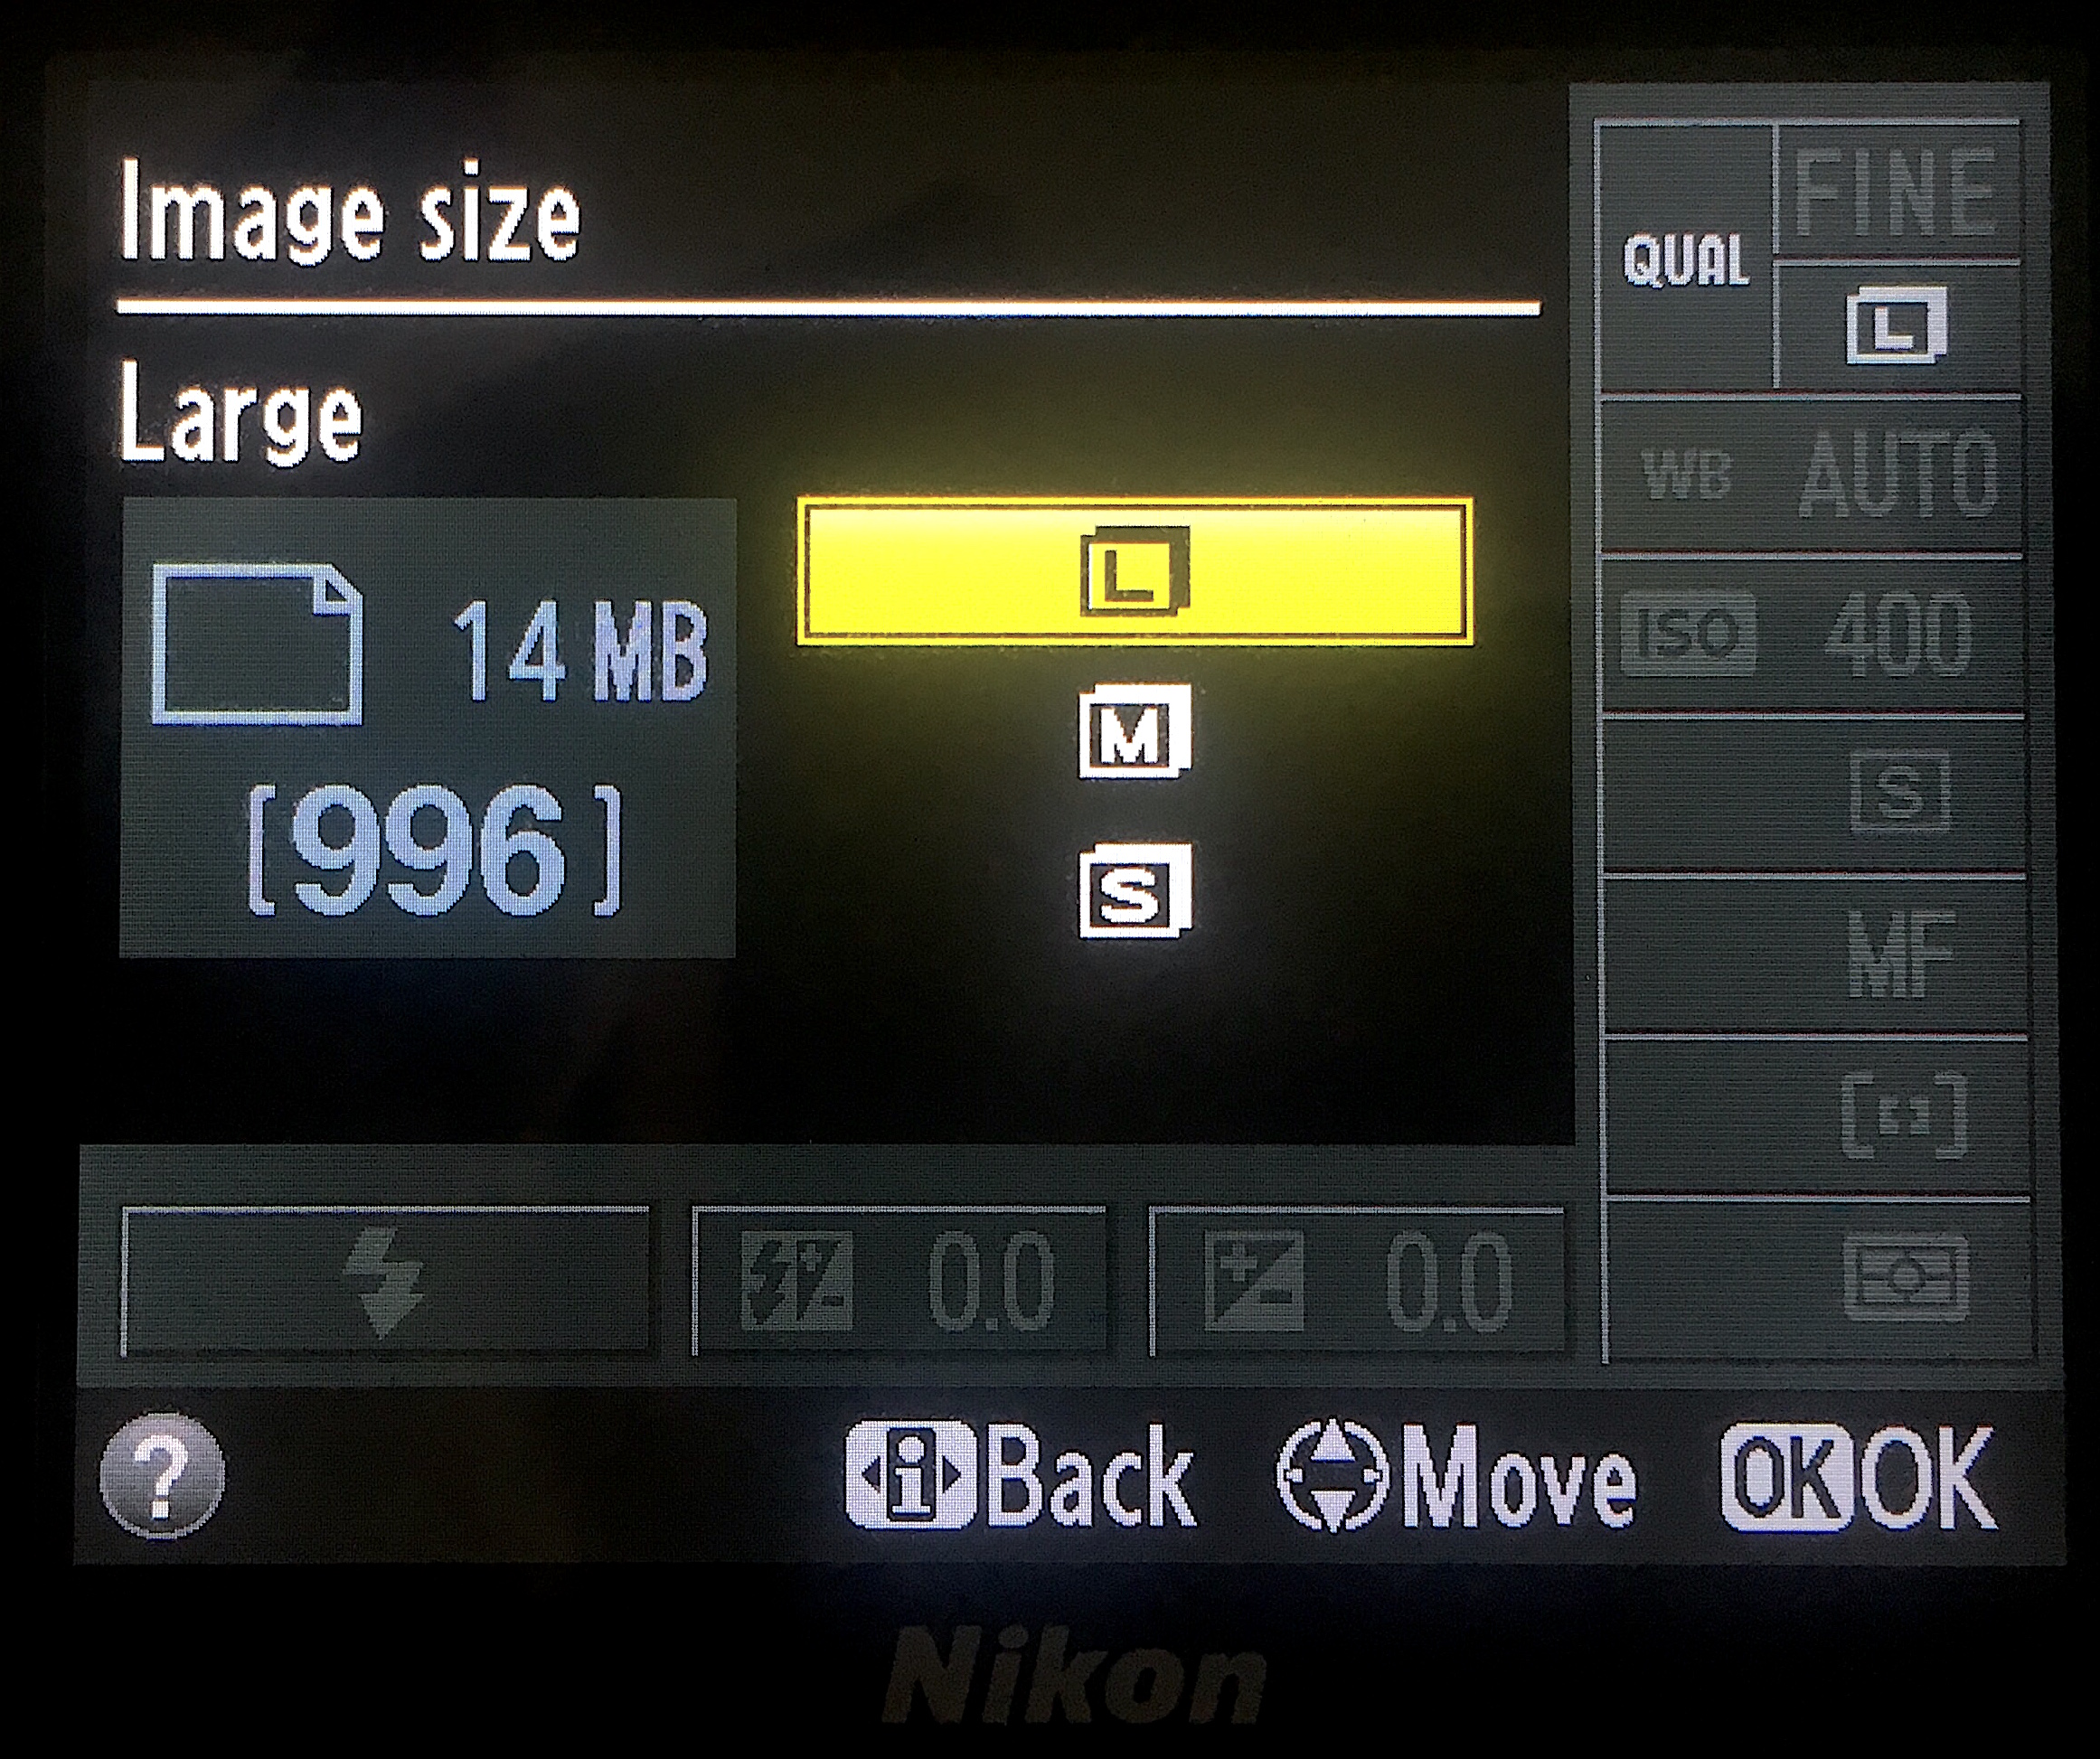
- If shooting in JPEG you can select how large you want your images below the image quality setting:
- Push the ‘< i >‘ button again to return to the previous screen.


Shooting Modes
This camera offers a range of shooting modes. You will either be shooting in AUTO mode if you want the camera to automatically try and choose the best settings for you, or M(anual) mode, where you have full control over the exposure settings. Use the dial at the top right of the camera to select your shooting mode.

If you want more information about the shooting modes, switch to a mode then press the help (?) button on your camera, for an overview of the selected mode.

Setting up your shot
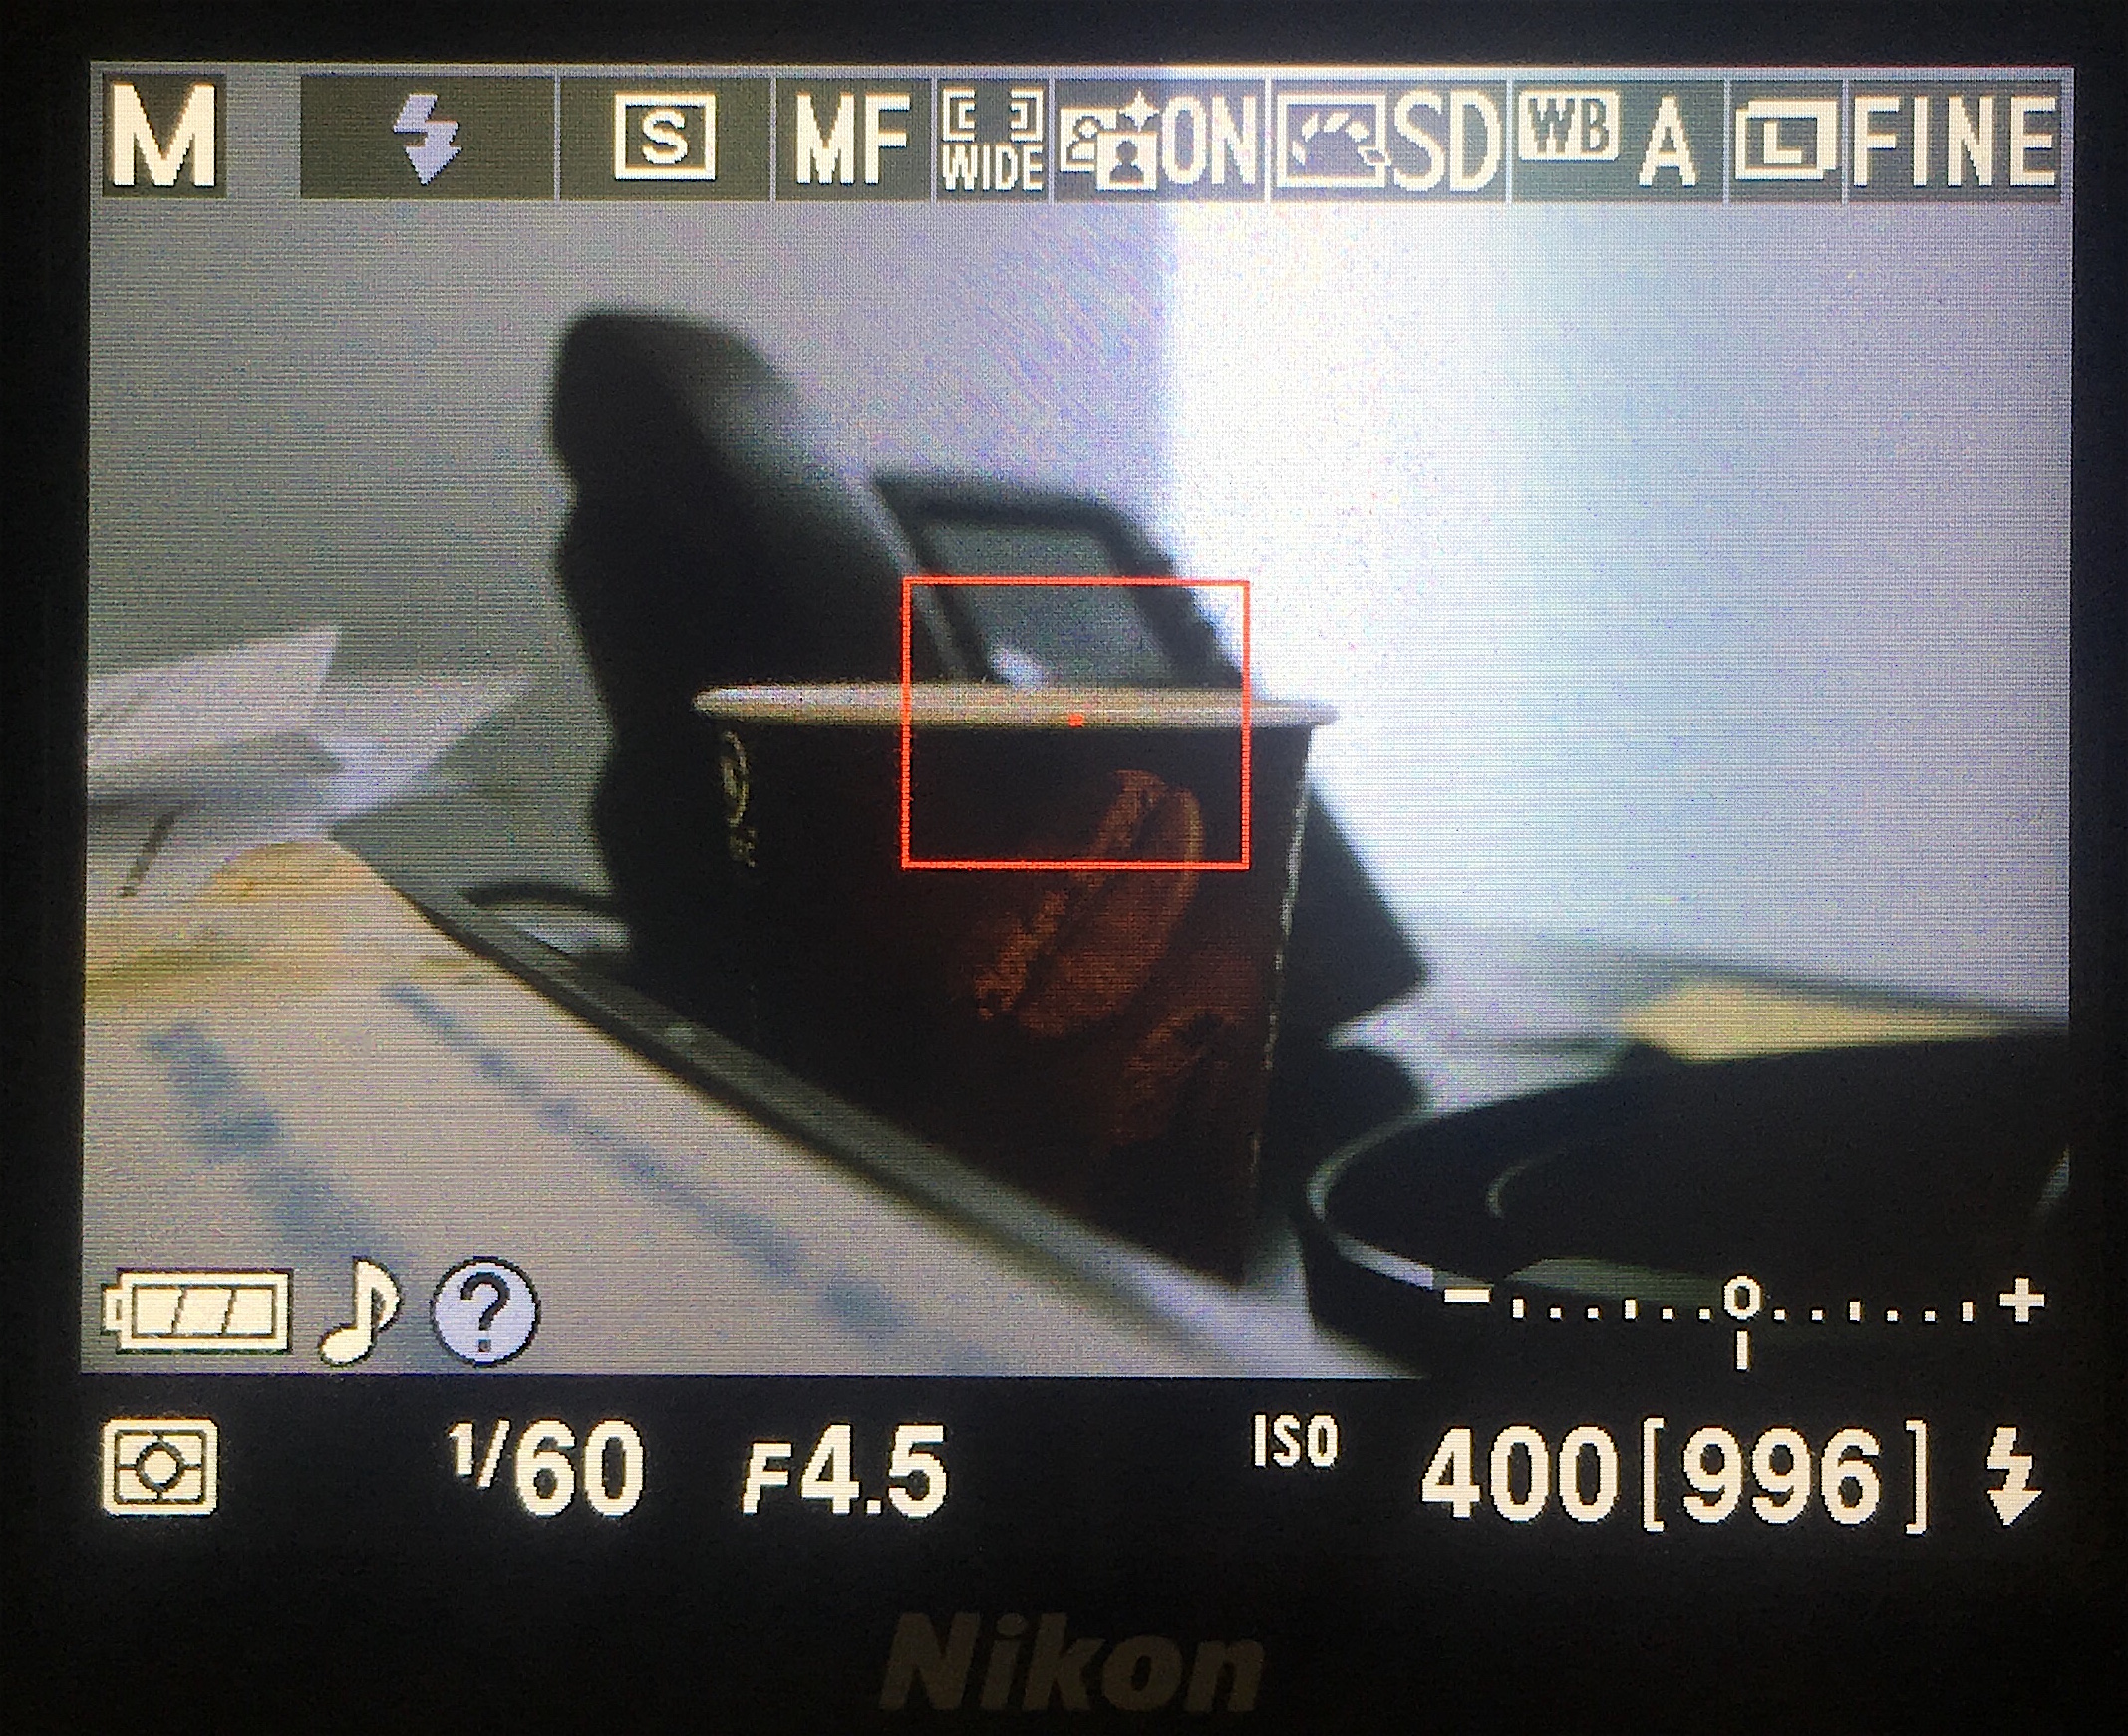
Getting the perfect exposure
The settings to keep in mind when shooting still photographs are the ‘aperture’ and ‘shutter speed’, the goal is to adjust these to get the best exposure depending on your shooting conditions.
Aperture affects how much light is let through the lens and also affects the depth of field of your shot.
- A low aperture lets the most amount of light in and has a narrow depth of field, meaning usually only what you’ve focused on will be clear, and the rest will be out of focus.
- A high aperture lets in less light, but gives you a sharper overall image, with more things in focus. A high and low aperture can be useful creatively, but is also important for getting the right exposure in low light and bright conditions.
Shutter speed is simply how long your cameras sensor is exposed to your shot.
- A fast shutter speed is ideal for very bright conditions, as there is less time for the light to be picked up by the sensor, it is also ideal for handheld and unsteady shots.
- A long shutter speed is good for low light conditions, but as a result will pick up very small movements which will blur your image, it’s necessary to use a tripod in these conditions, or adjusting your aperture to allow more light. This can be used creatively if you want your image to represent movement, rather than have everything still in place.
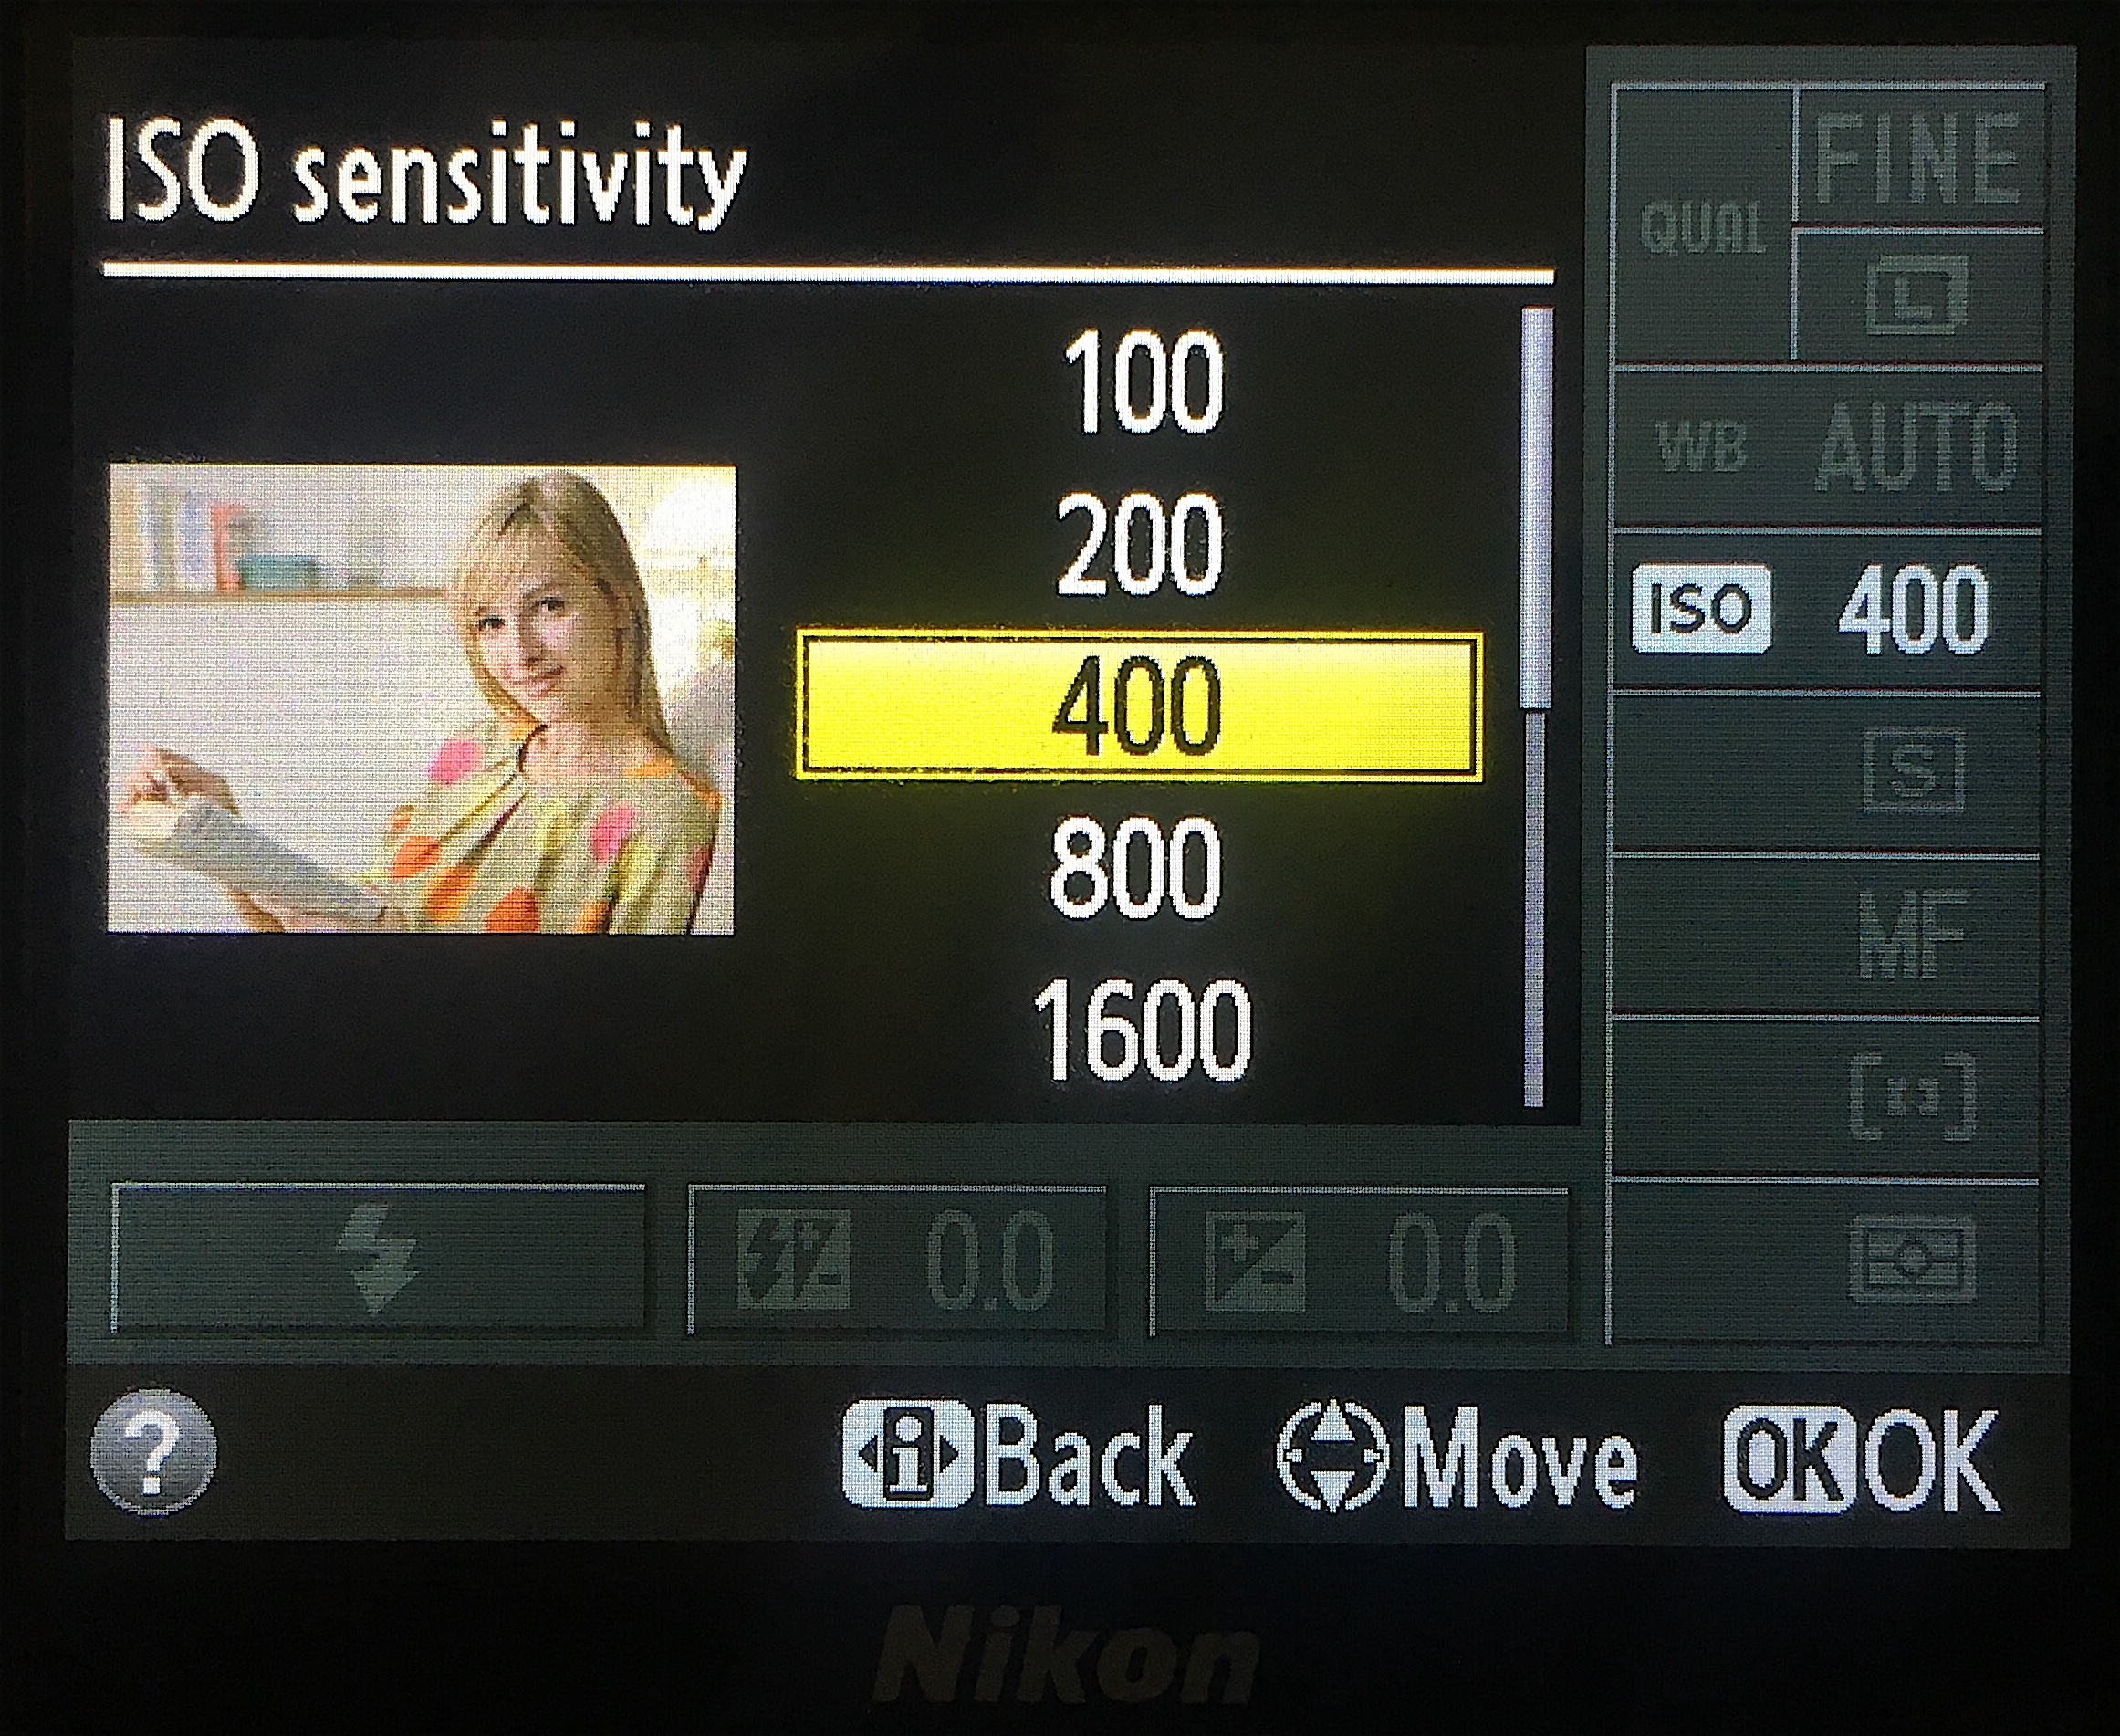
ISO is another option that can help you get the perfect exposure for your shot. ISO affects your cameras sensor sensitivity, and can range from as little as 100 all the way up to 6400. As with the aperture and shutter speed, there are trade offs to choosing the right setting, and the trick to mastering photography is finding the right balance between these settings depending on your lighting conditions or subject.
- A lower ISO setting means your sensor will be less sensitive to light, but will capture the clearest quality image.
- A higher ISO setting will mean the sensor can capture a lot more light, even in very low light conditions, however your image will have a lot of noise and grain which could degrade your image quality.
An ISO between 400 to 800 is usually ideal for images shot within the daytime, and offers you ample space for adjusting the other exposure settings before quality is affected. You can adjust your ISO from the cameras ‘< i >‘ menu.
Taking the shot
- Before taking photos, rotate the zoom ring to extend the lens. To do this, hold the button on the zoom ring while twisting clockwise.
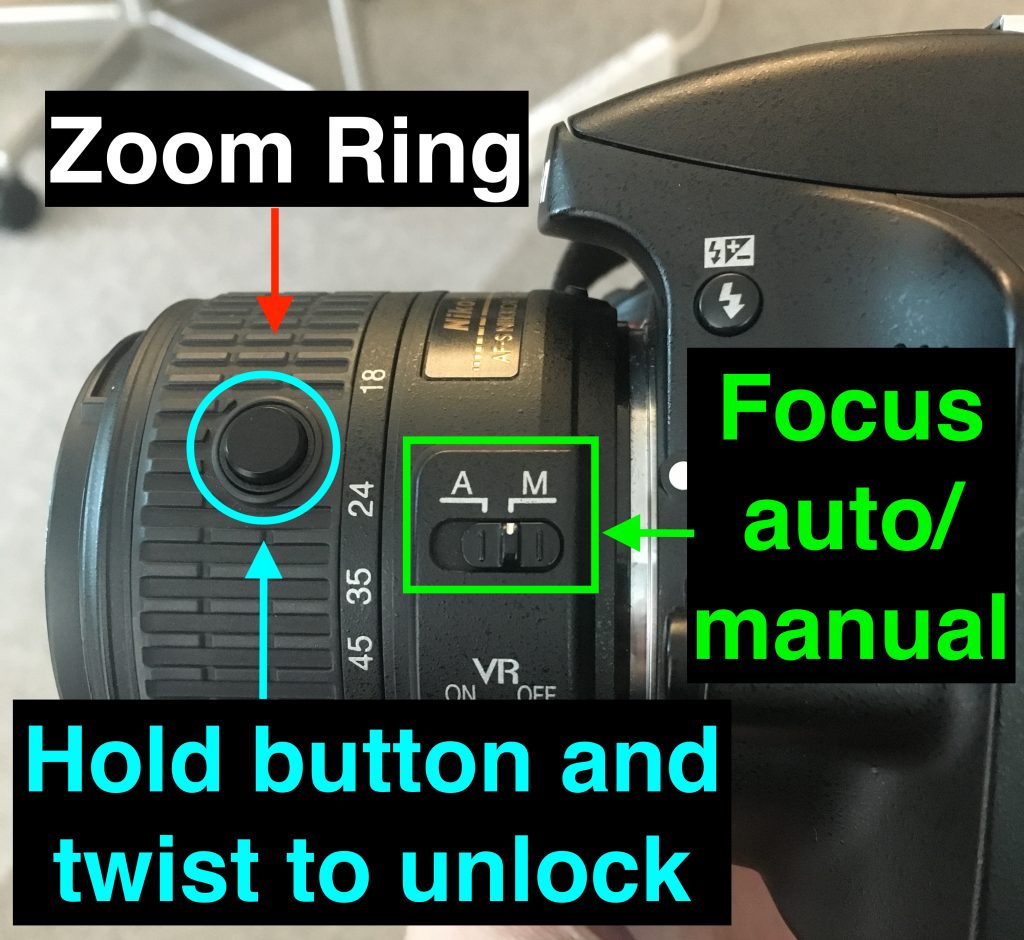
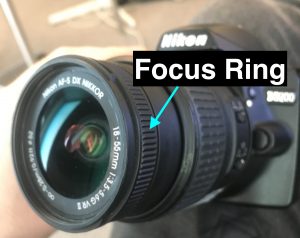
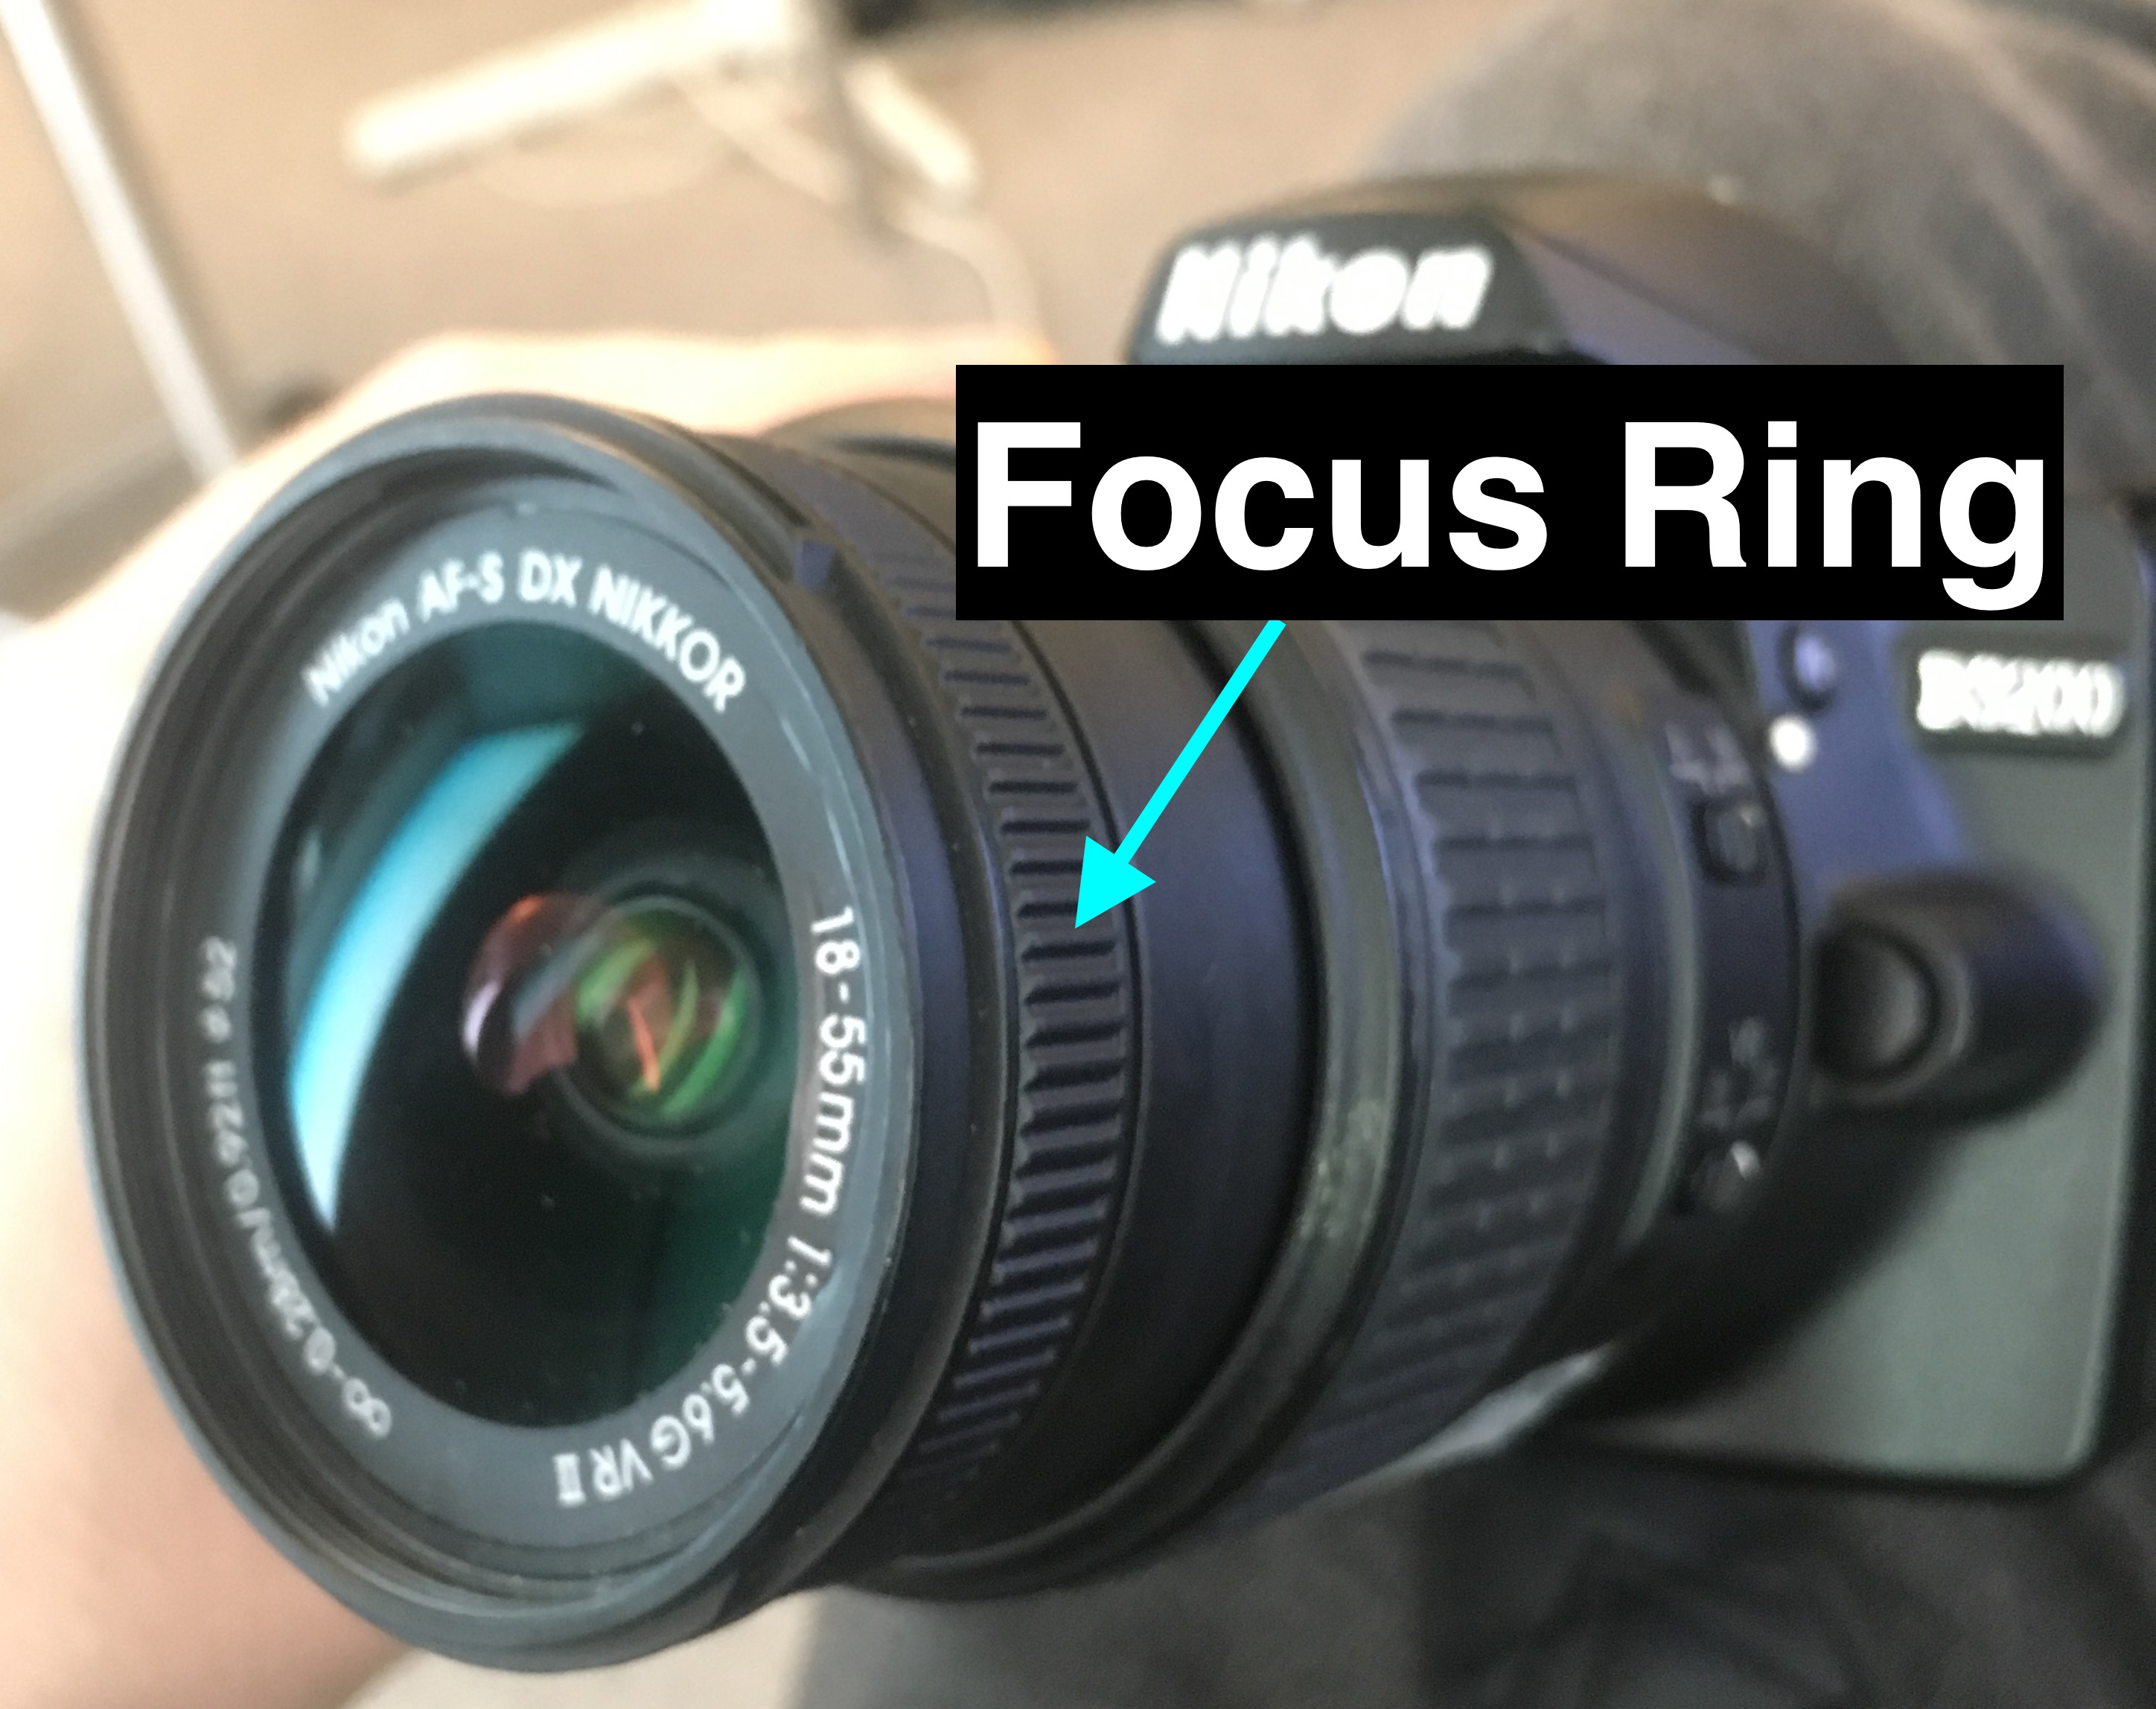
- Make sure your subject is in focus, if using manual focus, adjust the focus ring on the camera lens until your subject is clear.
- Use the command dial at top right on the back of the camera to adjust your shutter speed.

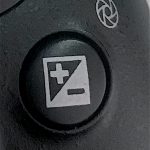
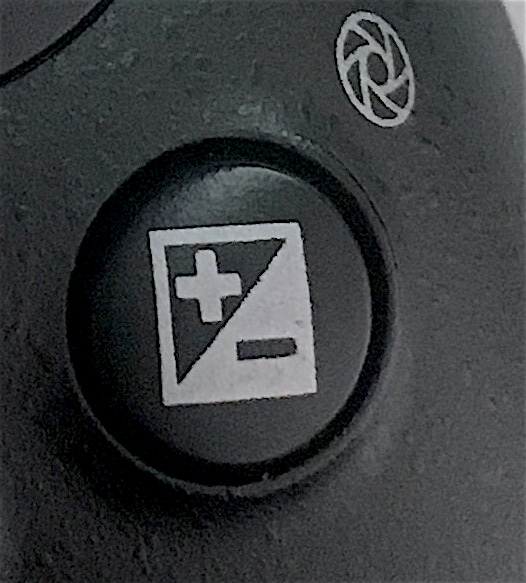
- Hold the ‘+/-‘ button on the top of the camera whilst adjusting the command dial at the back of the camera to change your aperture setting.
- Use the techniques outlined above if shooting in manual to adjust your exposure until the light meter in the viewfinder or screen gives you a balanced reading.

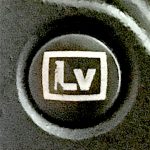
- You can push the ‘Lv‘ button on the back of the camera to get a live view of your shot, you can then use of the magnifying glass buttons on the left of the camera to zoom the display in or out. This zoom will not affect the picture taken, but allows you to zoom to a point on the display in order to more easily focus on fine points.

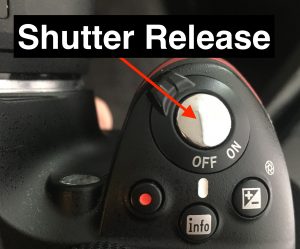
- Push the shutter release button on the inside of the OFF/ON ring switch to capture your image. If using a long shutter speed, make sure you do not move the camera whilst it captures the image.
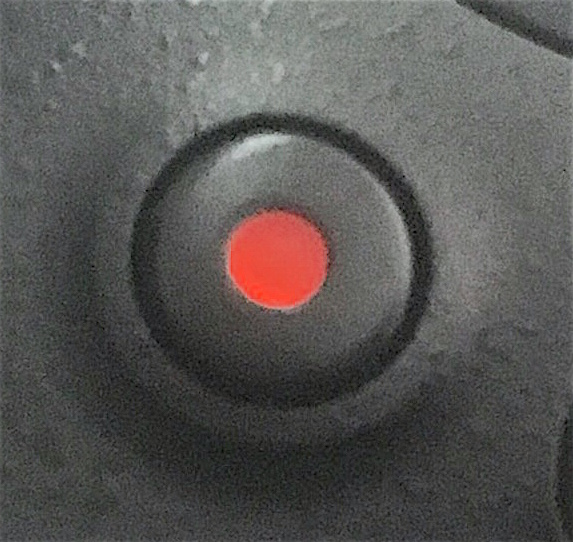
- If you want to record a movie instead, push the ‘Lv‘ button to switch to the live view, and push the red record button below the shutter button at the top of the camera. Push this button again to stop recording.

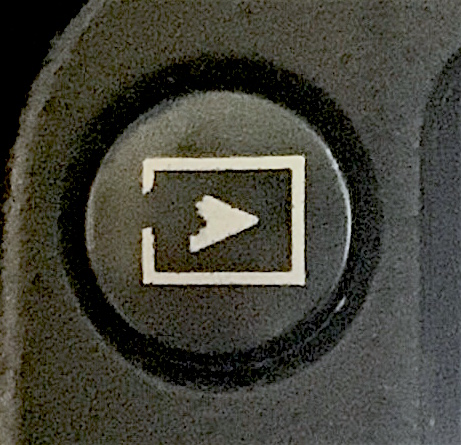
- To view your shot footage, push the preview button at the top left on the back of the camera.


Please refer to the documentation at the end of this article to find the instruction manuals for your camera if you need further help.
Transferring your files to a computer
- Remove the SD card from your camera and insert it into your computers SD card reader.
- If using a Mac, open Finder, you can find your SD card under ‘Devices’ on the sidebar, open the ‘DCIM’ folder. Your video files should be in a numeric folder where you can transfer them to your computer.

- If using a Windows computer, open File Explorer, click on ‘This PC’ in the sidebar, from here find your SD card and follow the same steps as above to locate the ‘DCIM’ folder and video files.
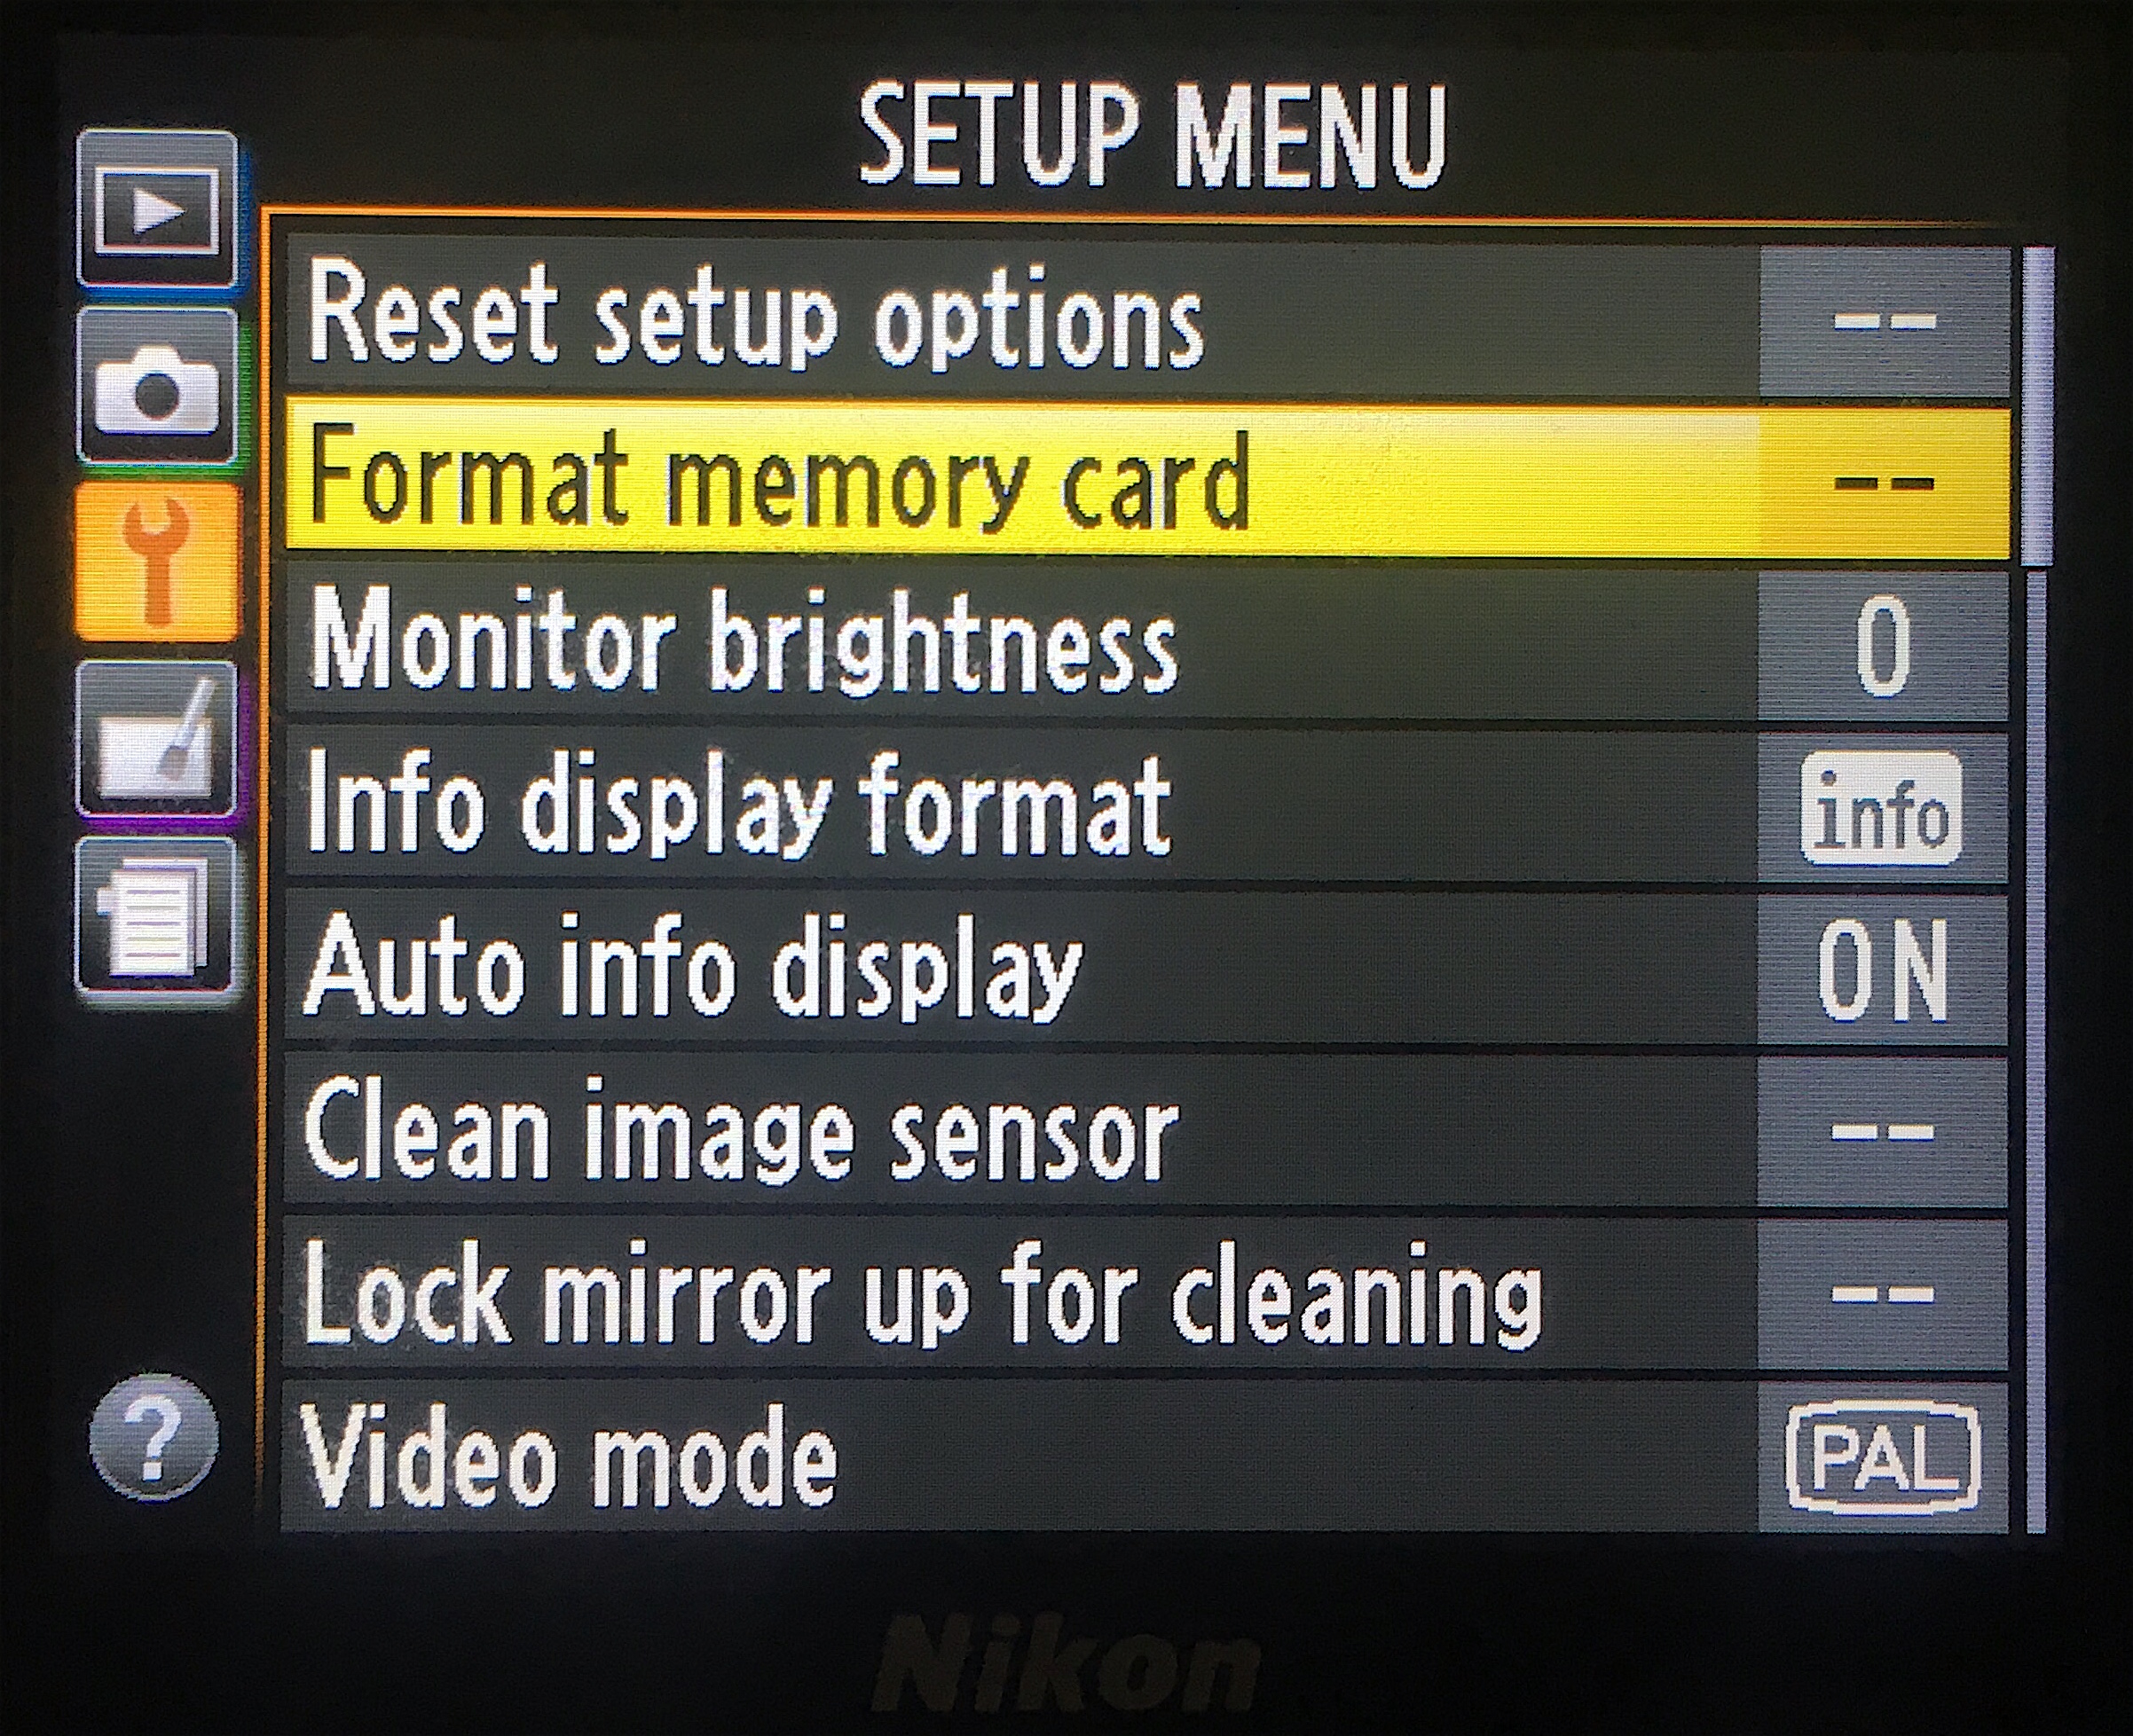
Formatting your SD card
Once you have finished transferring your footage you may want to erase the footage to free up space on the SD card.
- Insert the SD card into the camera and push the MENU button.

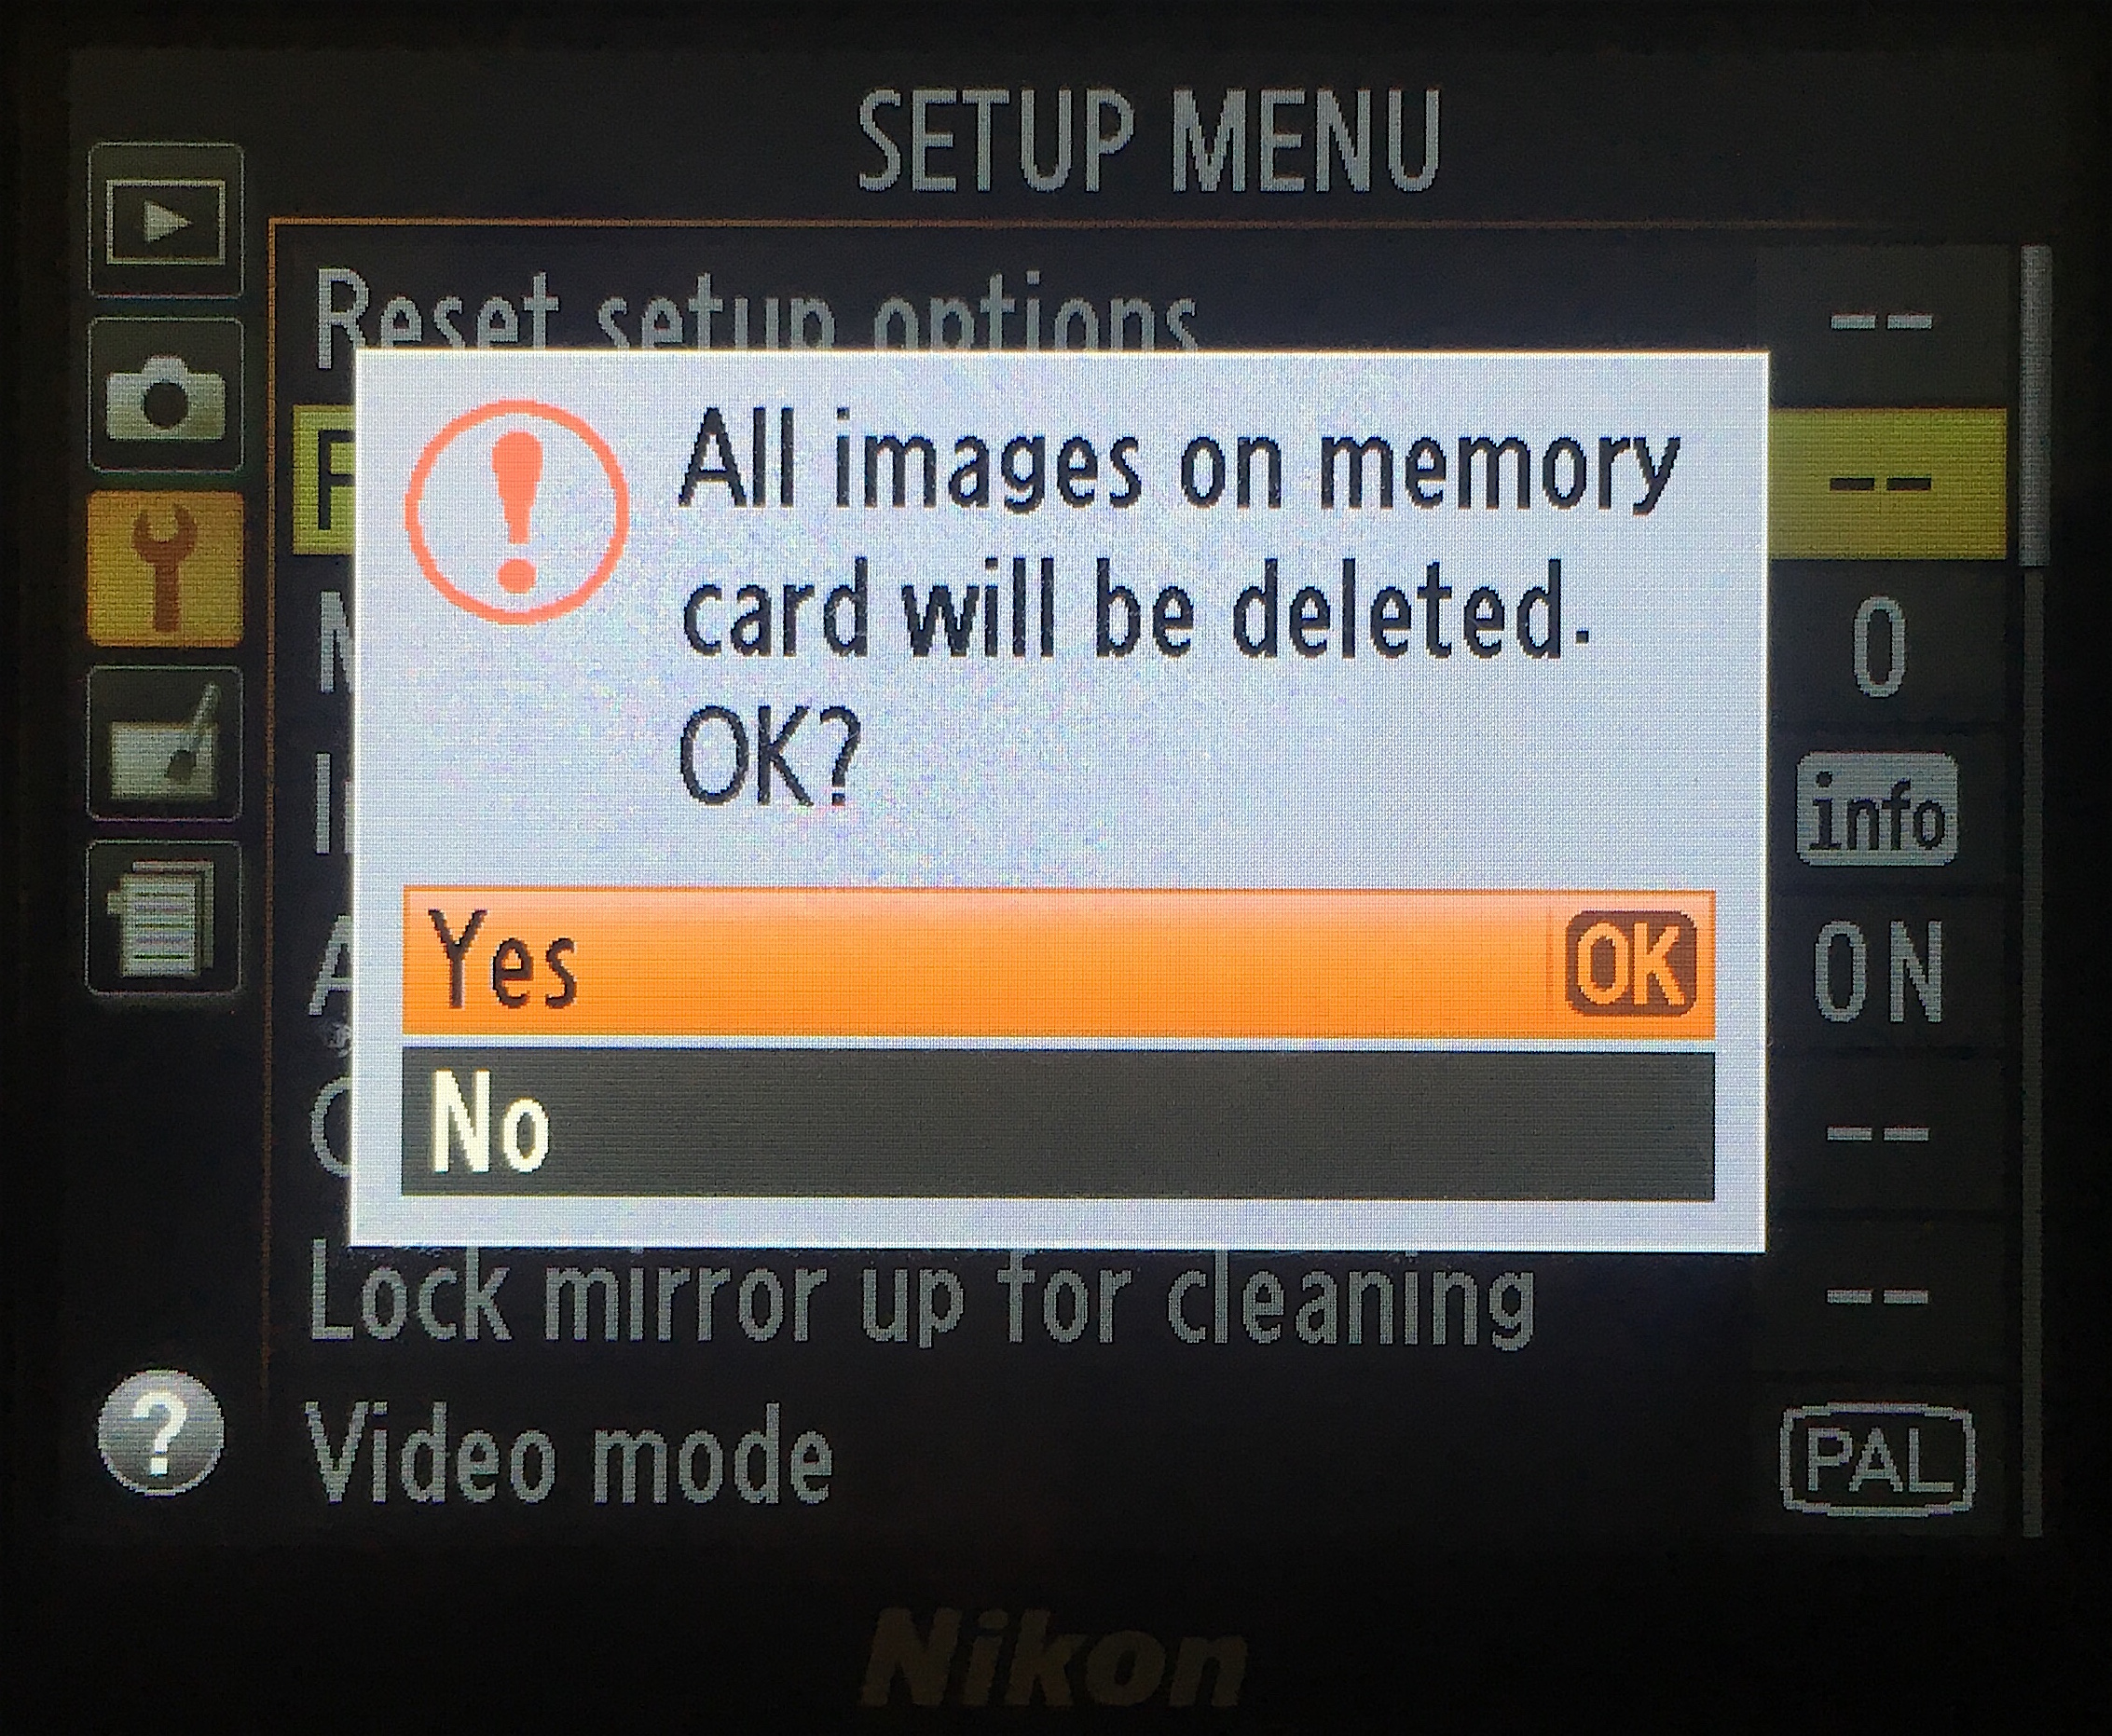
- Scroll to the ‘SETUP MENU‘ and select ‘Format memory card‘

- Select Yes if you are sure you wish to erase all the data on your SD card. This data cannot be recovered once the SD card has been formatted.

Troubleshooting
My images come out too blurry
There are a few things that could cause your image to come out blurry. Please ensure that your subject is correctly in focus if using manual focus, and if using autofocus, ensure that it is correctly focusing on your subject.
If your subject is in focus and your images are coming out blurry, it means the camera is capturing too much movement when it takes the shot, either from your movements whilst handling the camera, or the subjects. If you’re shooting handheld, you can resolve shakiness by using a tripod, if it is your subject, then you should try shooting with a faster shutter speed. Use the techniques mentioned in this article to get a balanced exposure that works around a faster shutter speed. A shutter speed of 1/250 or faster typically works well to capture a stable image if shooting handheld.
My images appear very grainy
A grainy image means a high ISO setting. There are times when a high ISO can be useful, such as if you are shooting in very low light conditions and cannot use a long exposure. In these cases some noise in the image cannot be avoided, but can be filtered out pretty decently through editing software. If shooting in light conditions, then try lowering your ISO to around 200 – 800 for a clearer image.
How to charge the batteries
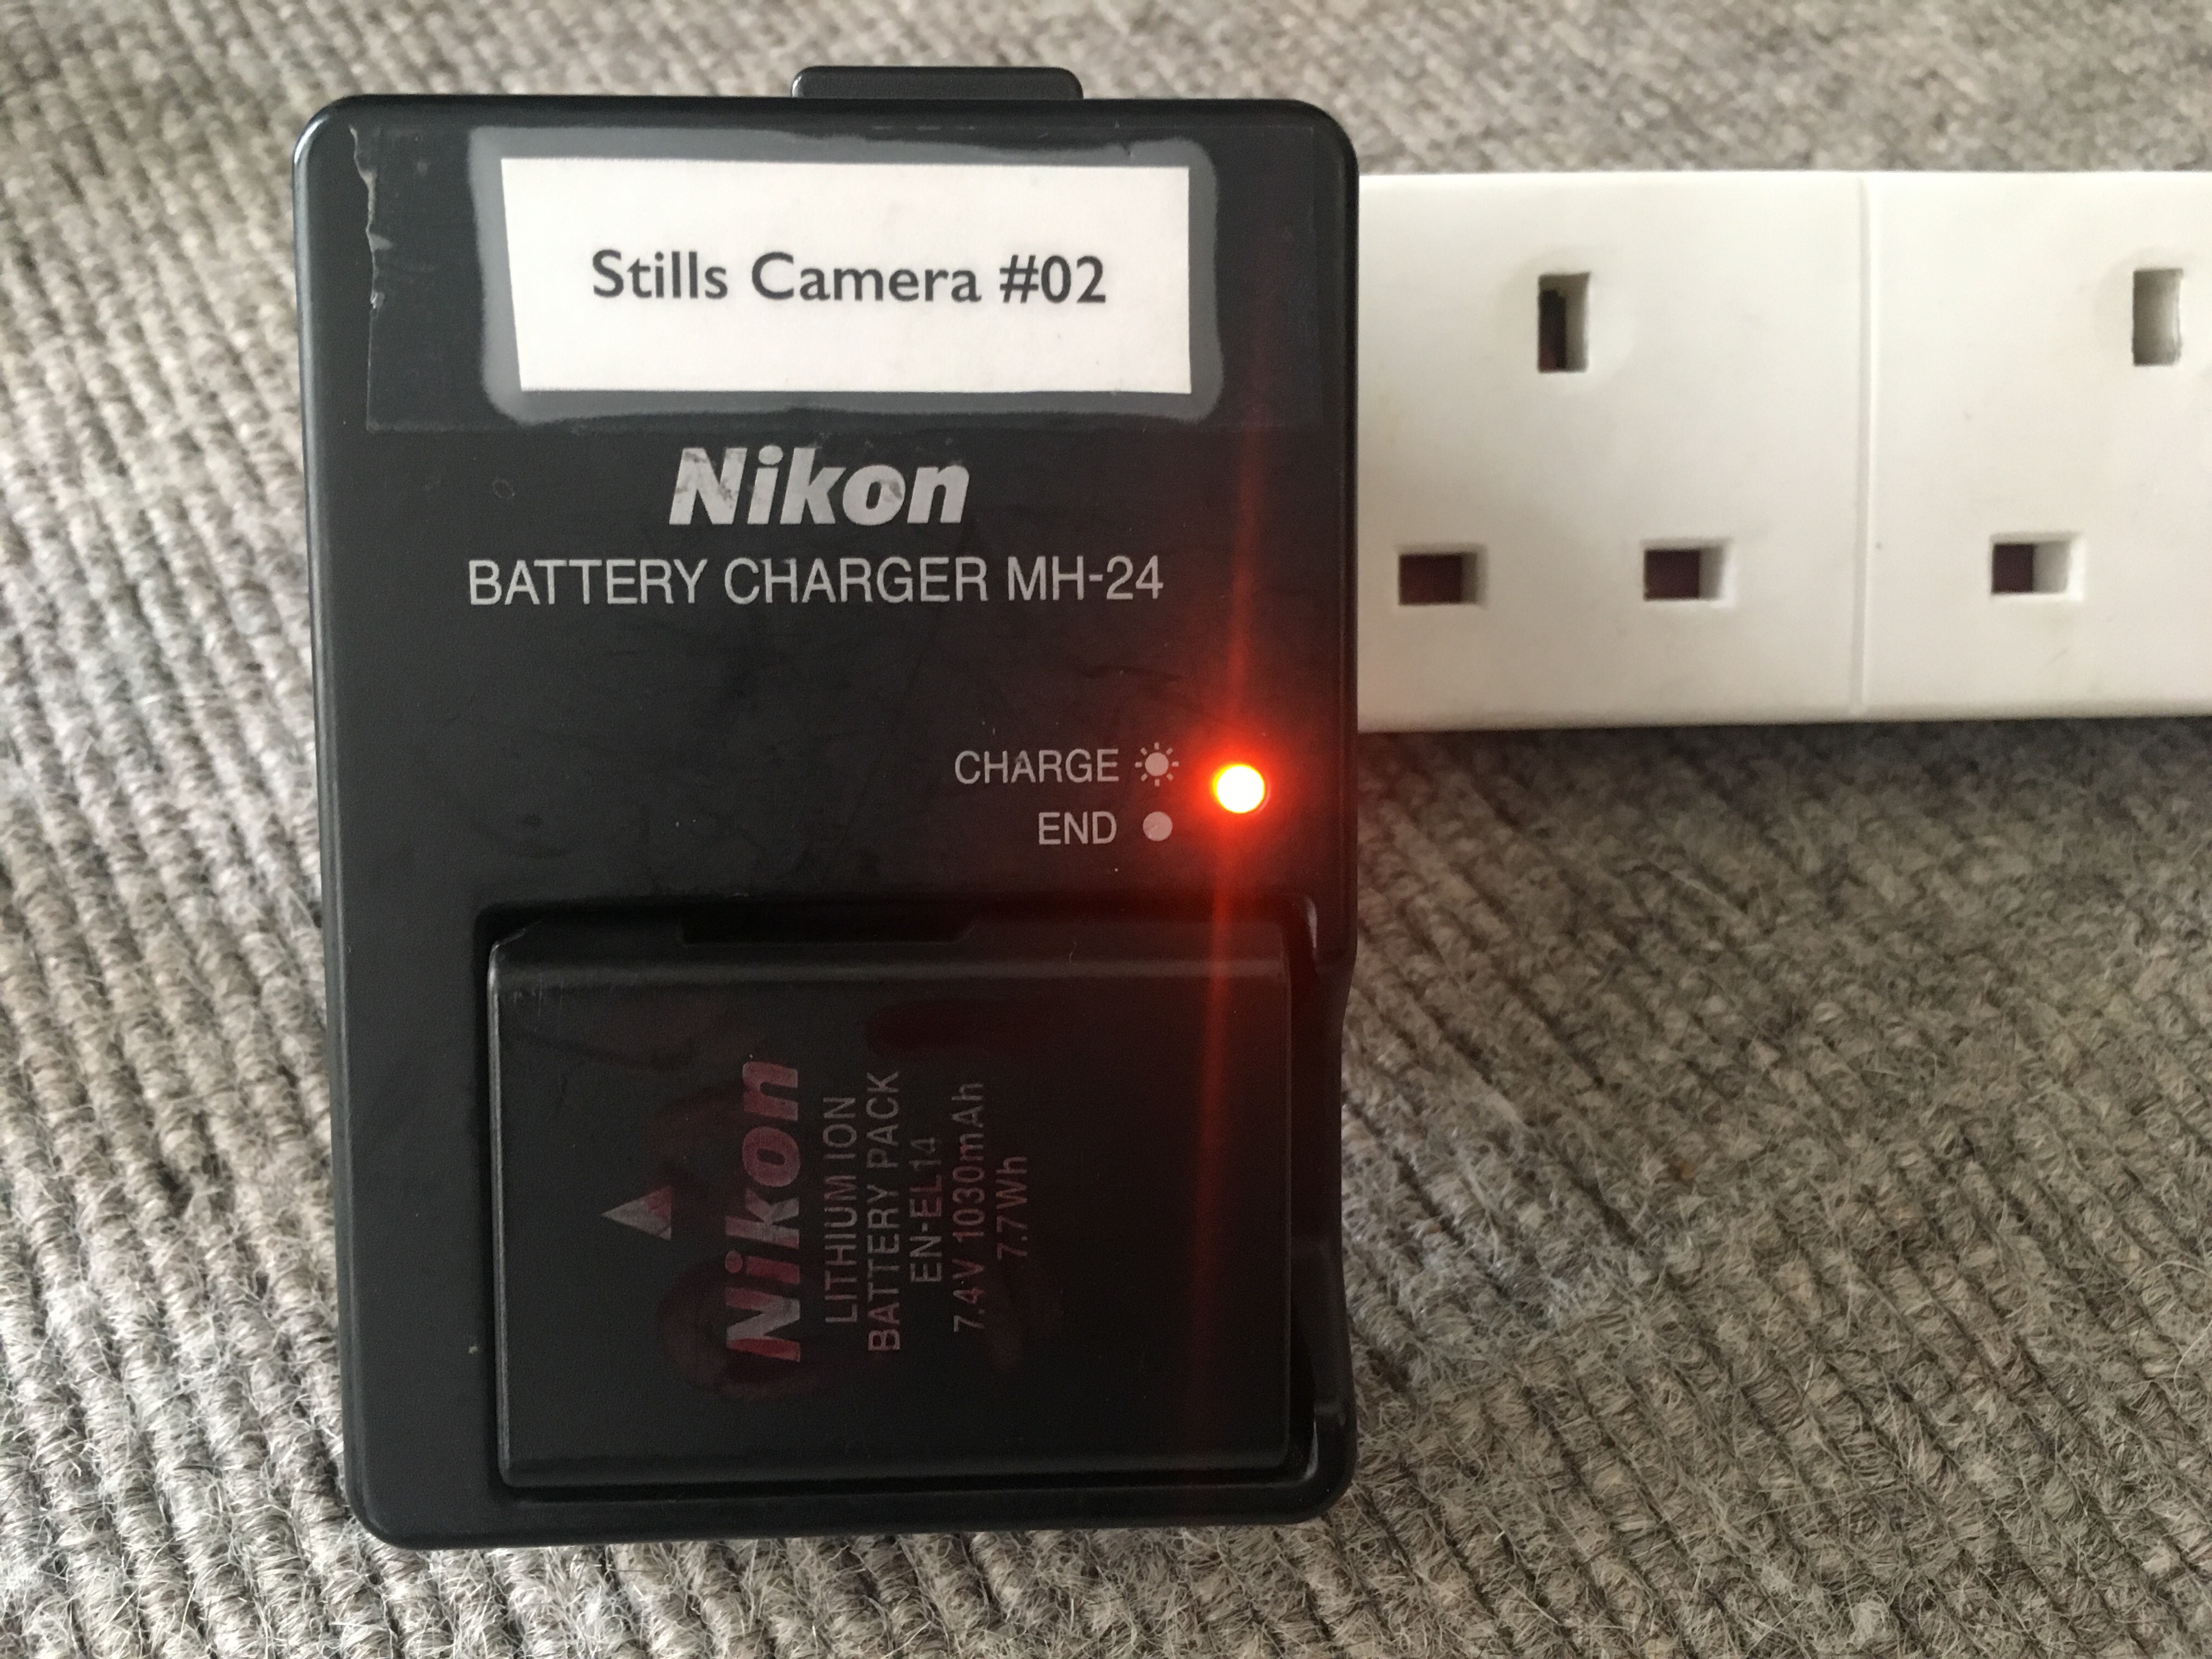
As the library can issue each camera several times every day, we are unable to guarantee that batteries will be charged.
The Nikon DSLR camera is supplied with a battery charger. To recharge the battery, follow these steps:
- Ensure the supplied battery is inside the camera, you can find the battery compartment at the bottom of the camera
- Plug the supplied battery charger into a power socket
- Put the cameras battery into the battery charger
- The light on the charger will blink whilst the battery charges, once it is fully charged, the light will remain on.