
This article outline solutions for preparing content for eStream, along with suggested encoding settings that strike a good balance between file size and quality.
Before you begin
This article is intended to provide ways of compressing or optimising video files to make them smaller and easier to upload to eStream, which should help address a number of issues that arise when trying to post content to eStream. This guide should be used if you’ve already got a video (e.g. from Zoom, on your computer, etc) that you’re trying to upload and are experiencing difficulty.
Your internet upload speed is key to determining how long a file will take to upload. We would always recommend running a speed test before attempting your first upload from a new location and then possibly transcoding the file as described below depending on the Upload speed. If possible, use wired connection to the internet when uploading files, as these tend to be more consistent in their speeds.
One very reliable speed test is available at https://www.speedtest.net/
Once you know your upload speed, you can run a quick calculation at https://downloadtime.org/ to see how long it will take to upload a file.
We would strongly recommend downloading and installing the free Handbrake application.
Installing Handbrake
Handbrake is free, and works on Windows, Mac and Linux. It is available to download from https://handbrake.fr/downloads.php.
Once you have downloaded the installer:
- Windows: Open it and follow the onscreen instructions to install.
- Mac: Open the dmg file and drag the Handbrake icon to your Applications folder.
You should then be able to launch Handbrake via:
- Windows: Start Menu -> All Apps -> Handbrake
- Mac: Launchpad -> Handbrake (or via the Applications folder in Finder)
Using Handbrake
-
-
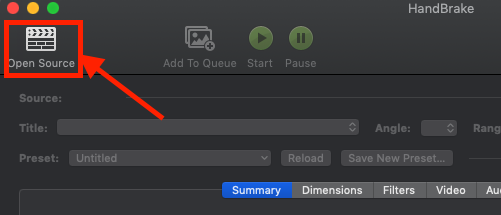
- Open the Handbrake application, and select Open Source
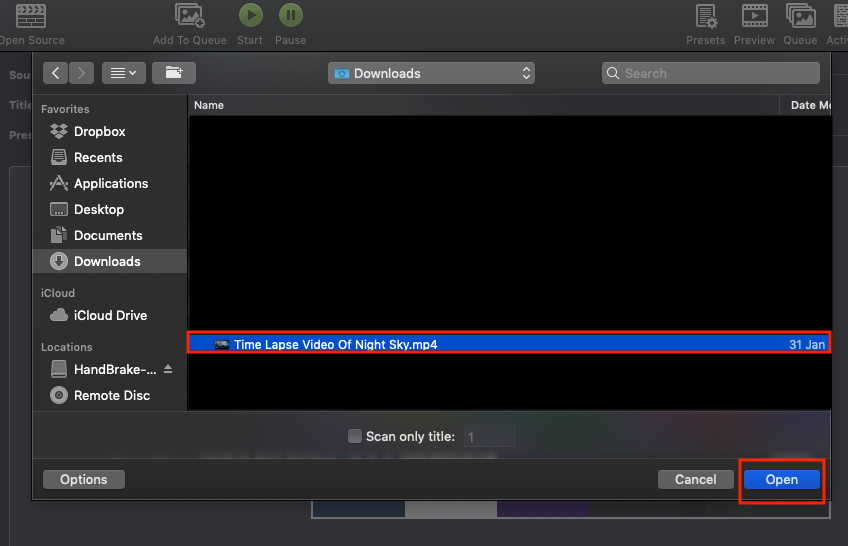
Using Handbrake – Open Source - Browse to the folder where the file you’d like to optimise is, select the file and click Open
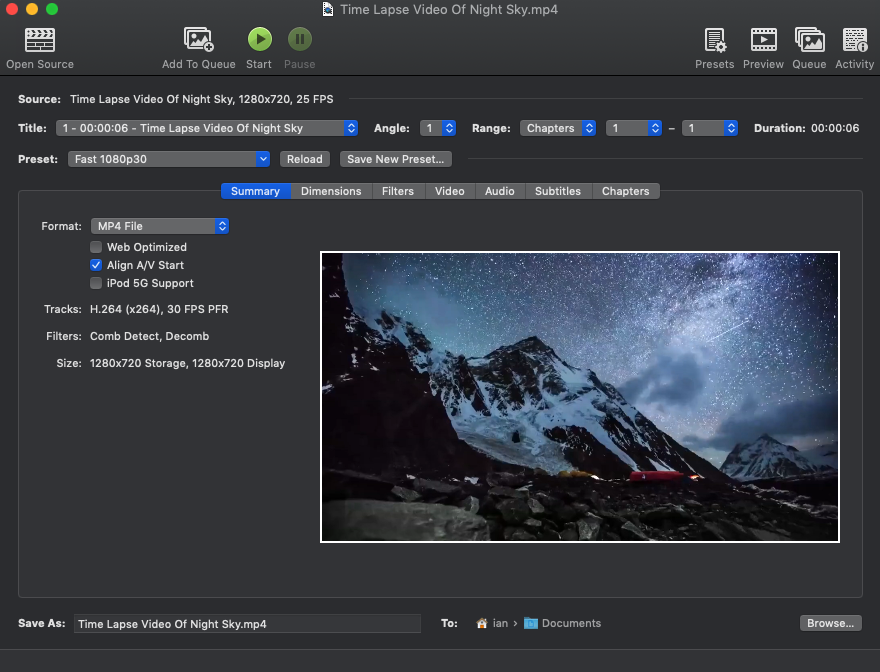
Using Handbrake – Select File - You should then see the file load into Handbrake, and a preview thumbnail of the file appear:
Using Handbrake – Preview - Select the Presets button from the Handbrake’s top toolbar

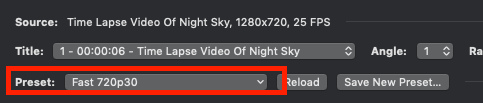
Using Handbrake – Accessing the Presets - Select the appropriate preset for your internet upload speed:
- If upload is less than 5mbps: use the Fast 480p30 setting
- If upload is greater than 5mbps: use Fast 720p30 setting
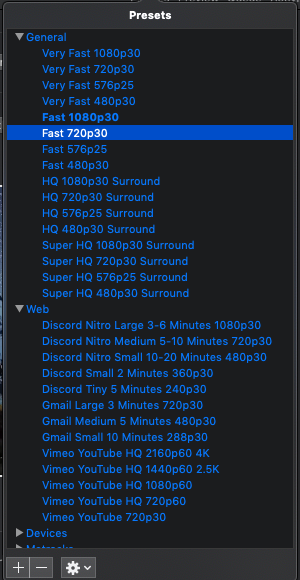
Using Handbrake – 5. Selecting a preset
- Once selected, you should see that the preview screen has changed a little and the preset you selected should be visible in the preset area of the preview window
Using Handbrake – 6. Checking the preset - You should also check a couple of other things:
- In the Summary tab:
- Format: MP4 File
- Align A/V Start: Checked

Using Handbrake – 7. Checking the settings
- In the Summary tab:
- At the bottom of the window, you can specify what you’d like your optimised file to be called, as well as specifying the folder in to which it will be saved.

Using Handbrake – 8. Specify the filename and location to save to - When you are ready to start optimising the file, press the Start button
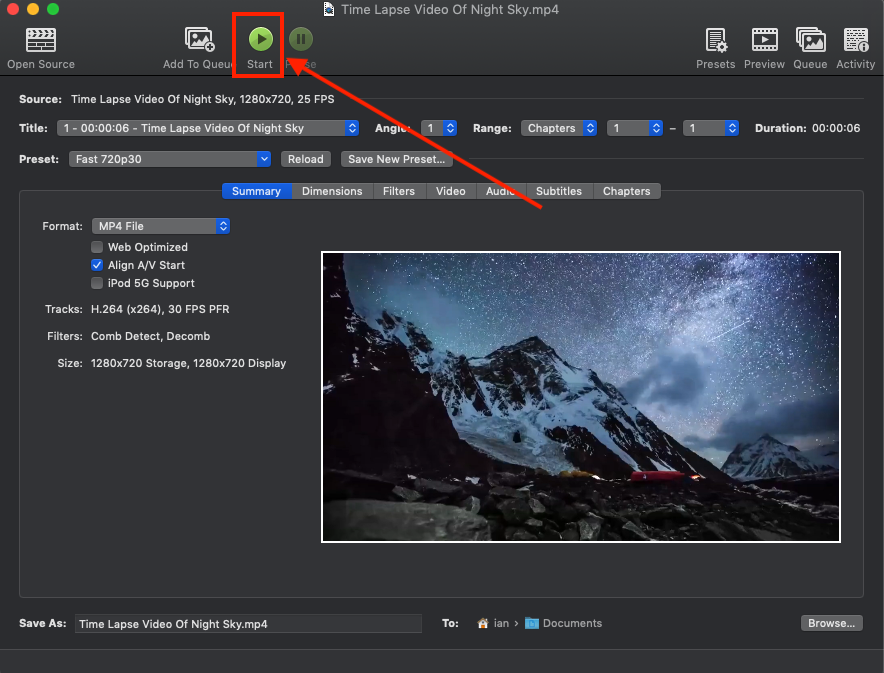
Using Handbrake – 9. Starting the process - You should see a progress bar at the bottom of the Handbrake window indicating the progress of the encode, and will be notified when the process has been completed.
- Now follow the instructions available on the Uploading to eStream article, and ensure you select your newly optimised file.
- Open the Handbrake application, and select Open Source
-
Advanced – Improving audio quality
Handbrake presets are set up to compress audio feeds too (in order to optimise file size). This can lead to a noticeable reduction in audio quality. In order to address this, there are a couple of options available to limit the impact of this. It is recommended you ONLY do this if you are unhappy with the audio when using the presets (as outlined above).
Audio passthrough
- Before starting the encode as outlined in step 9 above, select the Audio tab area within Handbrake.

Using Handbrake – setting up Audio Passthrough – 1. Audio Tab - In most cases (unless you’ve recorded multiple audio tracks along with your video), there will be 1 track listed in the Tracks area. Select the Codec dropdown, and select AAC Passthrough. This will keep the audio exactly the same as the original file (please note that this may vastly increase the file size of the optimised video).

Using Handbrake – setting up Audio Passthrough – 2. Selecting Audio Codec 
Using Handbrake – setting up Audio Passthrough – 2. Selecting AAC Passthru (2)
Increase audio bitrate
If the AAC Passthru does not work or generates an error, we’d suggest reselecting the appropriate Preset (steps 4 & 5 above), revisit the Audio tab, and increase the bitrate to a higher number – in theory, the higher the number, the better the audio should be, however, this is all dependent on the audio quality of the original file.

Getting additional help
If you’re having difficulty uploading content to eStream or through Moodle to an assessment, please contact us. There are a number of ways to do this, which are all listed on the Help & assistance page, or use the live chat option at the bottom of each page (9:00 – 18:00 BST, Monday to Friday).
There is also a very good guide to using Handbrake at https://handbrake.fr/docs/en/1.3.0/introduction/quick-start.html or alternatively at https://www.imore.com/how-compress-video-handbrake