
This article explains how to easily use video or audio files embedded in to Moodle pages, forums and assessments. It is aimed at Trinity Laban Tutors/Course Leaders.
Considerations
Adding to Moodle pages
Before you start adding content to Moodle, it’s best to locate the recordings you’d like to add first. Please remember that only members of teaching staff can add to pages, not students. If you’d like students to be able to add content, please use a forum (if others should also be able to see the content), or an assessment (if only teaching staff should see their submission).
Where to find embed codes
eStream
Only teaching staff have access to embed codes. Please note that not all eStream recordings are available off-site. If you can personally access it offsite, others should be able too.
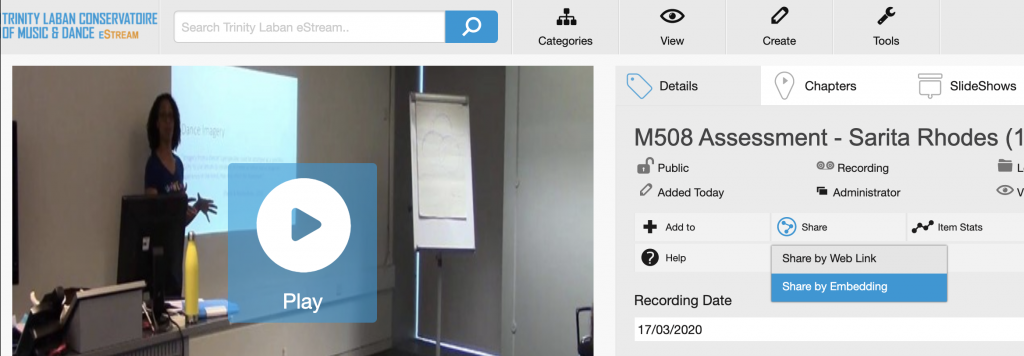
- To generate an embed code for a recording on eStream, navigate to the video/audio recording from eStream’s front end.
- Locate the “Share” button (just below the recording’s title), and click “Share by Embedding”
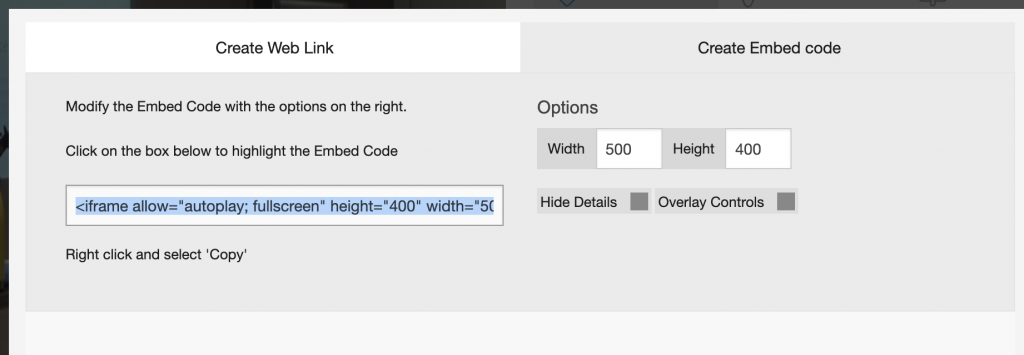
eStream – Share by Embedding - Copy the “Embed code” (right click -> Copy or CTRL+C) from the window that pops up.
Generating an embed code
YouTube
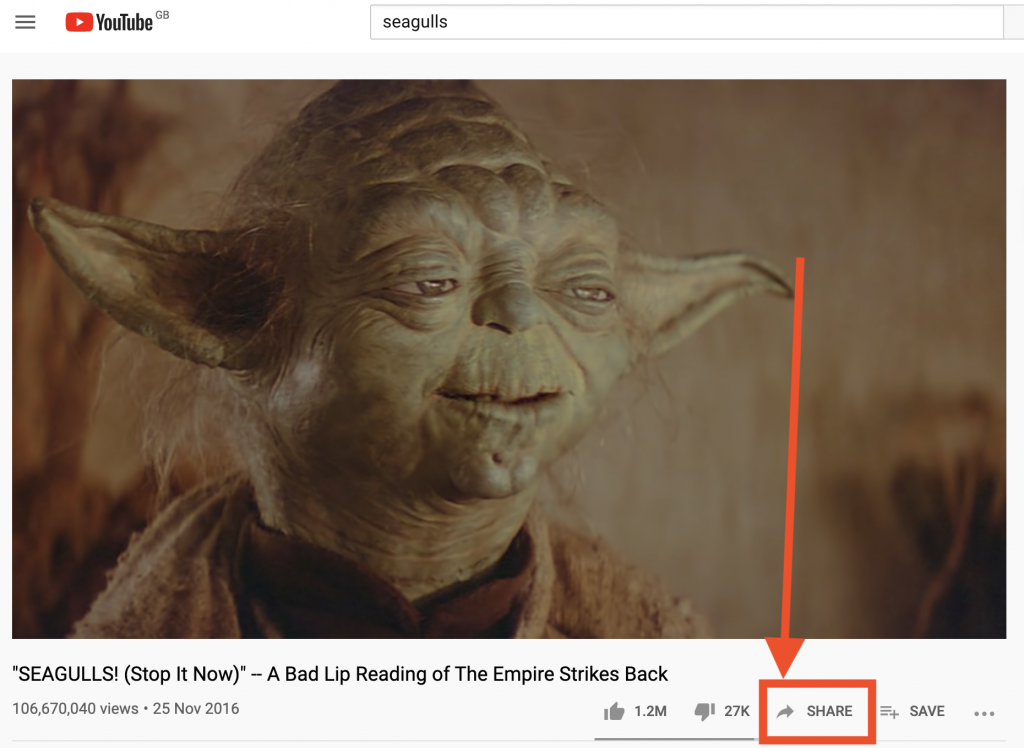
- Navigate to the YouTube video you’d like to embed.
- Click the share button (normally just underneath the recording).
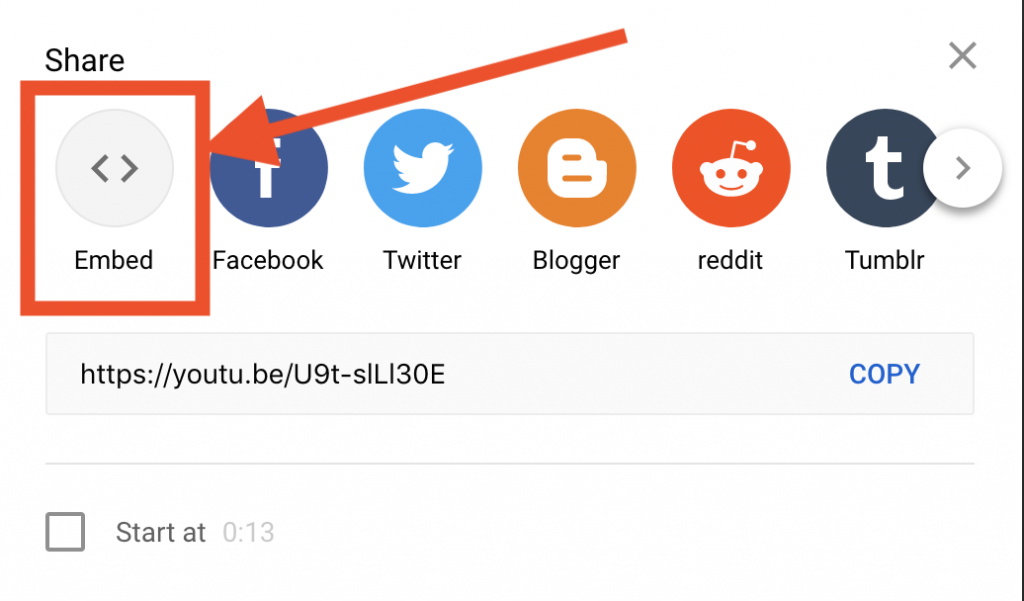
Where to find the YouTube Share button - On the menu that pops up, select “Embed”.
YouTube’s embed option - Finally, select the embed code and copy it (right click -> copy, or CTRL + C).
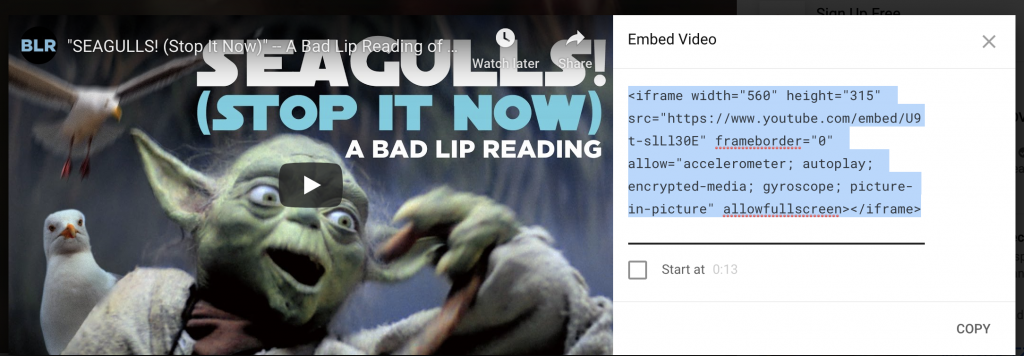
YouTube’s embed code
Vimeo
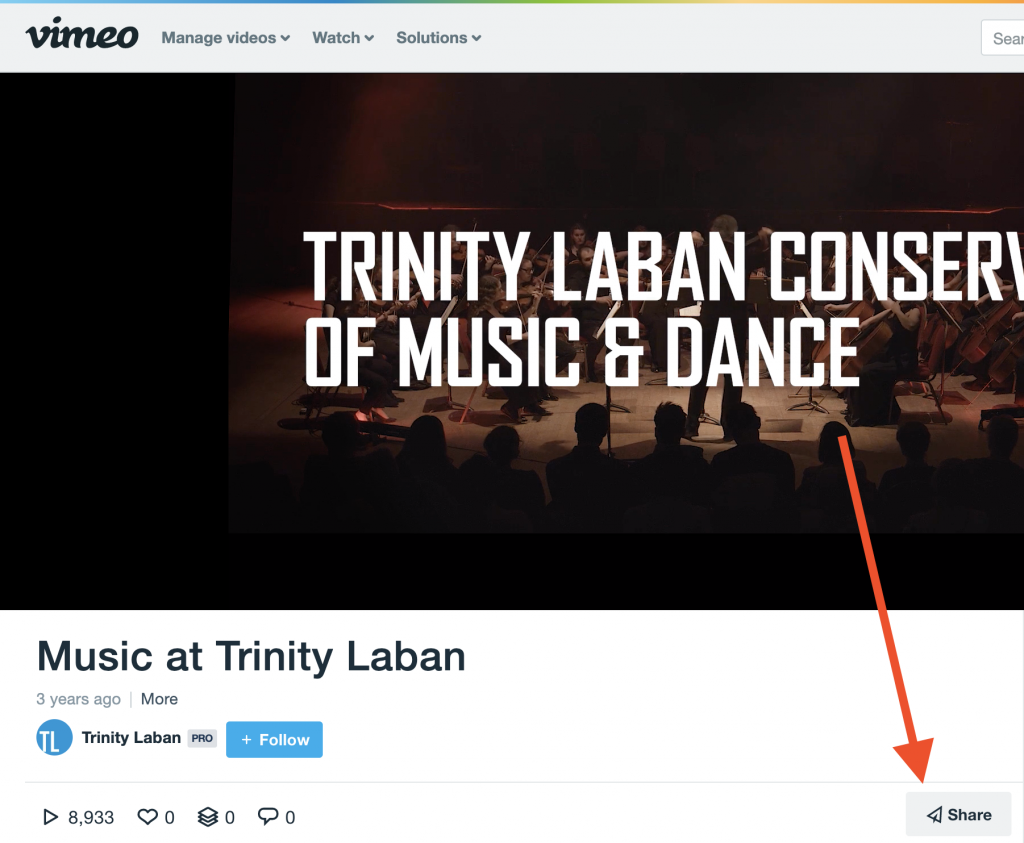
- Navigate to the video that you’d like to embed from Vimeo, and on the recording’s page, find the “Share” button and click on it.
Vimeo’s share button - Select the embed code and copy it (right click -> Copy, or CTRL + C).
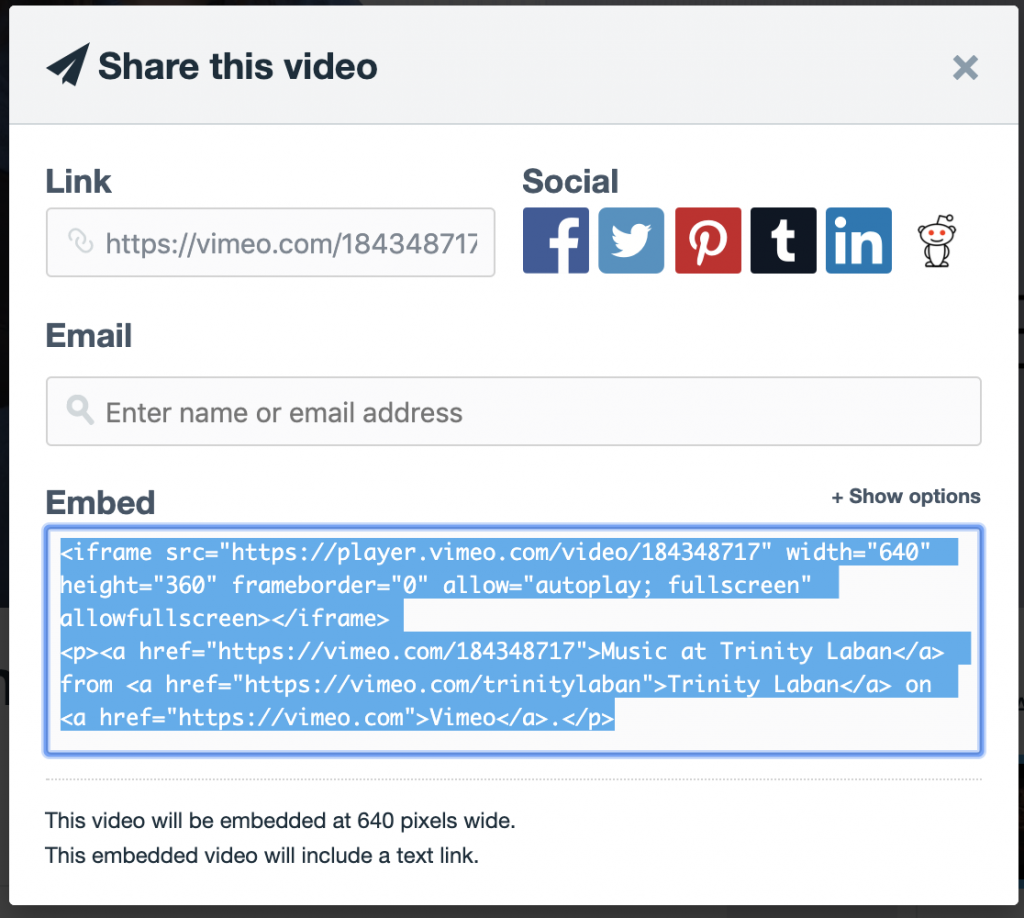
Vimeo’s embed code
Embedding pre-existing content
- Log in to Moodle and navigate to the course page where you would like to add a video or audio recording. Ensure editing mode is turned on.
- Navigate to or create a new section/topic where you’d like your video to appear and select “Add an activity or resource“.
- From the list, scroll down and select “Page“. Click the “Add” button.
- Give the page a name. If you’d like the videos/audio to be visible on the Moodle course page (and not on a sub page), click the “Display description on course page” checkbox, and ensure you use the “Description” content area and copy over all code (described below) to the code area of the “Page Content” field.
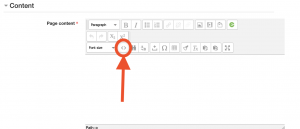
Where to find the Edit HTML Source icon on Moodle - In the “Page content” area, select the “Edit HTML Source” icon.
- Paste the embed code in to the HTML Source Editor’s box. If you want to include multiple recordings, I’d suggest including a line space between them (to do this press the enter key). When you are done, you should have something that looks like Figure A (below).
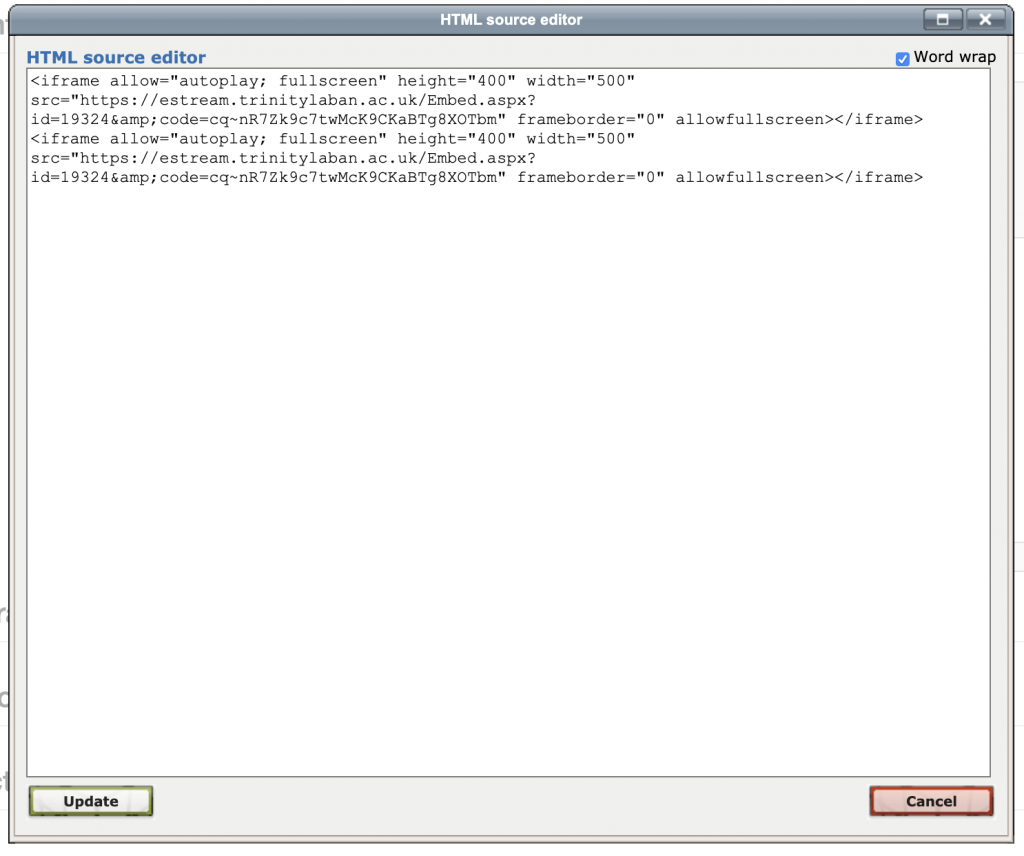
Figure A: Moodle HTML code for embedding video or audio files - When you’ve included all the embed codes you’d like (and please remember you could include a page for each video if you’d like), click the “Update” button. This will close the HTML Source Editor, and the preview box should update to show a preview of the embedded video.
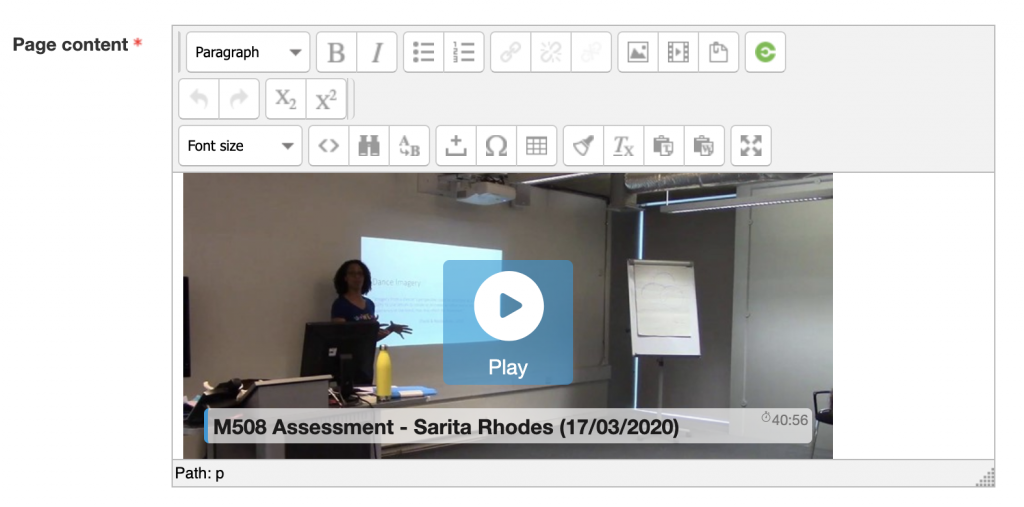 Preview of embed on a Moodle page
 - Select one of the save options at the bottom of the page, and your embedded video will now be viewable by anyone who has access to your Moodle page.
Uploading and embedding in to Moodle directly
If the content you want to include isn’t already on eStream or another location with an embed code, you can upload directly through Moodle using the eStream Moodle plugin, which will automatically include the recording as an embed in the content area that upload through.
The process is very nearly identical as uploading to Moodle forums (which is outlined below), with the only difference being that you click on the “Add Planet eStream item” icon in the content area. There is a walkthrough video showing this process:
Adding to Moodle forums
Moodle forums allow anyone who has access to them to post and view content, so can be a great way of getting feedback on items, or allowing students to share new audio visual recordings with others.
To upload new content to a Moodle forum
Ensure that a forum has been created on the Moodle course/page. We would also recommend you use the Google Chrome browser.
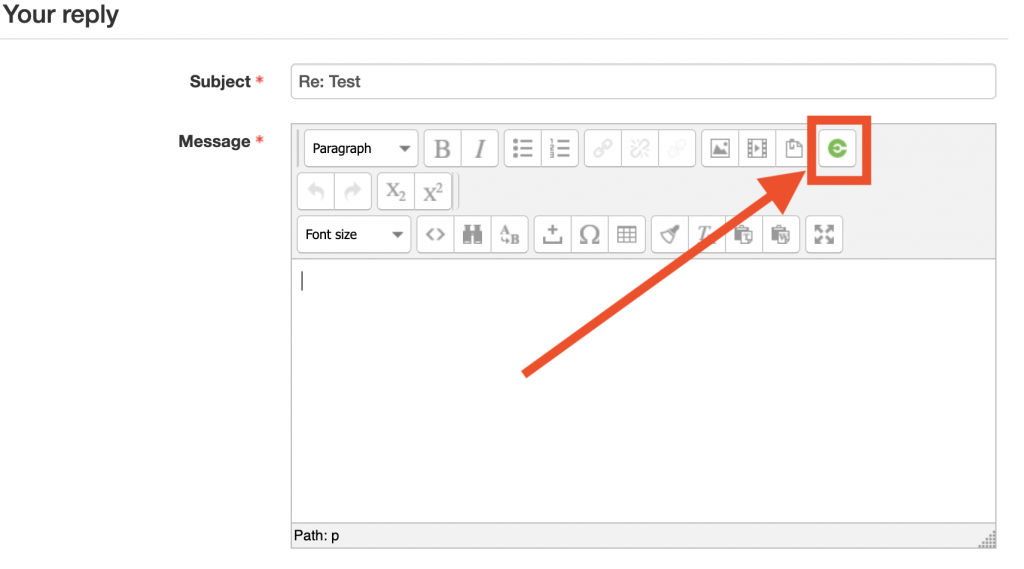
- When adding a new discussion or a reply to an existing one, you can easily add a video or an audio file. From the “Message” area, select the “Add Planet eStream item” icon.
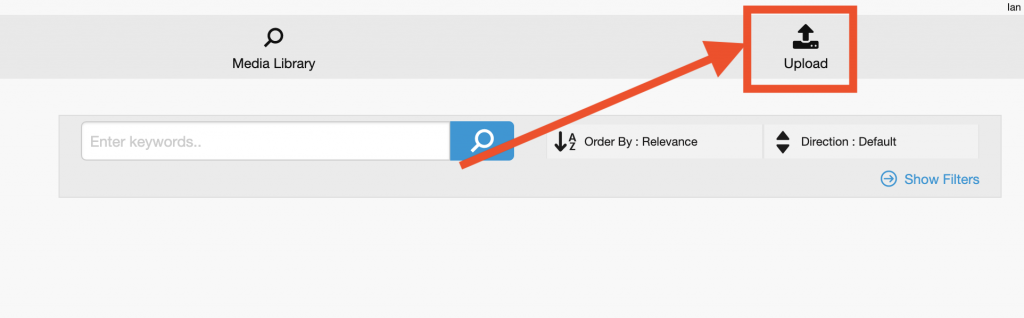
Moodle Forum – Add eStream Item icon - Select the “Upload” button.
eStream – Moodle forum upload button - Press the “Upload Video or Audio Files” button.
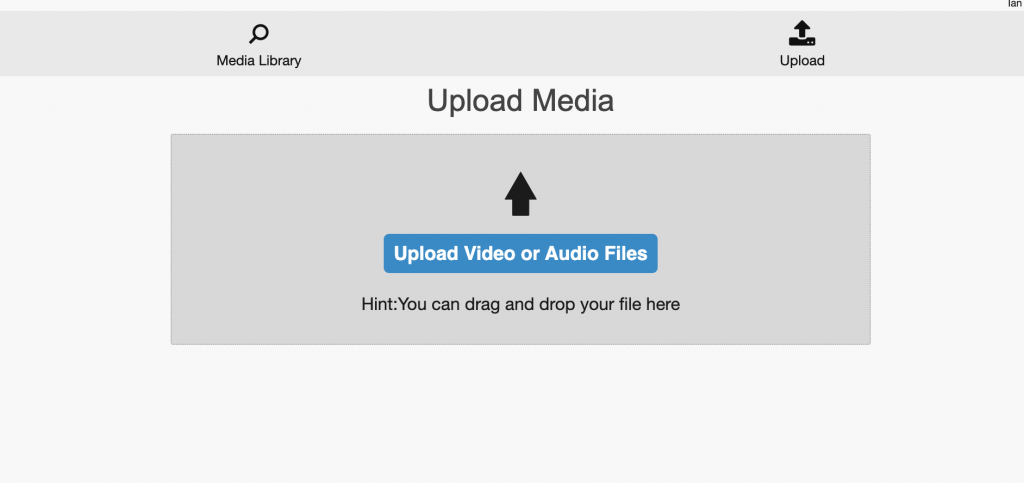
Moodle forum – upload video/audio files - Select the file that you’d like to upload, and click Open

File selector - You’ll then be prompted to enter some details, we’d suggest unticking the “Use Filename for Title” checkbox. In the title field, give the file a sensible name. Ensure that the Publishing Policy is set to “Private“.
- Optionally, if you know that you’ve exported your video file as a H.264 mp4, you can select the “Copy only” tickbox, but if you’re in any doubt, leave it unticked (for more information, see Troubleshooting eStream uploads.
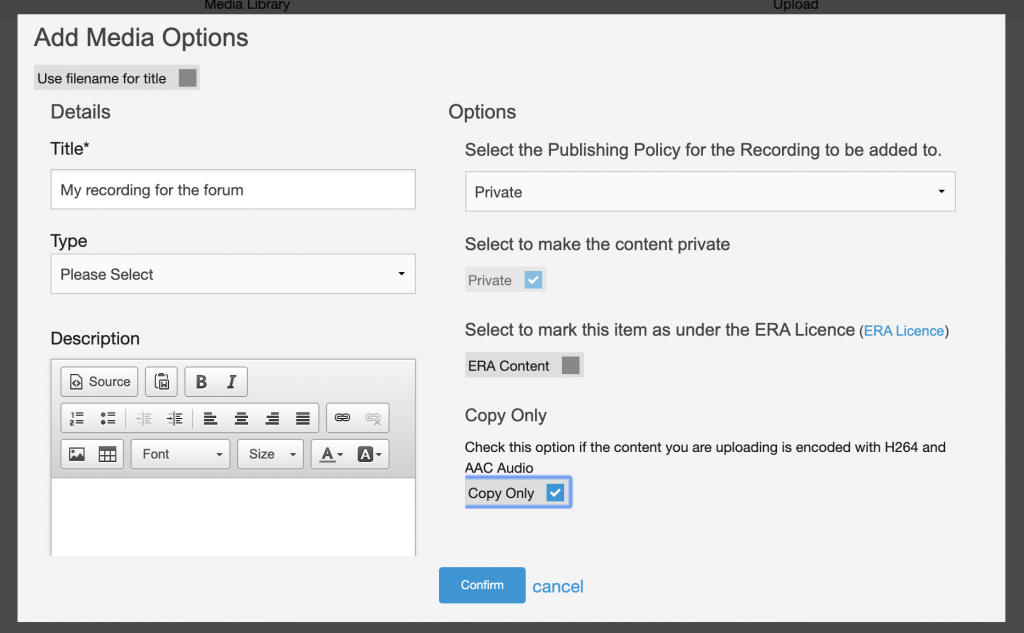
Uploading video to Moodle metadata entry - Press the “Confirm” button.
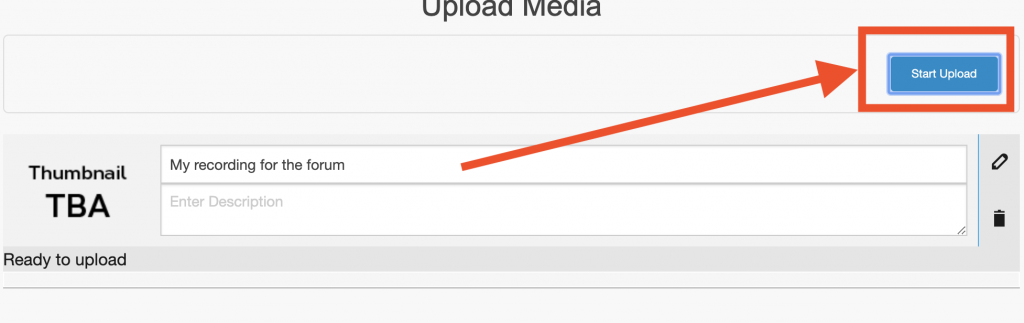
- On the new screen that loads, press the “Start upload” button.
Start upload to Moodle forum - Be patient, and wait until the file completes the upload (depending on the filesize, it may take some time). When it’s complete, you’ll see a preview in the forum, or a coming soon message in the forum – this means the video is being optimised for online streaming.
- It may take a while to convert (depending on the file size and the number of other recordings being added). You do not have to wait for it to convert, however, you will have to press the “Post to Forum” button at the bottom of the screen.
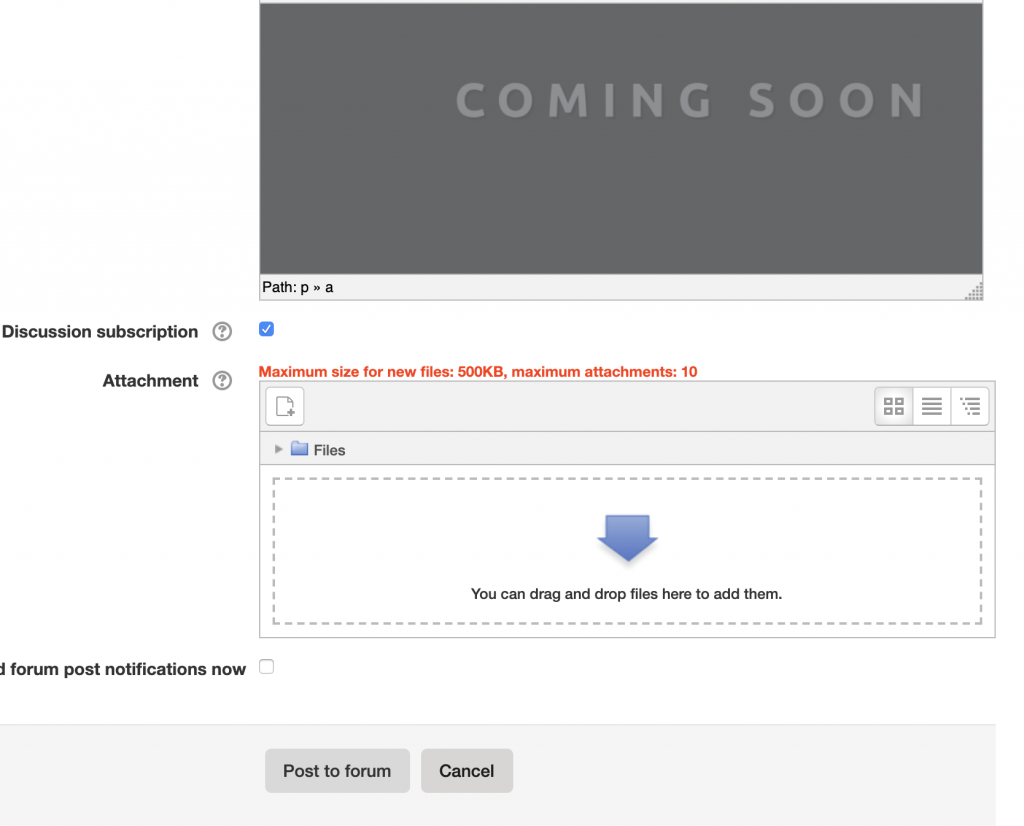
Post to Forum - You’ll be redirected to your post. If you’re still seeing the “Coming soon” screen, after a few moments (once it’s been transcoded), your video/audio file should be available to stream, and you should be to refresh the page and see it.
- If you are having any problems with recordings not transcoding, please see the FAQ or Troubleshooting eStream uploads articles, or use the live chat function from the bottom of this page. Alternatively, email avsupport@trinitylaban.ac.uk with the details of the forum and we’ll look into it as soon as we can.
Creating Moodle Assessments for video or audio submissions
See this separate step by step guide on How to set up Moodle to accept videos and audio files for assessment