
This article explains the steps to take in order to upload content to eStream as a student, either for submission as an assessment or inclusion in a Moodle forum.
Prepare your media
The first step is to make sure you have your file(s) ready.
There are a range of resources on this knowledgebase to help you create, edit, and optimise content:
- Do’s and Don’ts of Recording (at home)
- Smartphone cinematography: using mobile devices to create video content
- Preparing videos for eStream
- Making video content
Uploading to Moodle Forums
PLEASE NOTE: You can find a video tutorial on uploading to Moodle Forums here.
IMPORTANT INFORMATION: If you are uploading multiple media files for an assessment, you must upload them at the same time. If you add a media file to a previously submitted assessment, it will overwrite any previously uploaded media files of that assessment.
- Ensure you have your file(s) ready. We would also recommend you use the Google Chrome browser.
- Go to the Moodle course forum where you want to add your content. Follow the course specific instruction to add a new topic or reply to an existing one.
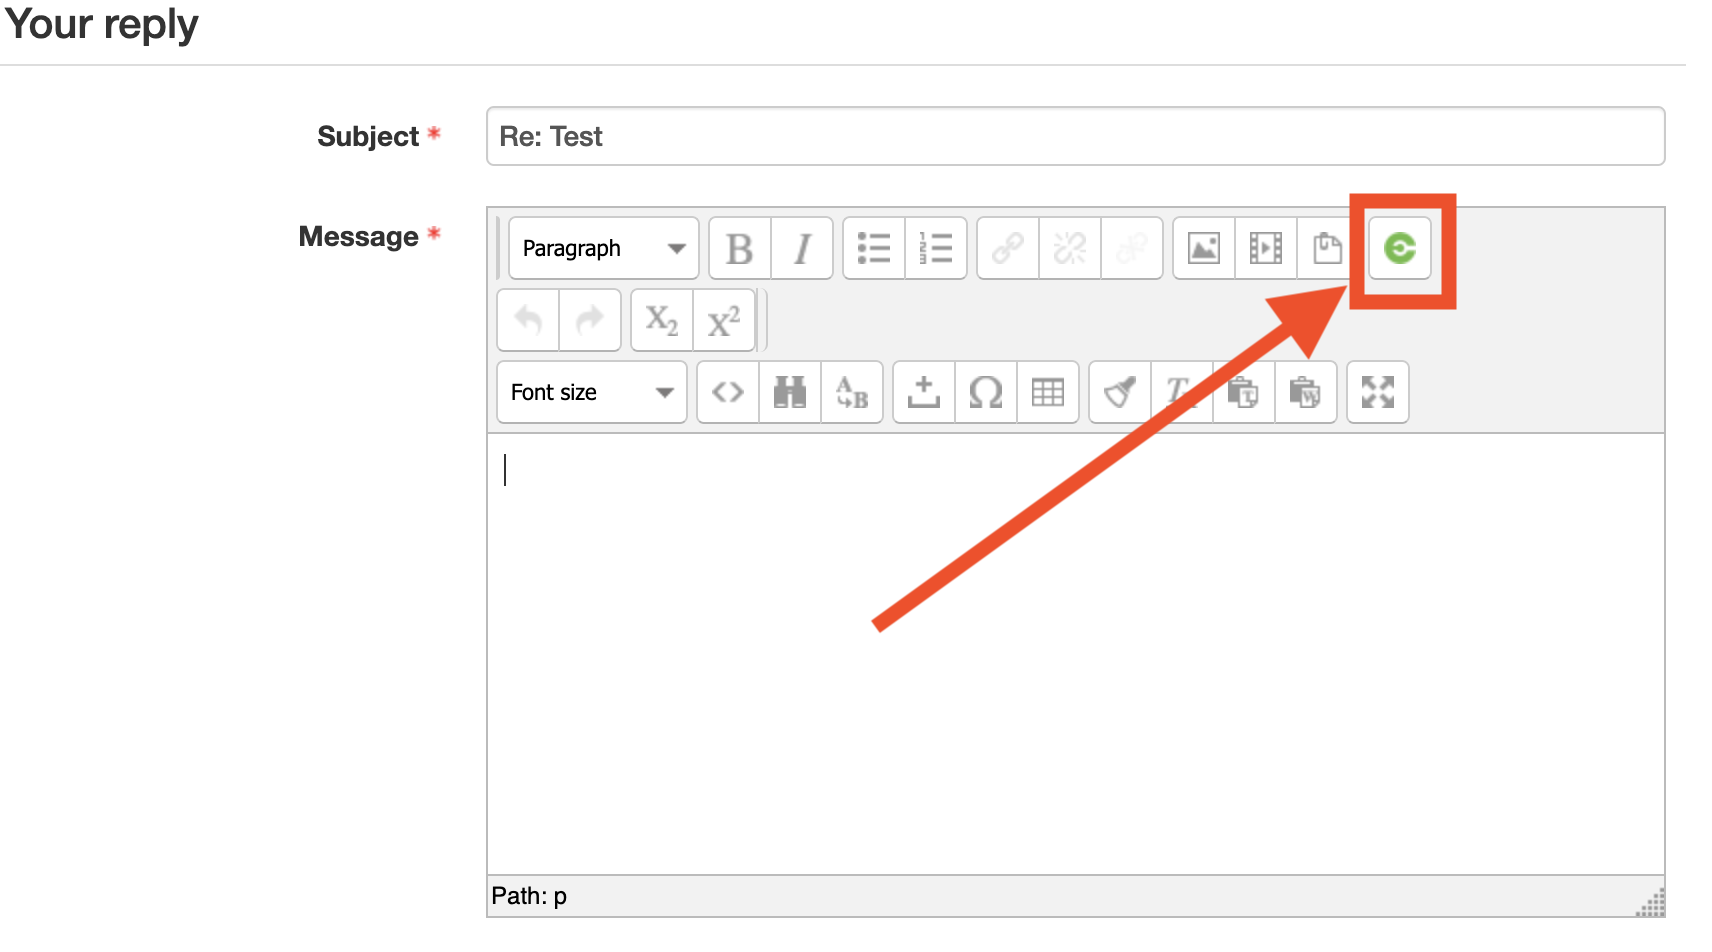
- From the “Message” area, select the “Add Planet eStream item” icon.
Moodle Forum – Add eStream Item icon - Select the “Upload” button.

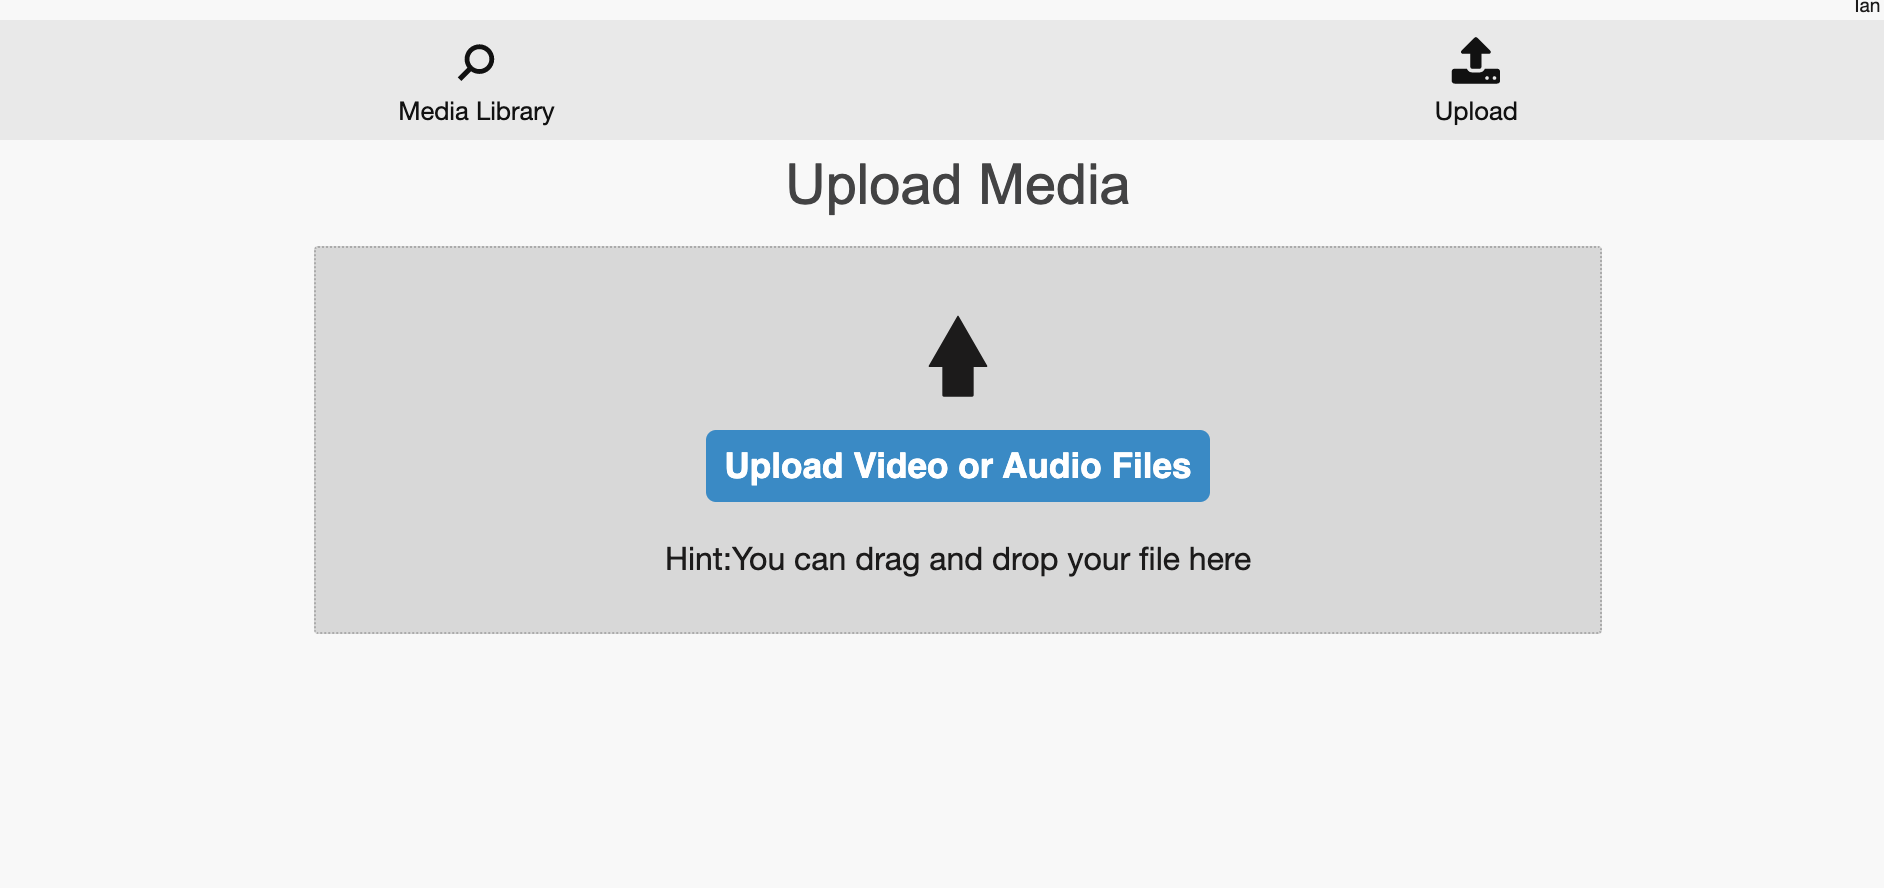
eStream – Moodle forum upload button - Press the “Upload Video or Audio Files” button.
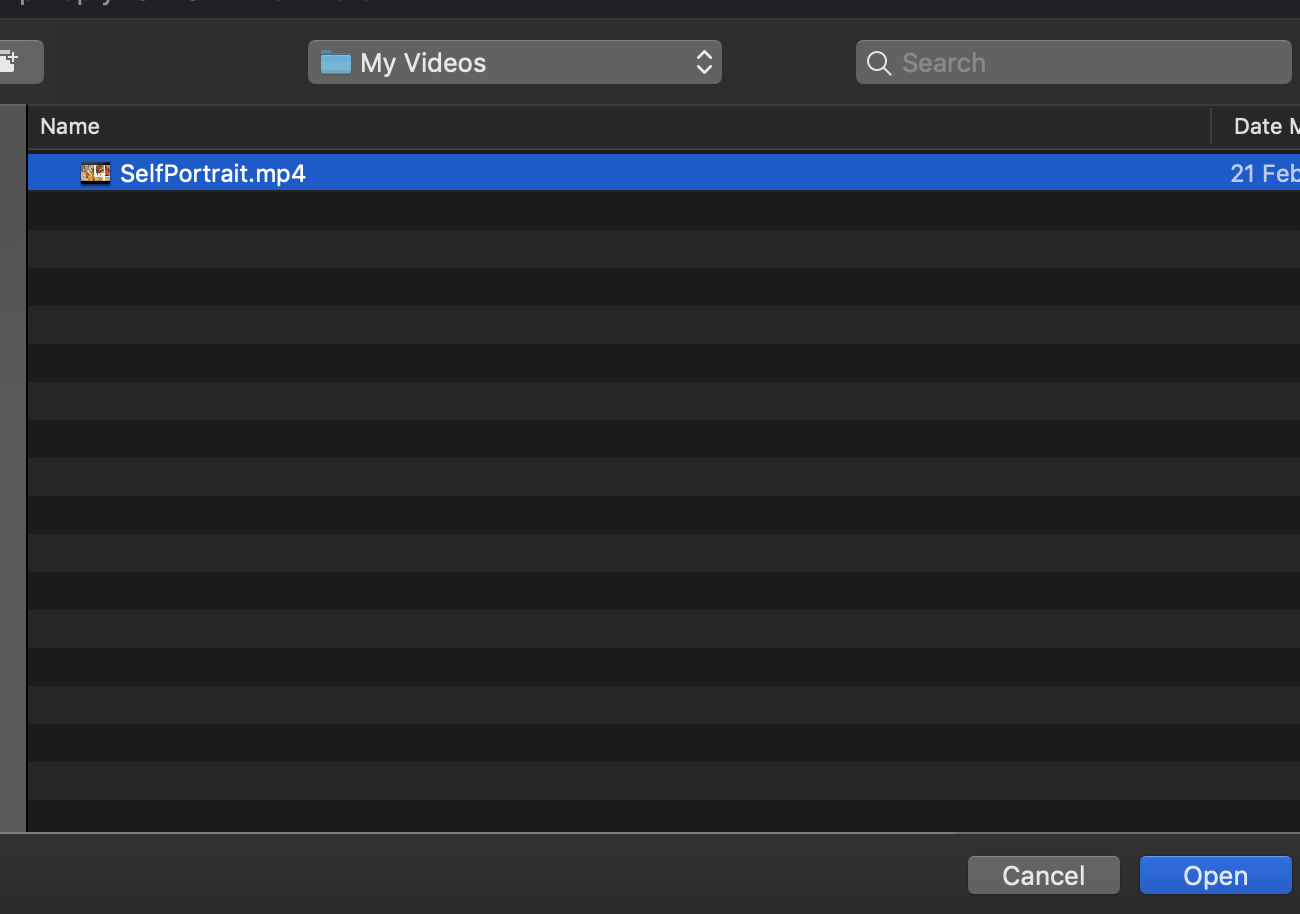
Moodle forum – upload video/audio files - Select the file that you’d like to upload, and click Open.
File selector - You’ll then be prompted to enter some details, we’d suggest unticking the “Use Filename for Title” checkbox. In the title field, give the file a sensible name – usually something like “Your Name – Module Code: Task name”.
- Change the Type dropdown to Student Submission. If you’d like, you can tag the correct course from the relevant Programme fields. Ensure that the Publishing Policy is set to “Private“.
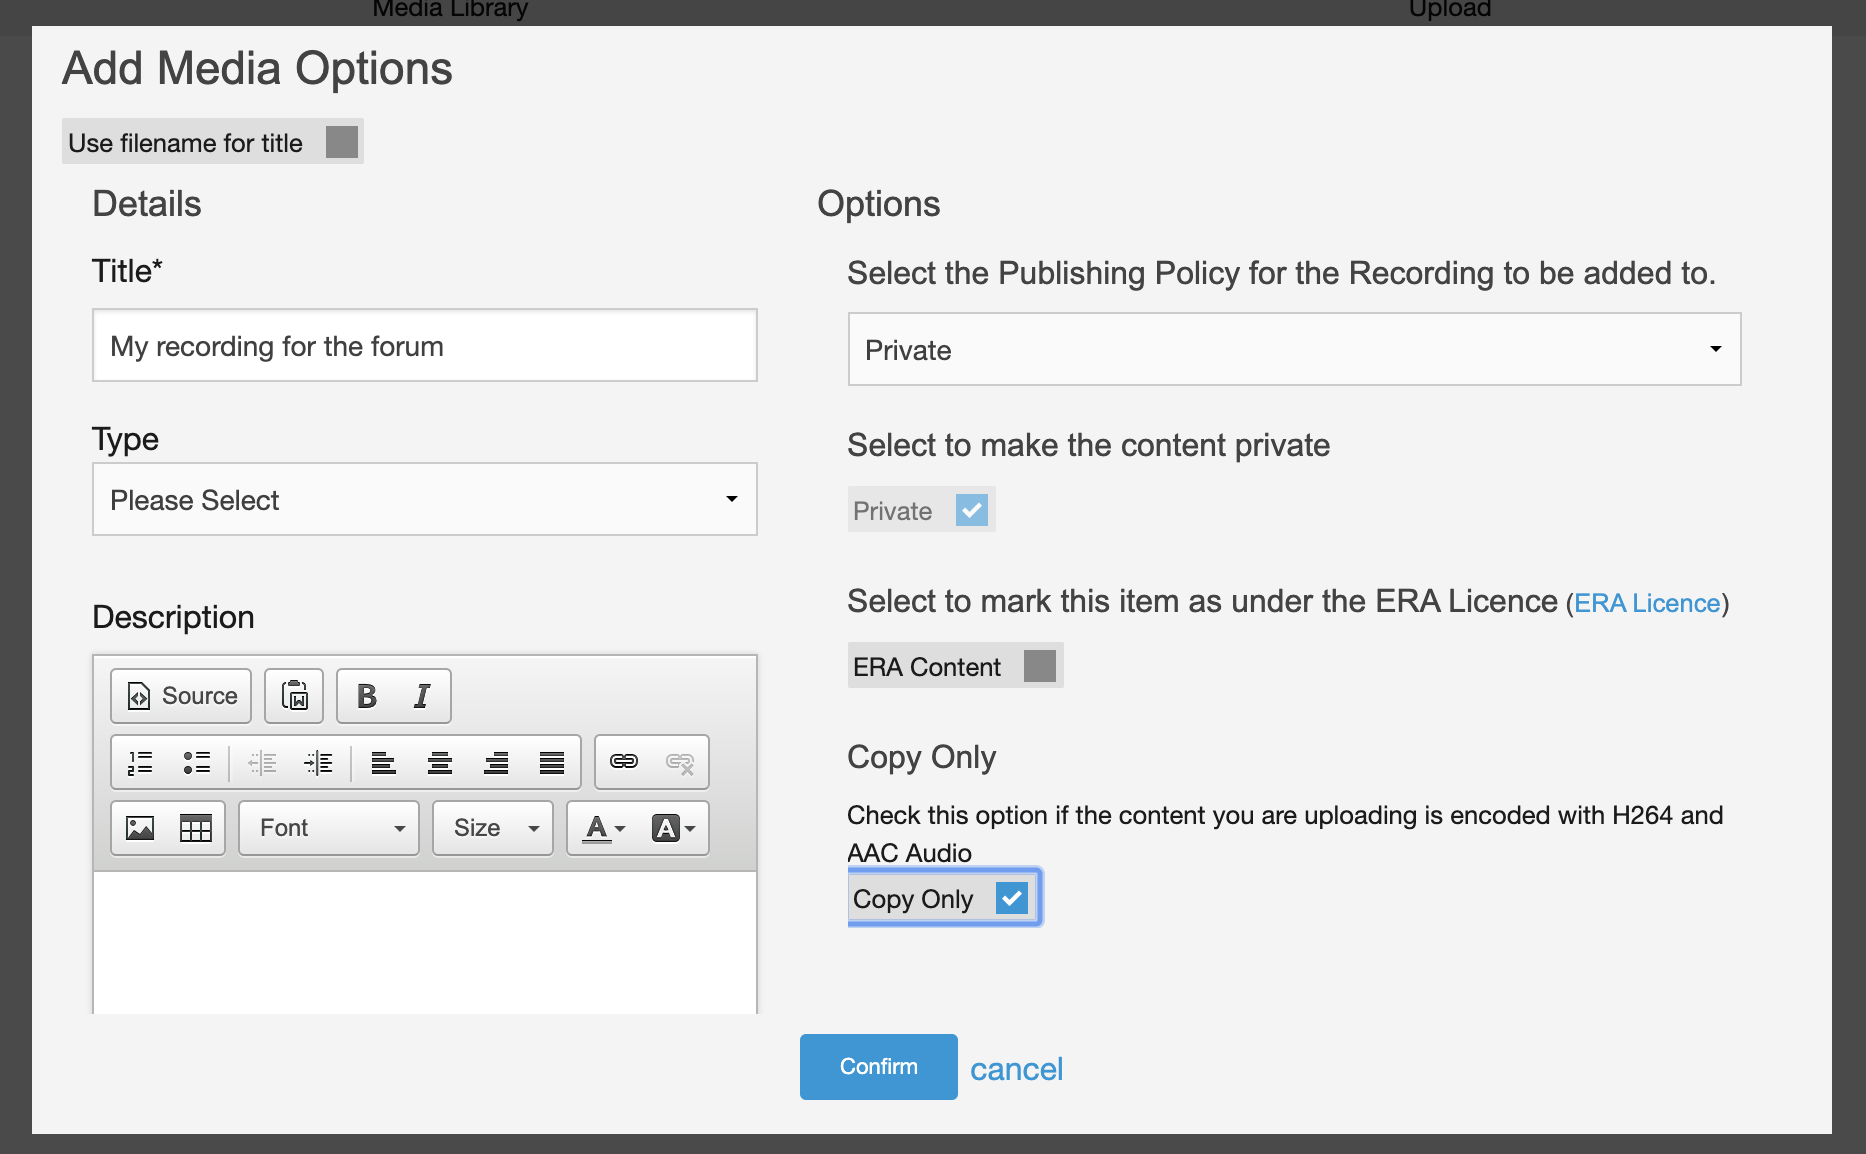
Uploading video to Moodle metadata entry - Press the “Confirm” button.
- On the new screen that loads, press the “Start upload” button.
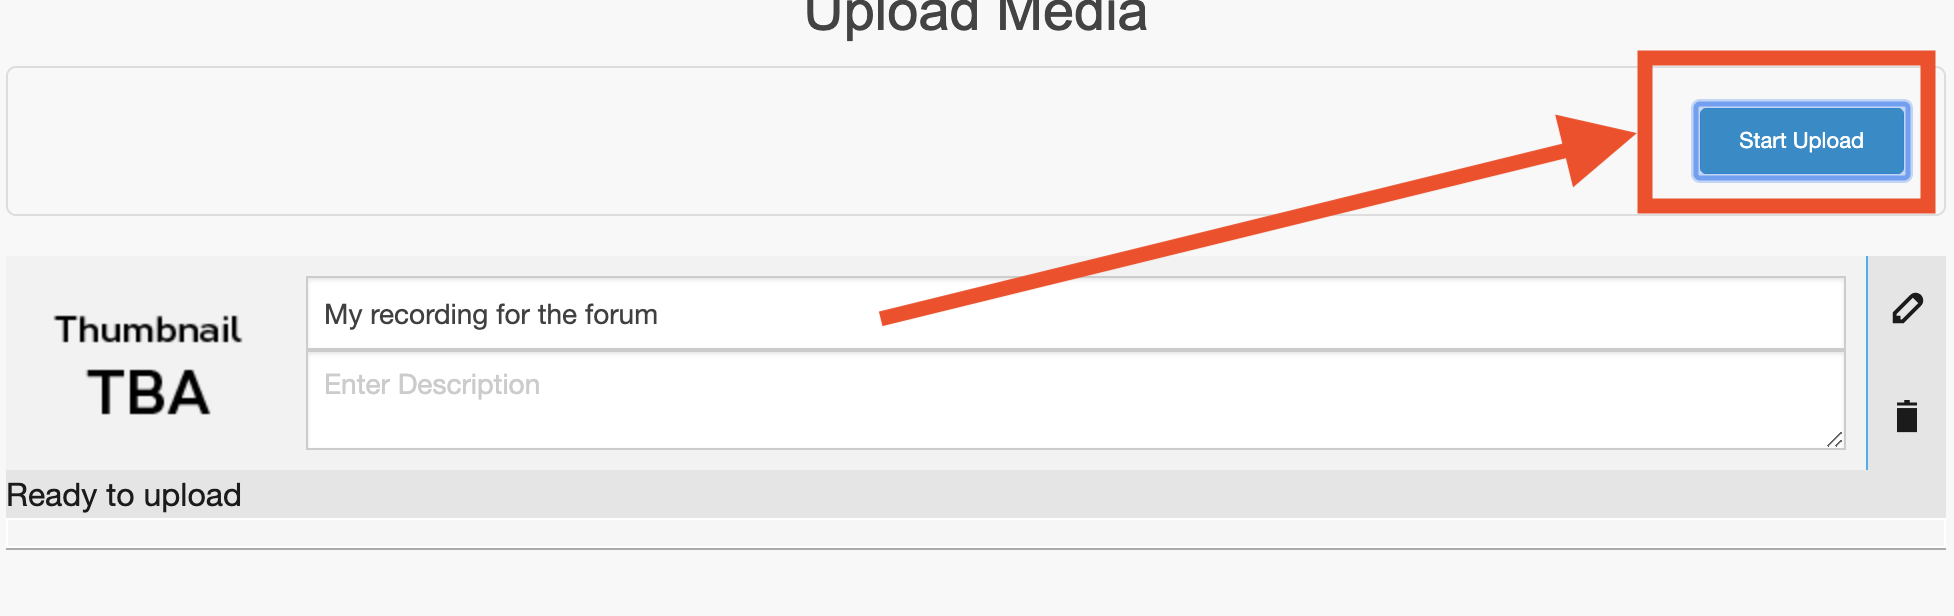
Start upload to Moodle forum - Be patient, and wait until the file completes the upload (depending on the filesize, it may take some time). When it’s complete, you’ll see a preview in the forum, or a coming soon message in the forum – this means the video is being optimised for online streaming.
- It may take a while to convert (depending on the file size and the number of other recordings being added). You do not have to wait for it to convert, however, you will have to press the “Post to Forum” button at the bottom of the screen.
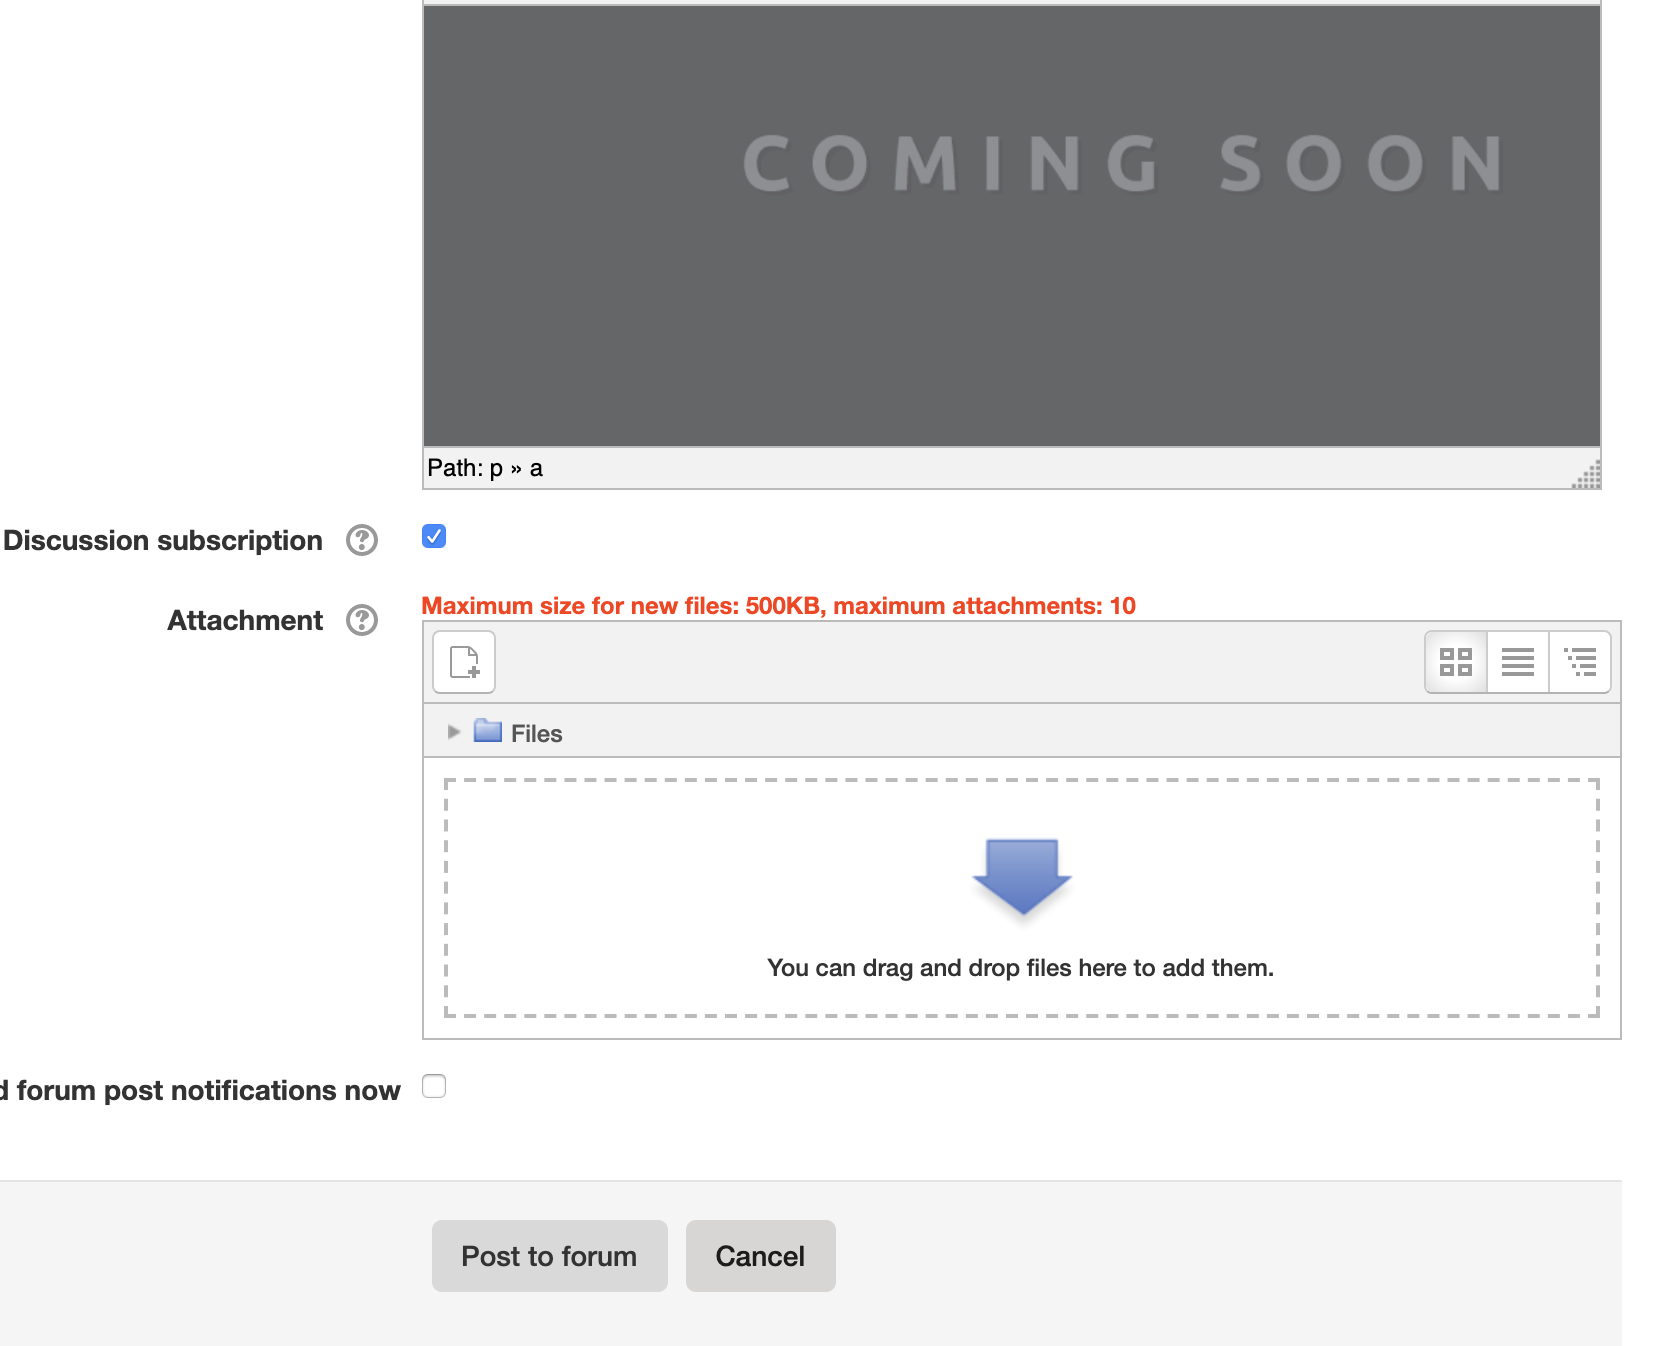
Post to Forum - You’ll be redirected to your post. If you’re still seeing the “Coming soon” screen, after a few moments (once it’s been transcoded), your video/audio file should be available to stream, and you should be to refresh the page and see it.
- If you are having any problems with recordings not transcoding, please see the Troubleshooting eStream uploads articles, or use the live chat function from the bottom of this page. Alternatively, email avsupport@trinitylaban.ac.uk with the details of the forum and we’ll look into it as soon as we can.
Uploading to Moodle Assessments
PLEASE NOTE: You can find a video tutorial on uploading to Moodle assessments, here.
IMPORTANT INFORMATION: If you are uploading multiple media files for an assessment, you must upload them at the same time. If you add a media file to a previously submitted assessment, it will overwrite any previously uploaded media files of that assessment.
- Ensure you have your assessment file ready (see the Preparing your media section above). We would also recommend you use the Google Chrome browser.
- Go to the Moodle course and assessment page.
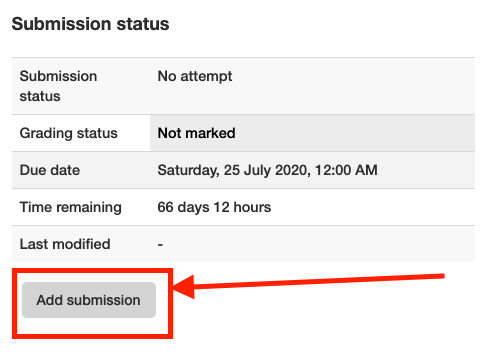
- Click the “Add submission” button.
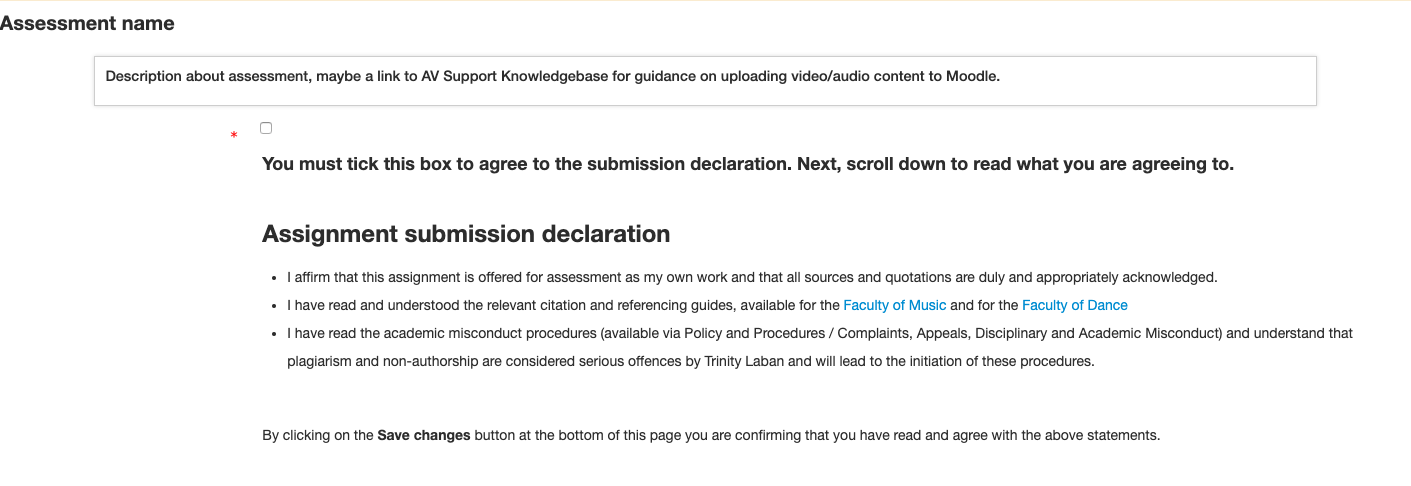
Moodle assessment – Add Submission - Read and then tick the Submission declaration checkbox.
Moodle Assessment – Submission declaration - Slightly further down the page, you’ll see a box with the words “Select Files for Submission“.
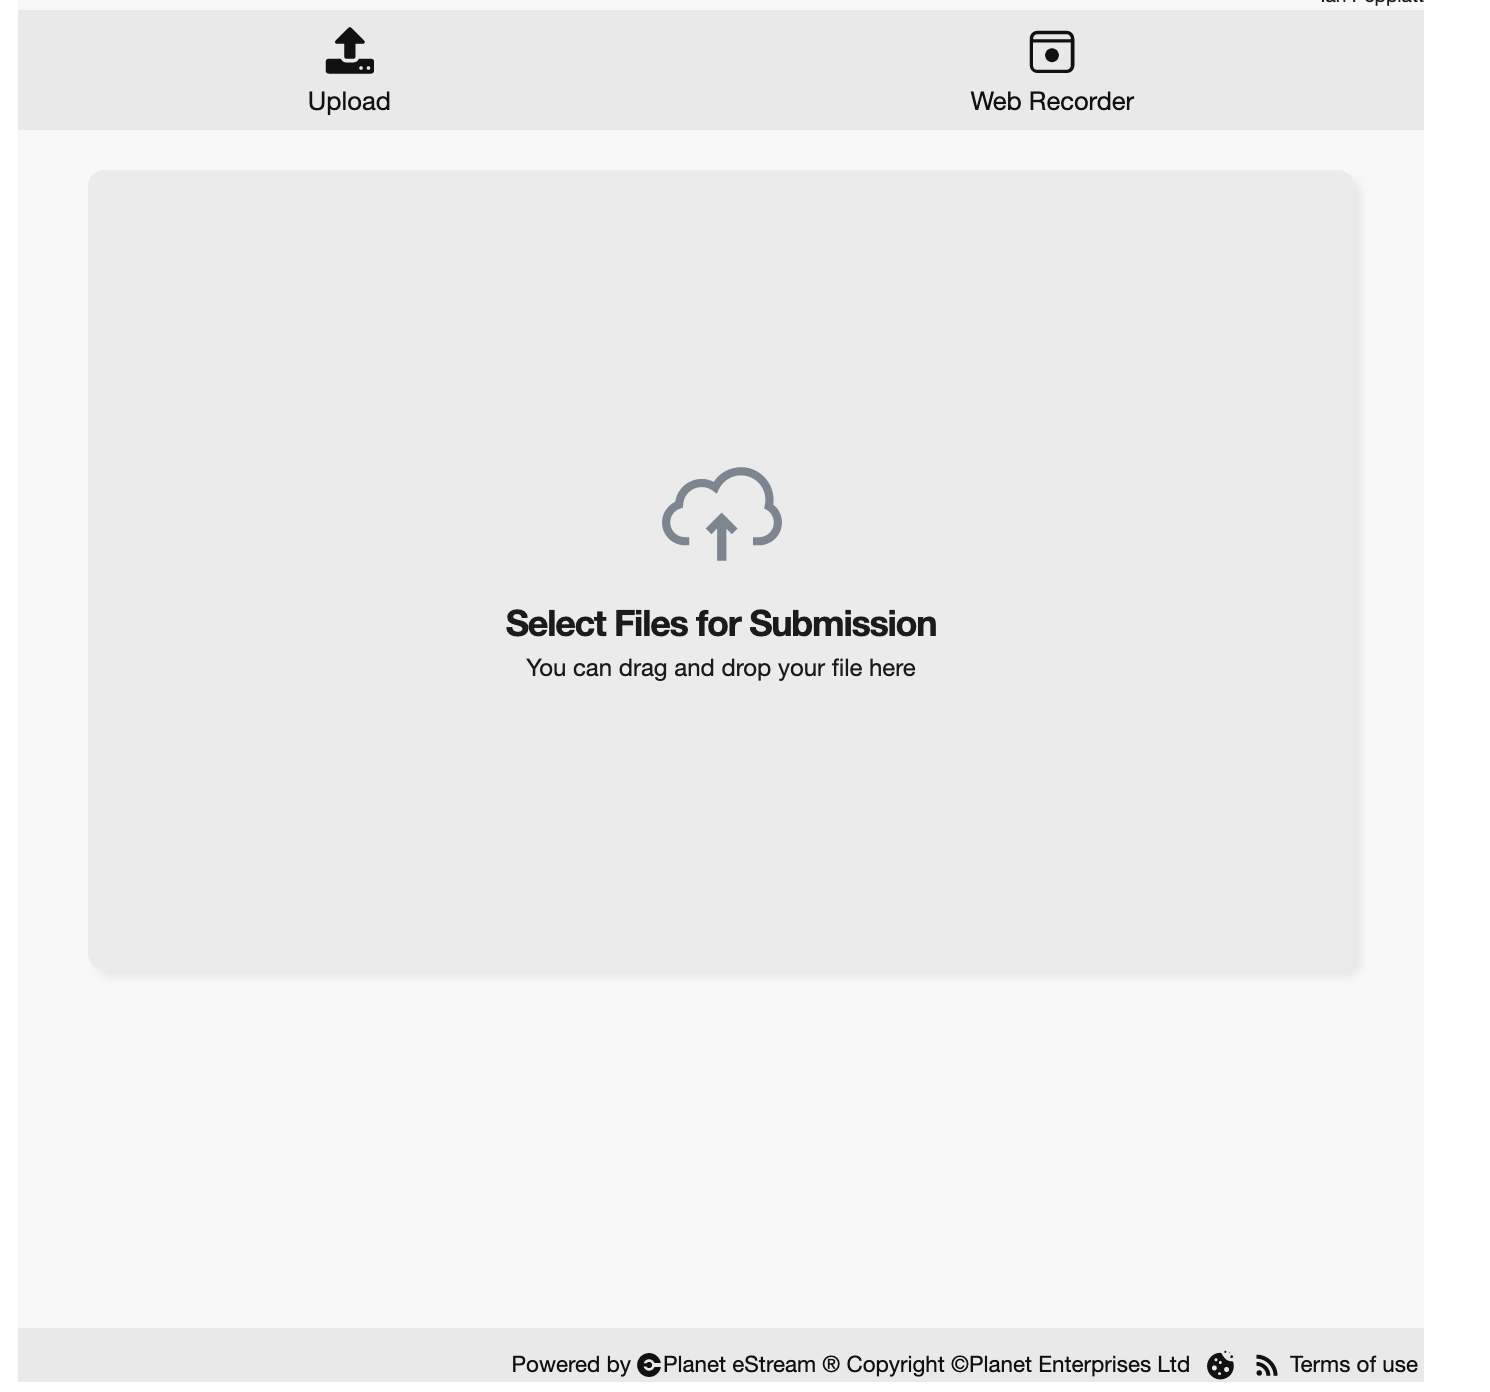
- You can drag and drop your files onto this area, or click the box and the file selector will display to select the file you’d like to add as your assessment
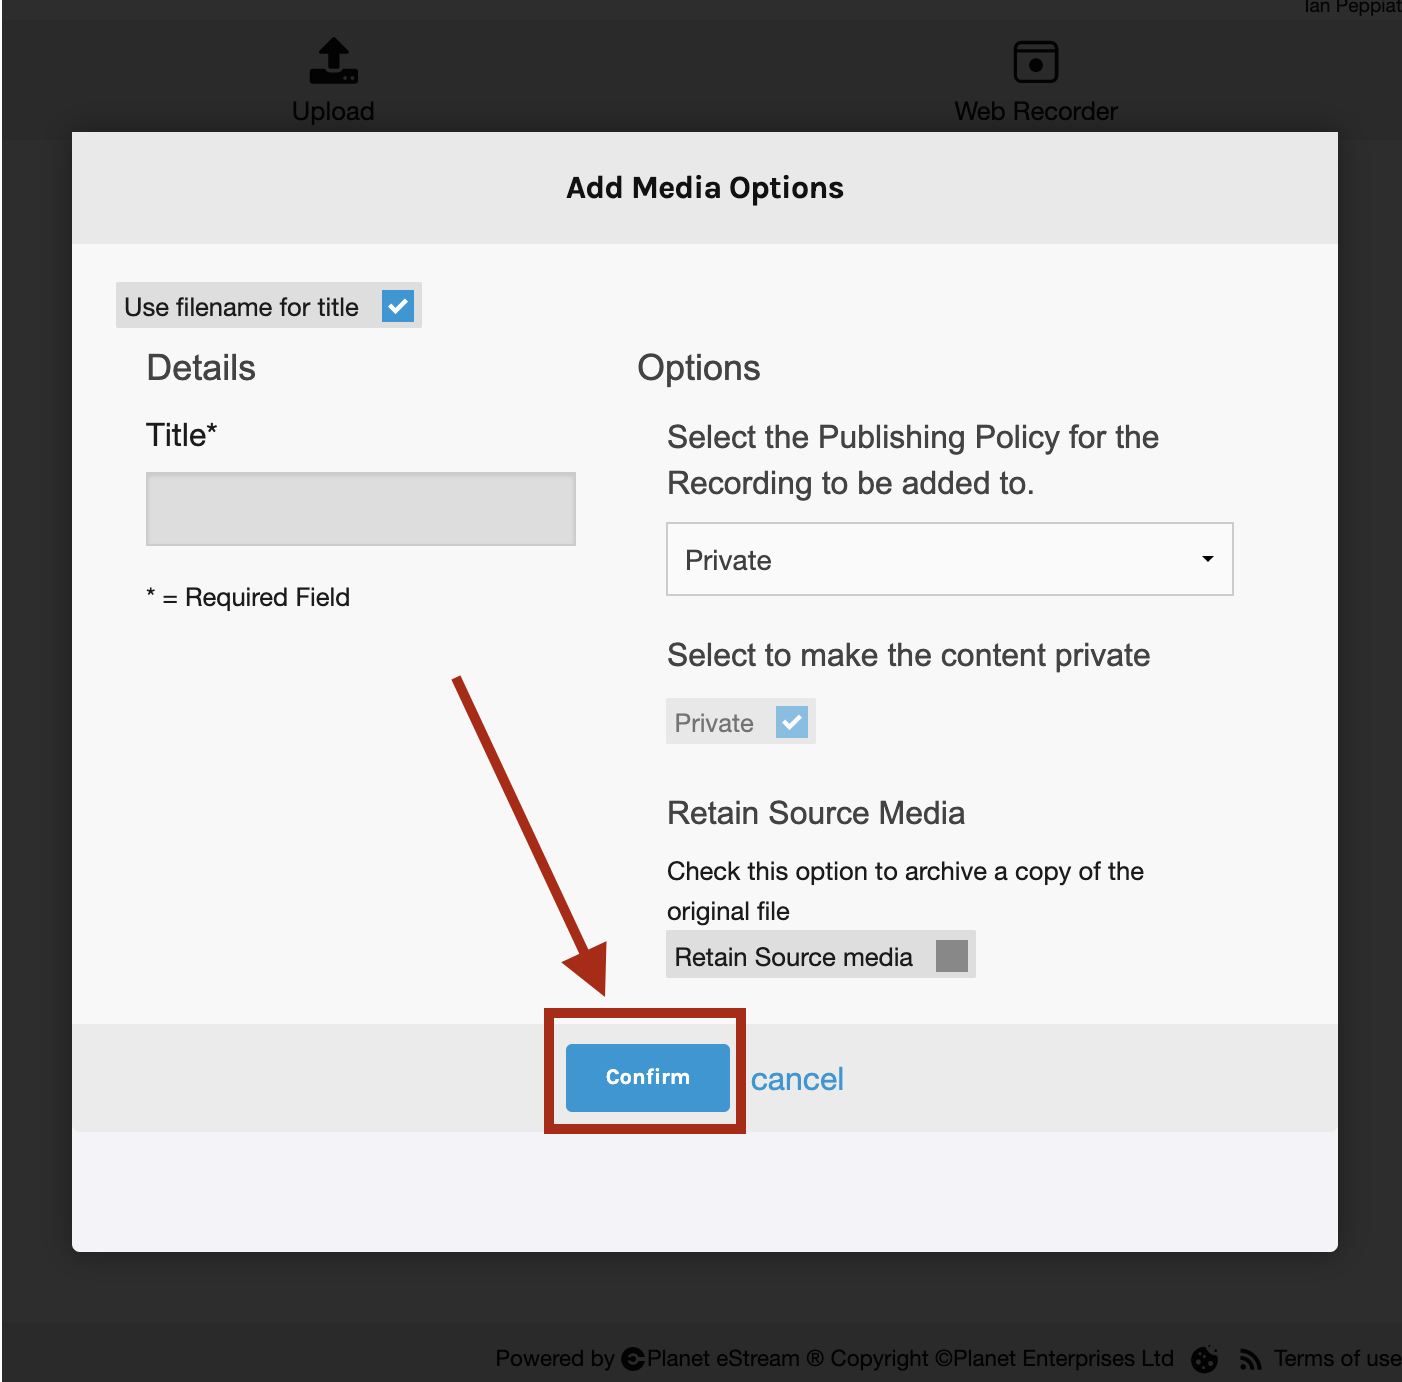
File selector - Press the “Confirm” button on the window that appears.
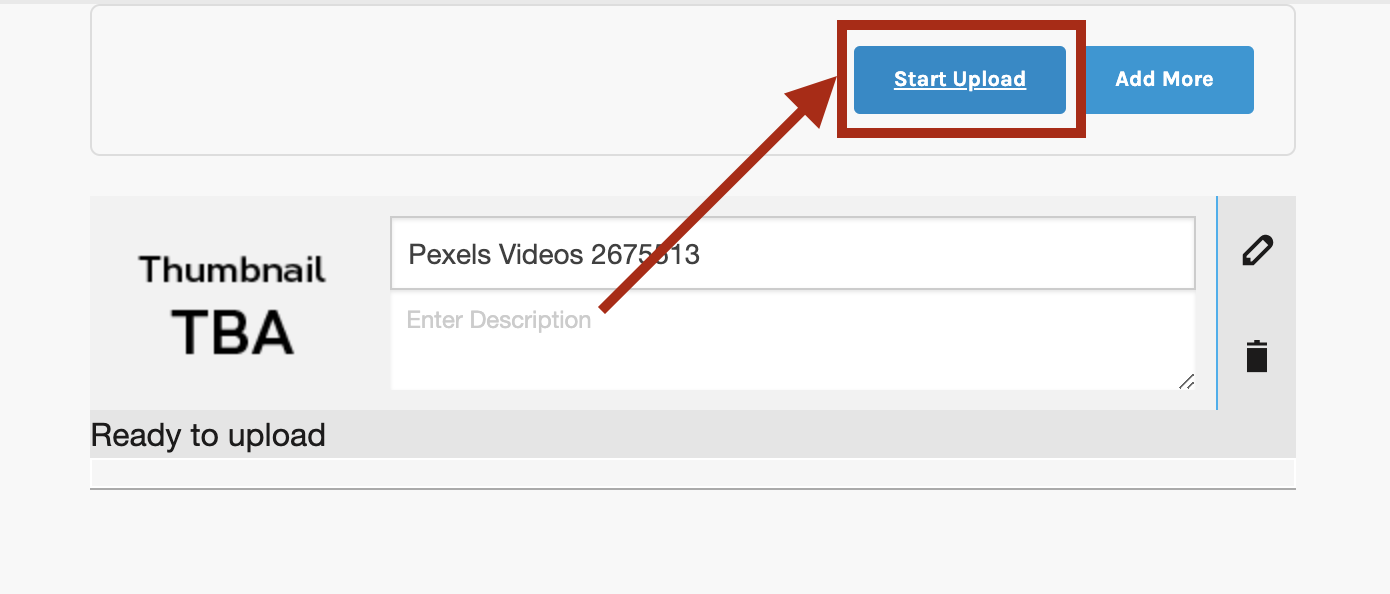
- If you need to add additional video/audio files, click the “Add more” button, and repeat steps 6-7. When all the recordings you want to include are listed, press the “Start Upload” button
 .
. - A progress bar will appear showing how much of the upload has occurred. Please be patient, stay on the page, and do not do anything until the upload completes. When the file is fully uploaded a message will appear:
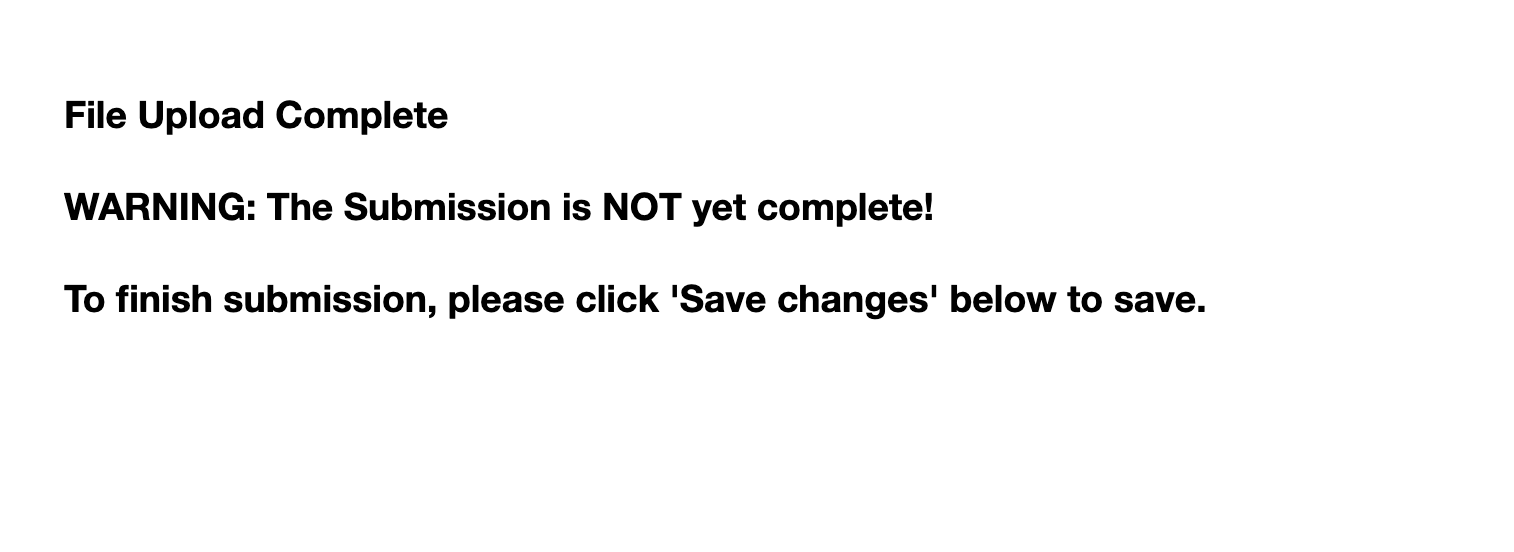
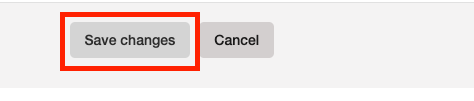
- You are now ready to hand in your assessment! To do so, click the Save changes button at the bottom of the page.
Moodle Assessment – save changes button - Your assessment is now almost complete, and you should see either:
- a thumbnail of your recording with a play button where you can stream the recording – if so, everything is great and your recording has successfully been uploaded and you don’t need to do anymore. Go and treat yourself to a cup of tea!
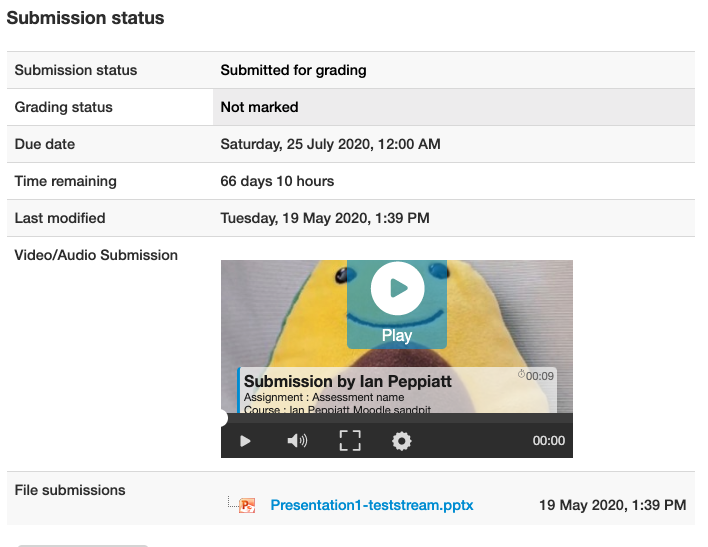
Moodle Assessment – successful upload - or, a message saying that your file is “Coming soon“- this means your recording has been added to a processing queue and is currently converting. This process may take between a few minutes and an hour or so (depending on its length and how many other recordings are in the queue). You can leave the page and check again in half an hour or so to see if the conversion has been successful (and shows the .
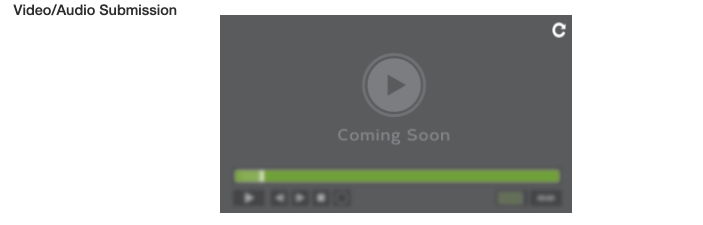
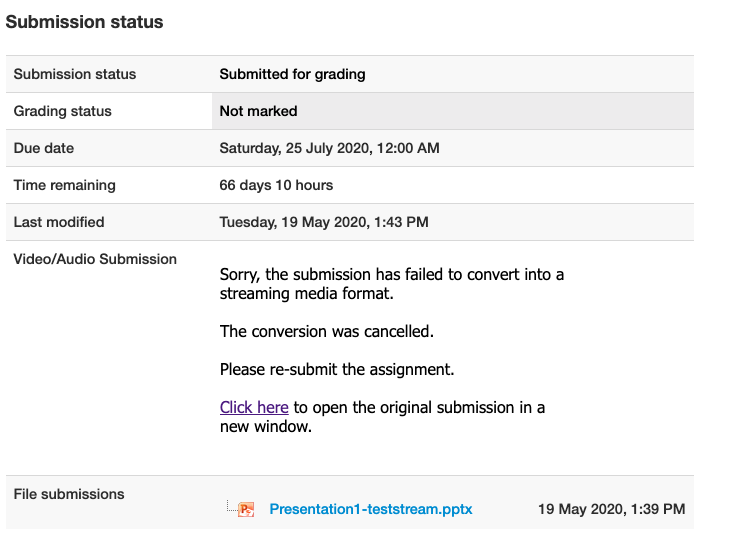
Moodle Assessment – coming soon - If you see an error message saying something like “Sorry, the submission has failed to convert into a streaming media format“, you should contact AV Support immediately and we’ll help get this sorted. You can find details of how to contact us on our Help & assistance page, or between 9am and 6pm Monday to Friday, via our Live chat widget at the bottom right of this page (and every other page on this knowledgebase).
Moodle Assessment – Error message
- a thumbnail of your recording with a play button where you can stream the recording – if so, everything is great and your recording has successfully been uploaded and you don’t need to do anymore. Go and treat yourself to a cup of tea!
Uploading to eStream directly
Students can upload to eStream directly, however, no one else will be able to view the uploaded content – unless it is embedded in another location.
See the instructions on uploading to eStream directly, but please be aware students only have the “Private” option.
Getting additional help
Please see the Help & assistance page for ways of contacting the AV Support team to get additional help.