
Exposure
Understanding exposure is essential to understanding some of the advanced camera settings in these articles. Exposure is the process of making sure images are the correct brightness. That means the lightest and darkest parts of the image are rich but aren’t clipping.
If there is not enough, or too much, light hitting the camera’s sensor it cannot record the image you are capturing accurately. As a result, clipping occurs and you lose definition in parts of your image. Often this cannot be corrected in post-production. Therefore, it is advised you expose your image to capture as much detail as possible and then use post-production software to alter the look of the image.
When we think of photography or video, we often think of exposure as a triangle. The Exposure Triangle outlines the relationship between three camera settings ISO, aperture and shutter speed. These three settings need to be balanced to achieve a well-exposed picture.
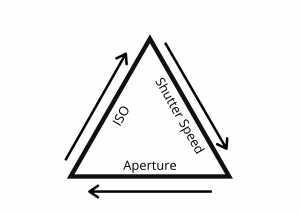
As you can see from the diagram above when you change one of the three settings, you have to change another to ensure the exposure is correct. This may mean reducing the aperture when you increase the shutter speed, for example.
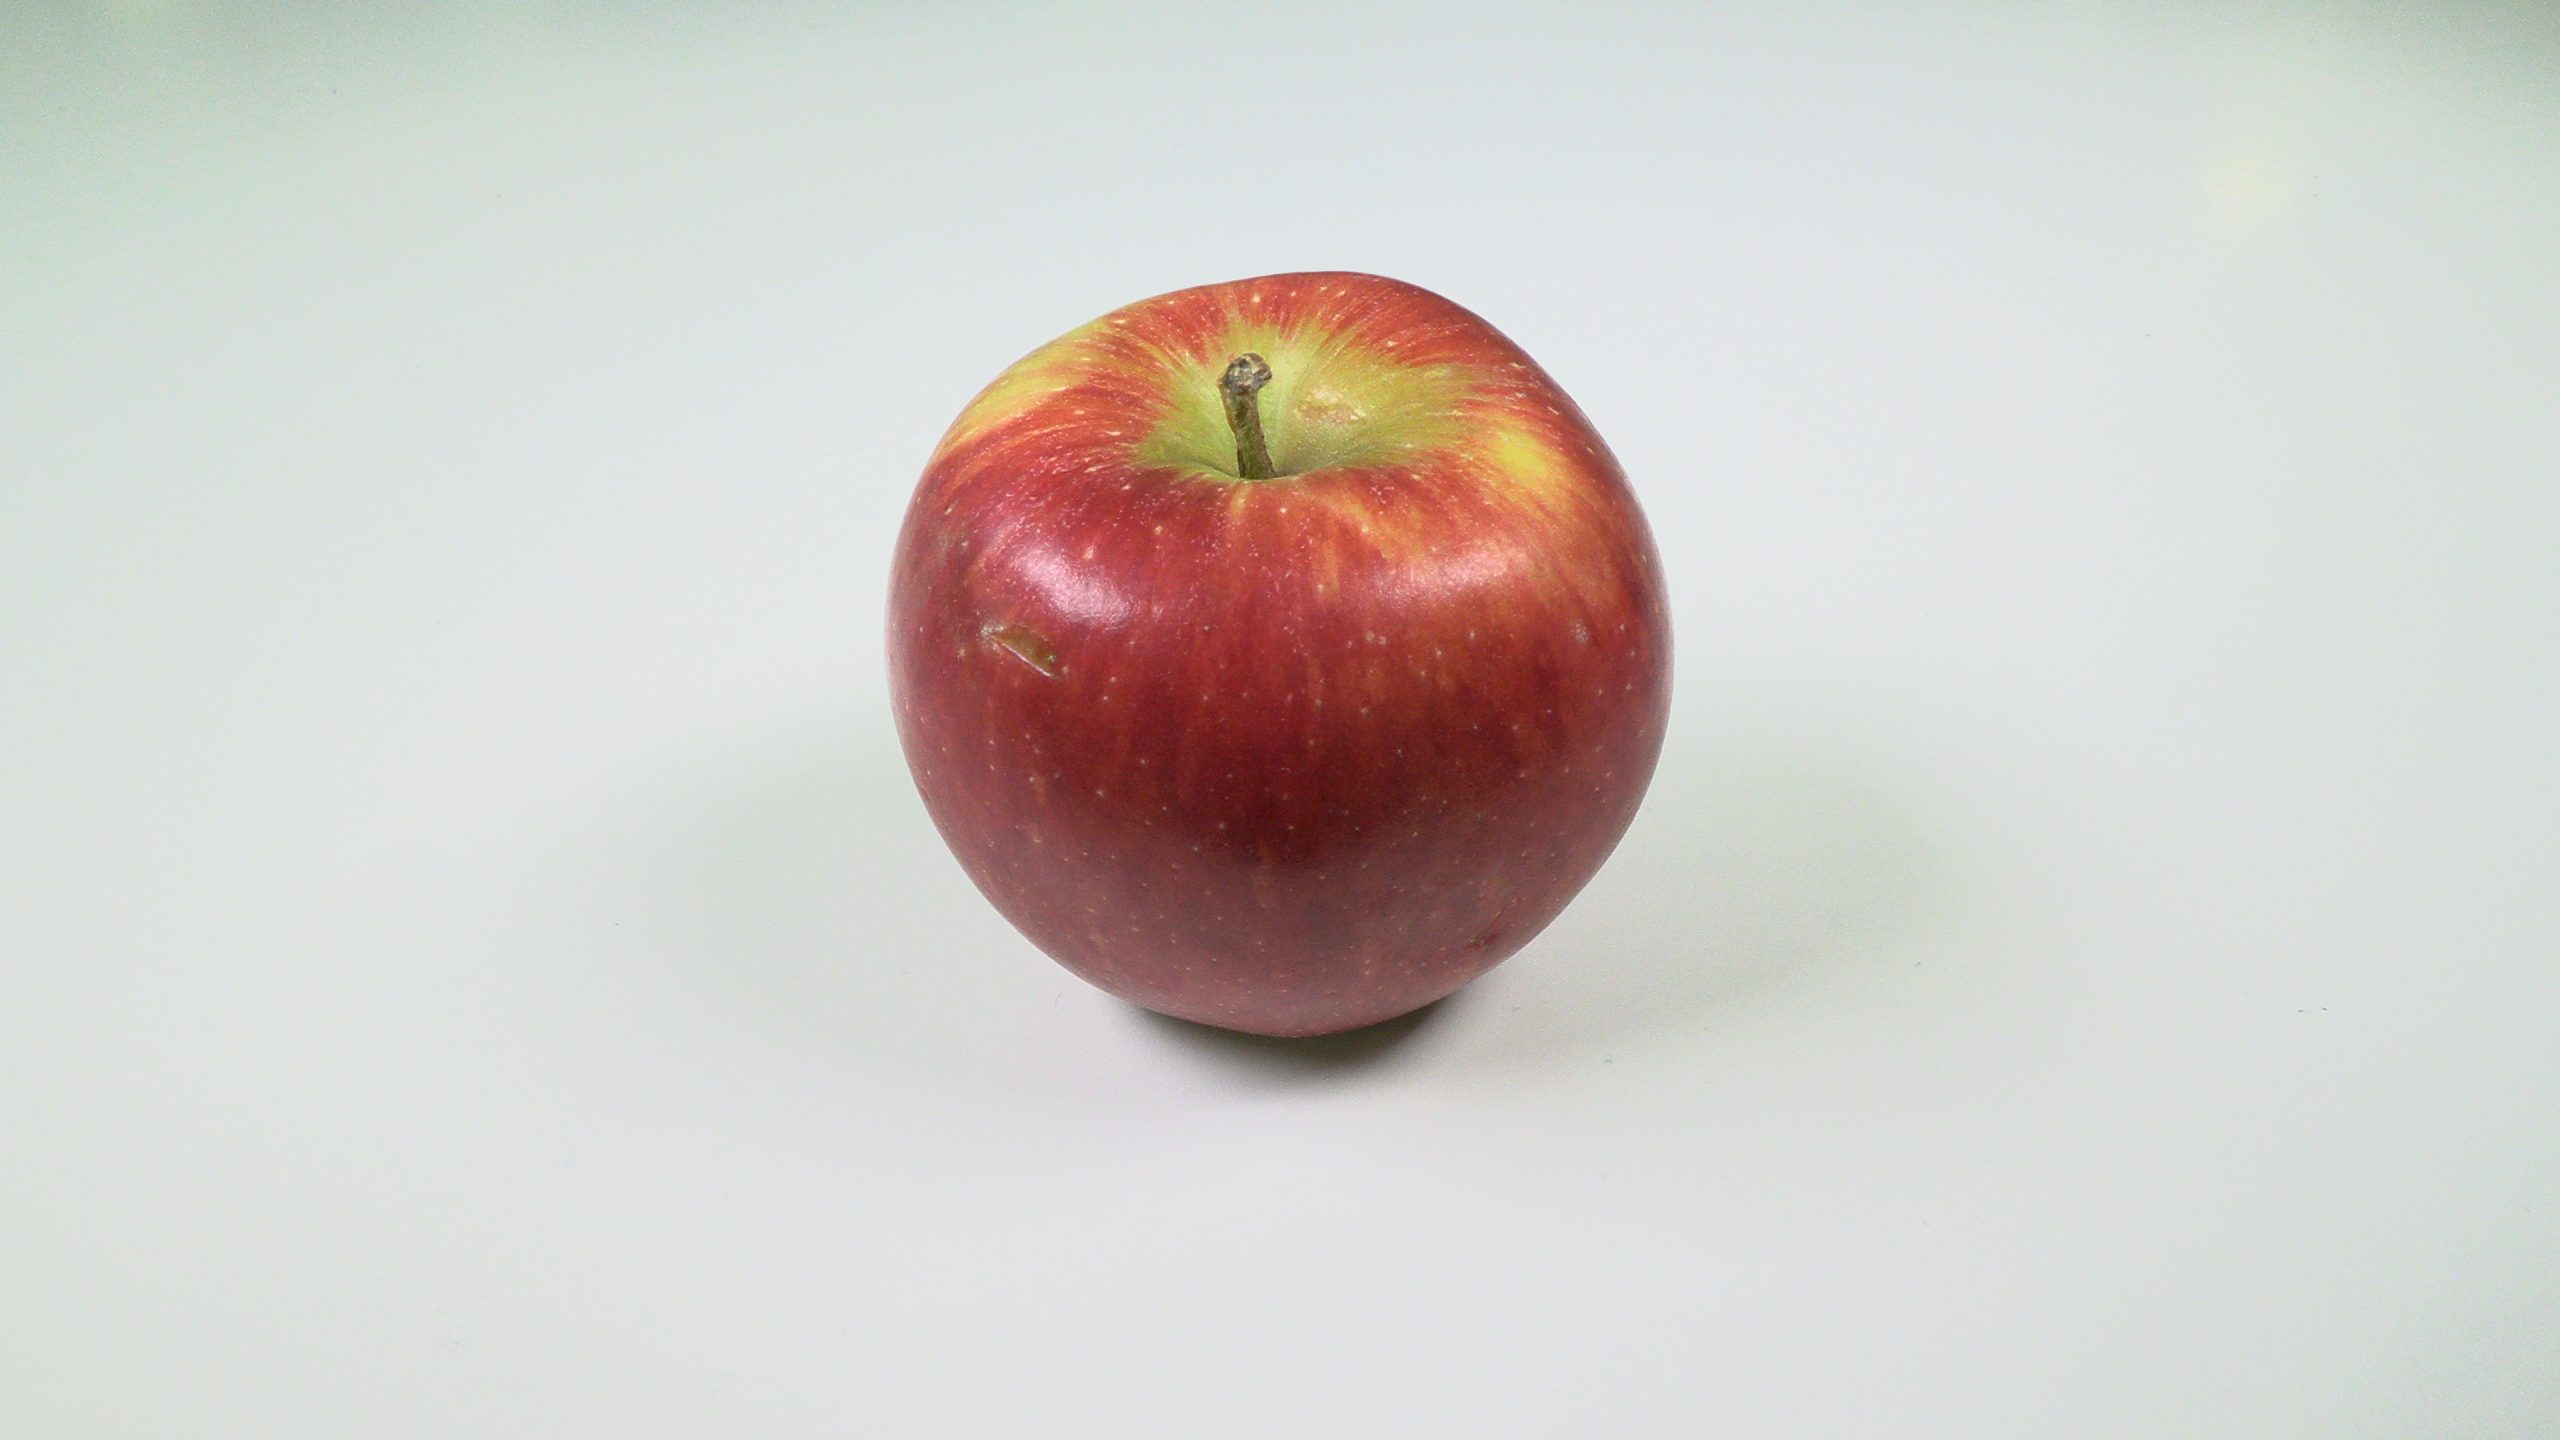
- well-exposed picture
-
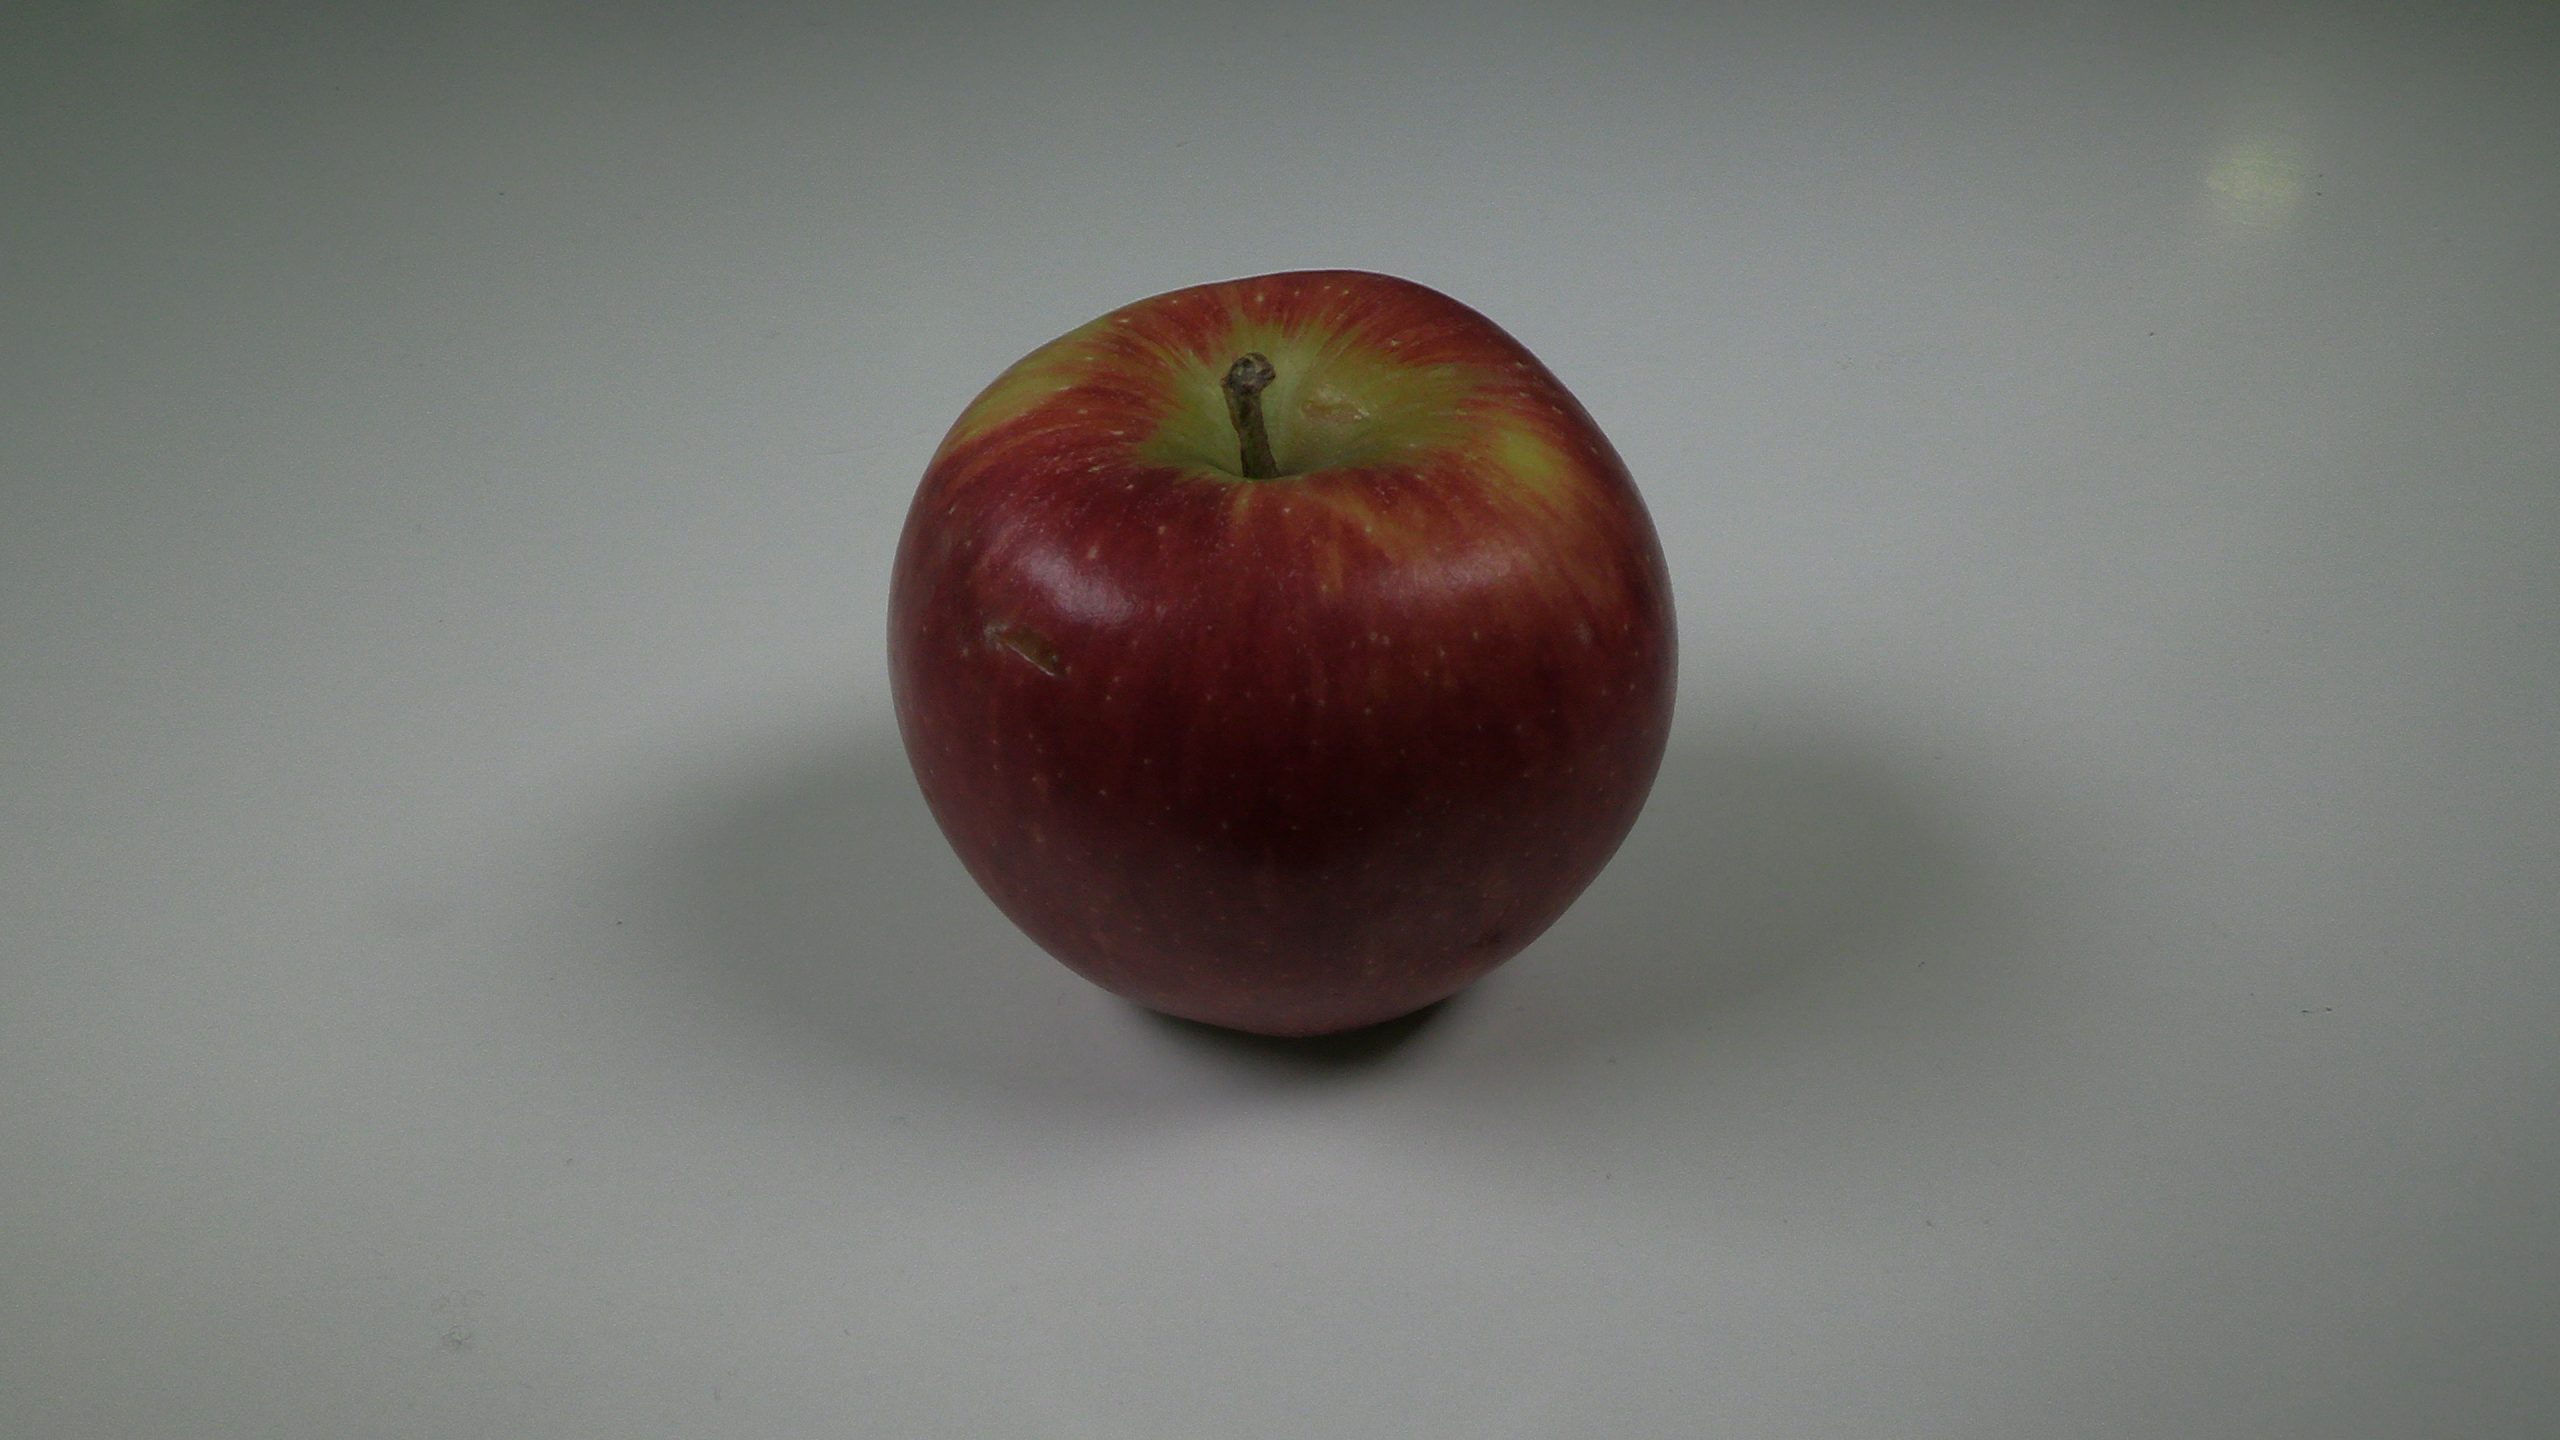
- under-exposed picture
-
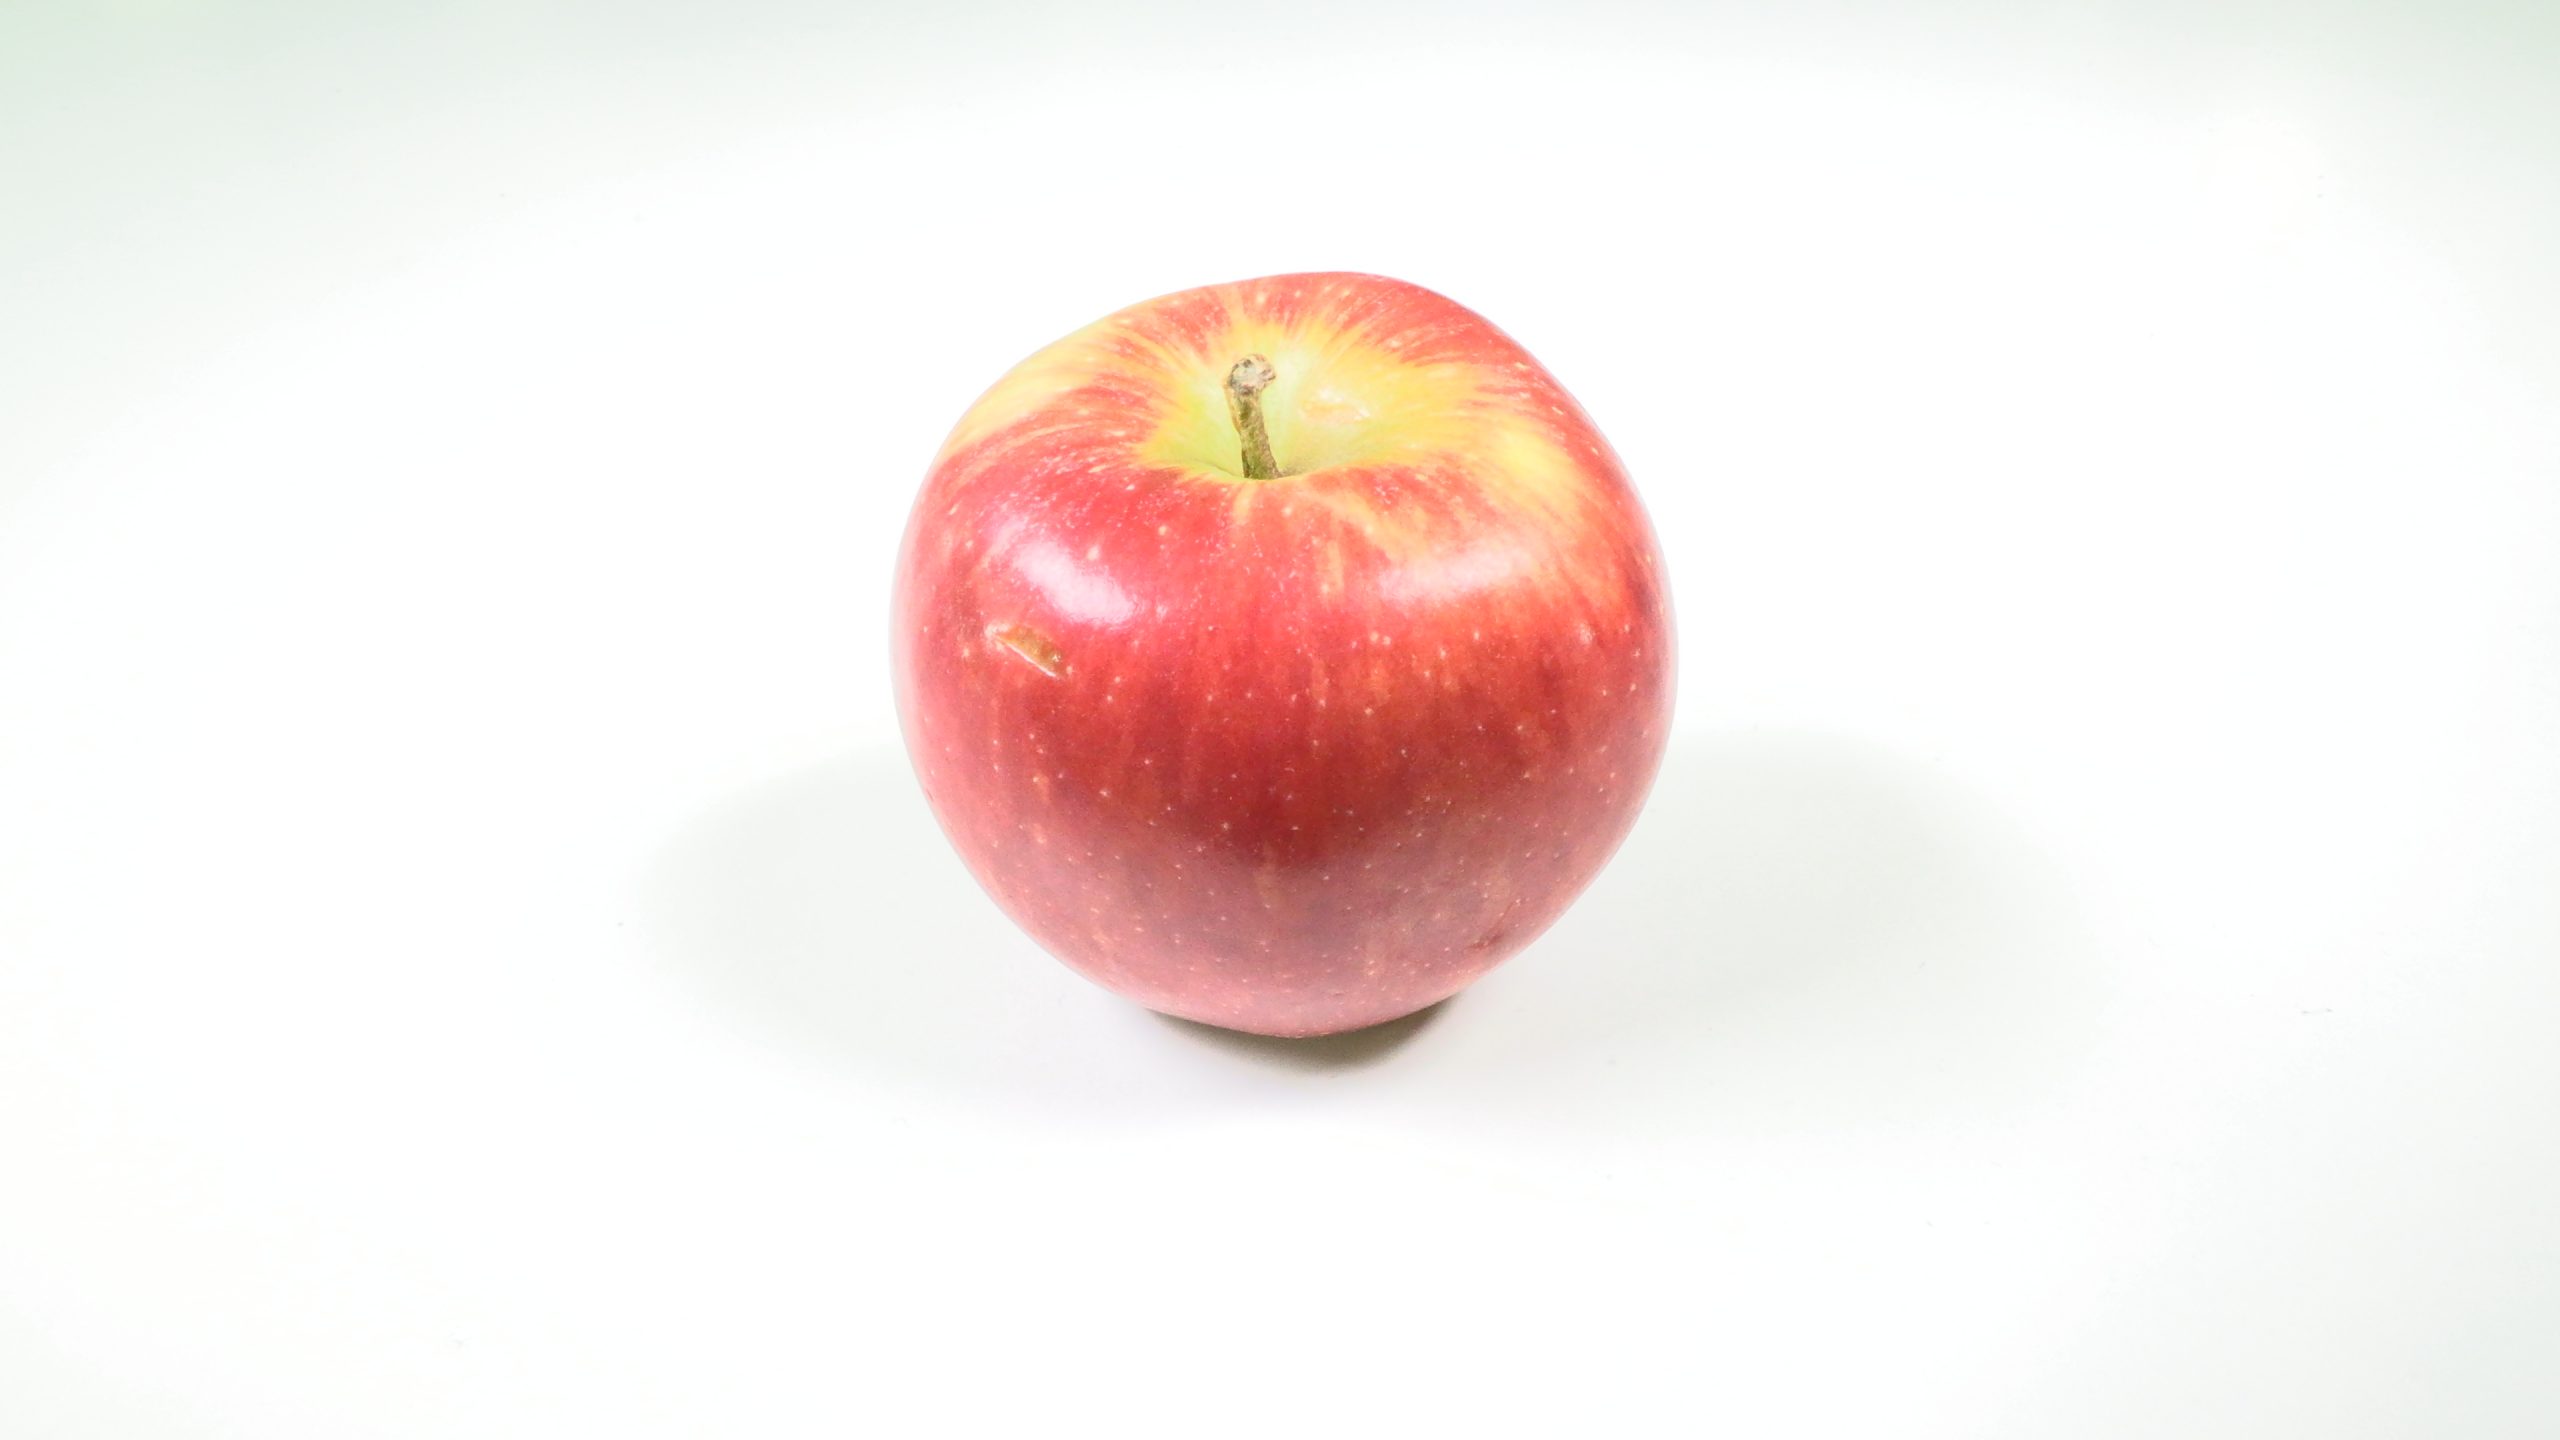
- over-exposed picture
The triangle points – ISO, aperture, shutter speed
But what do each of the three settings do?
We have three articles, one about each setting, which will explain the setting in detail. We’ll also show you what changing each setting will do to the images you produce and how to find them on Laban cameras.
The articles can be found here:
Ensuring Good Exposure
So how do you know if your images are exposed properly?
You can use certain settings on your camera to make sure the exposure is correct.
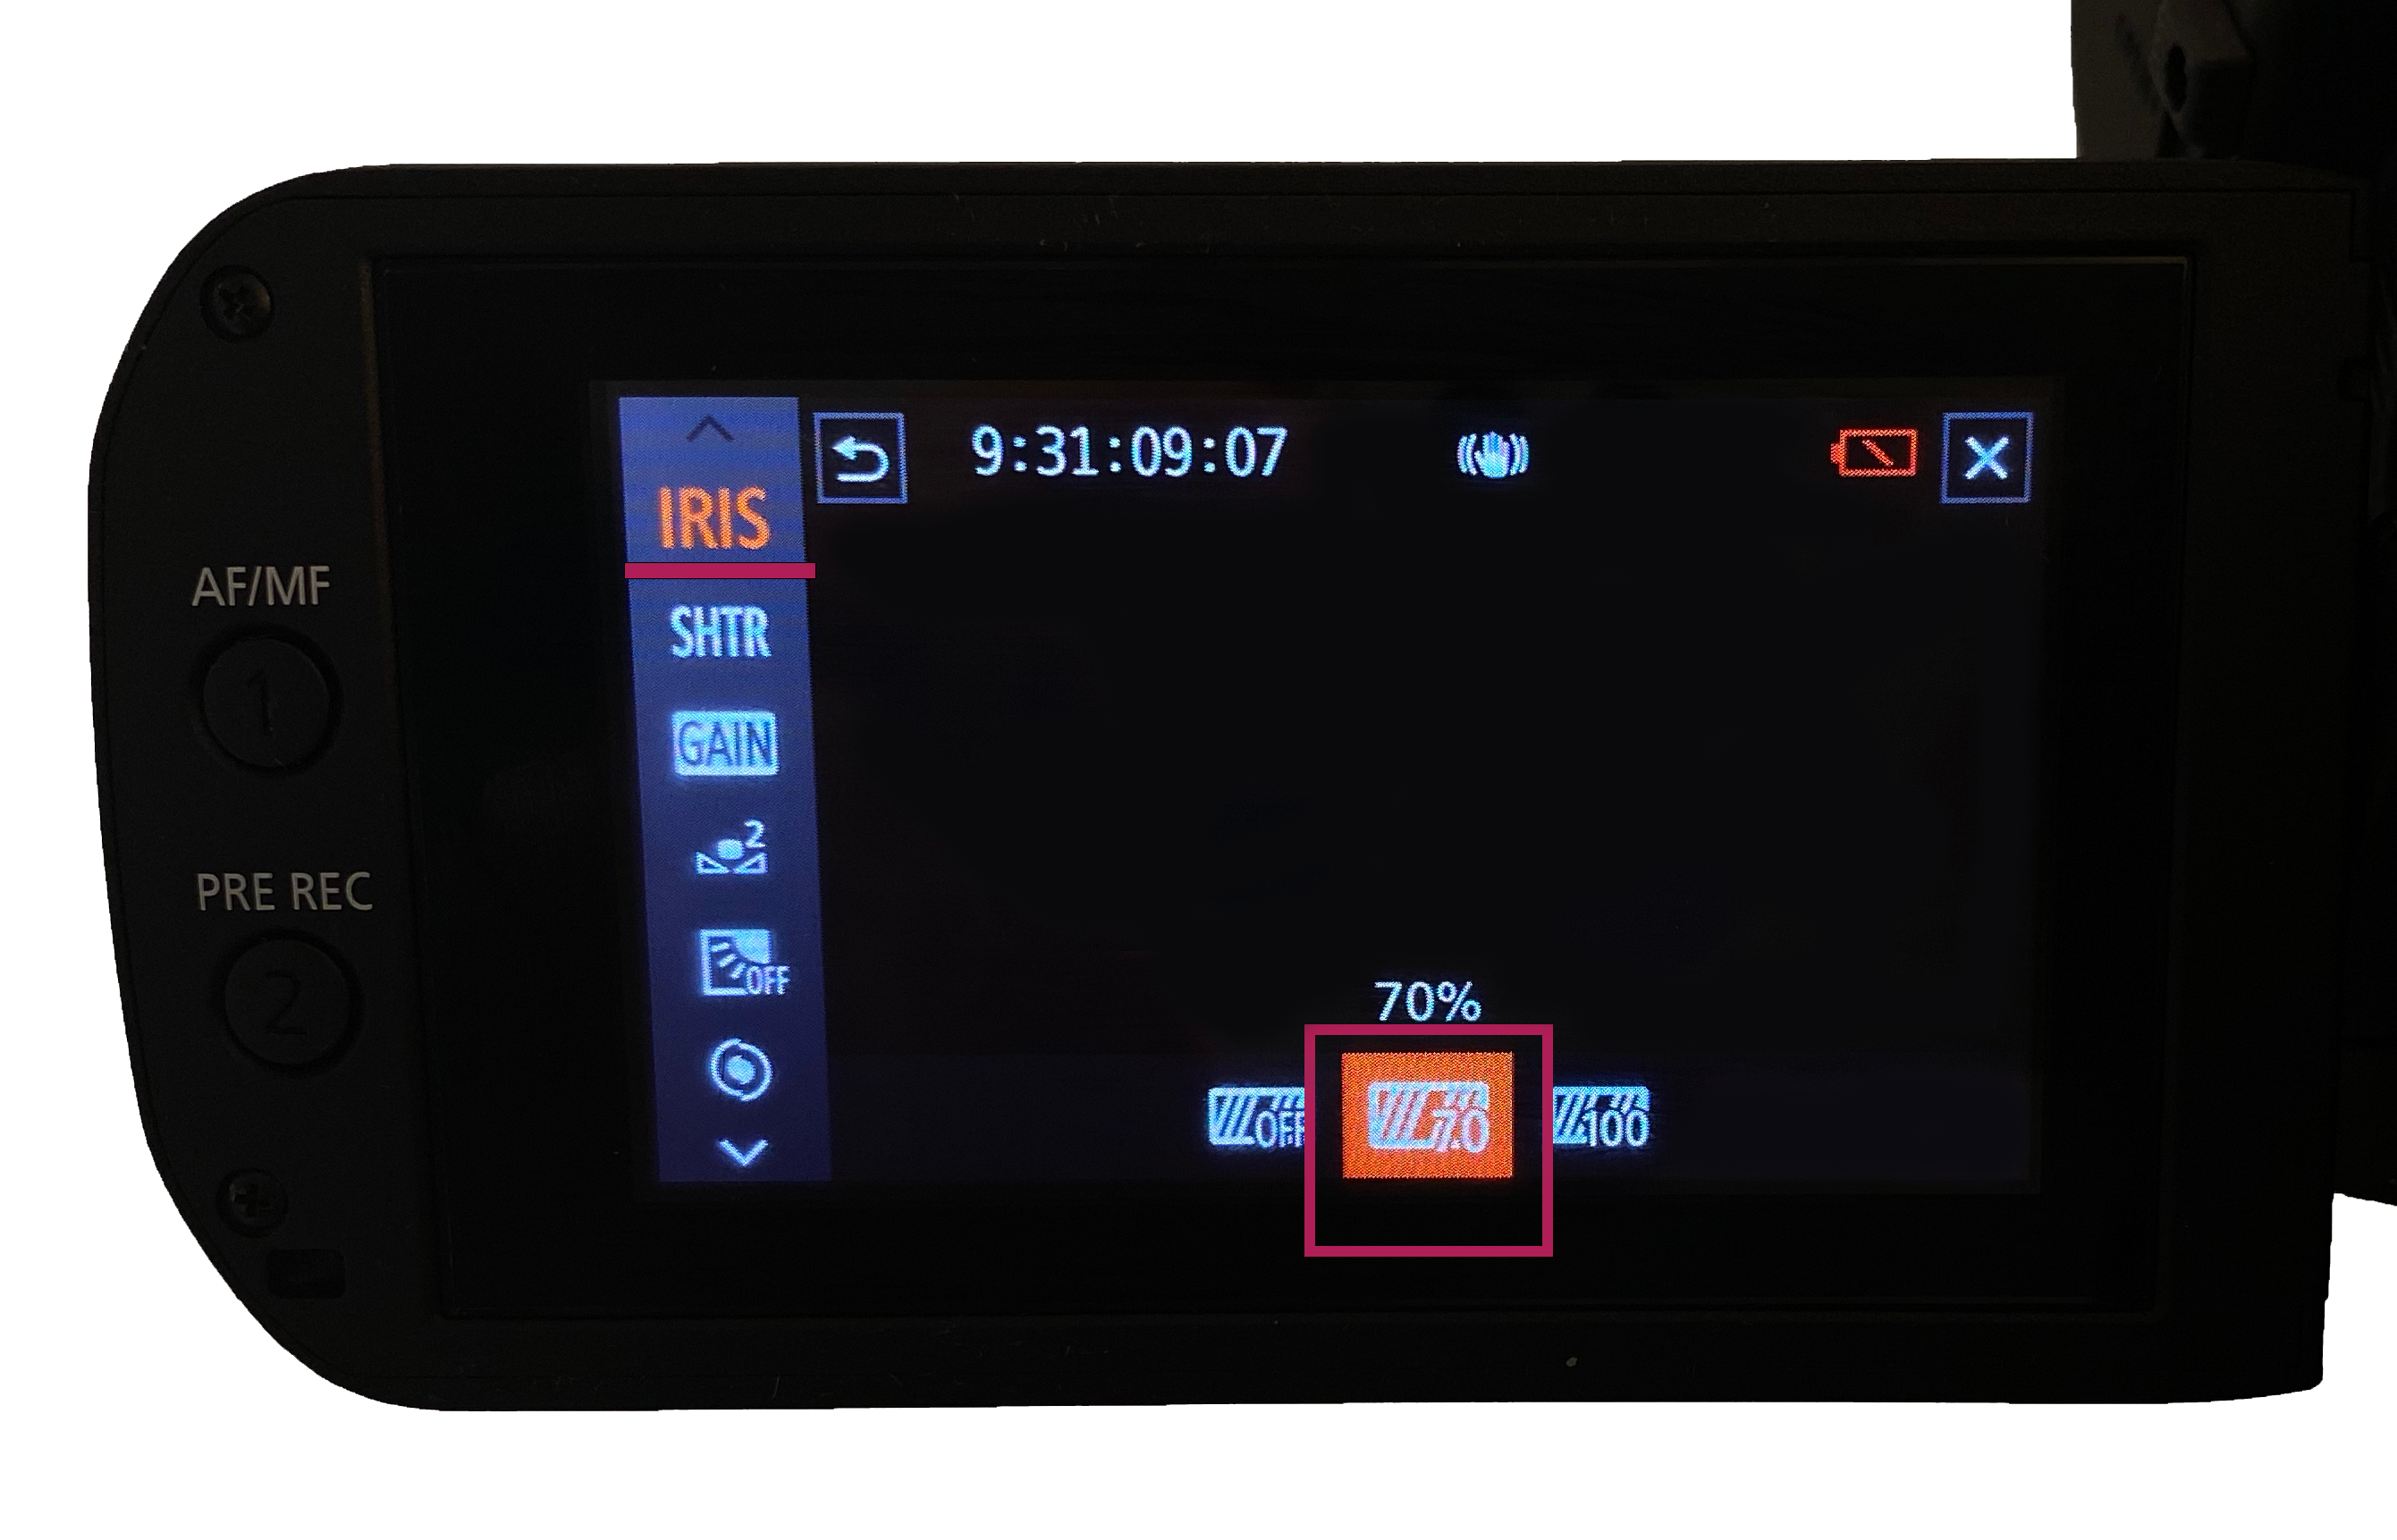
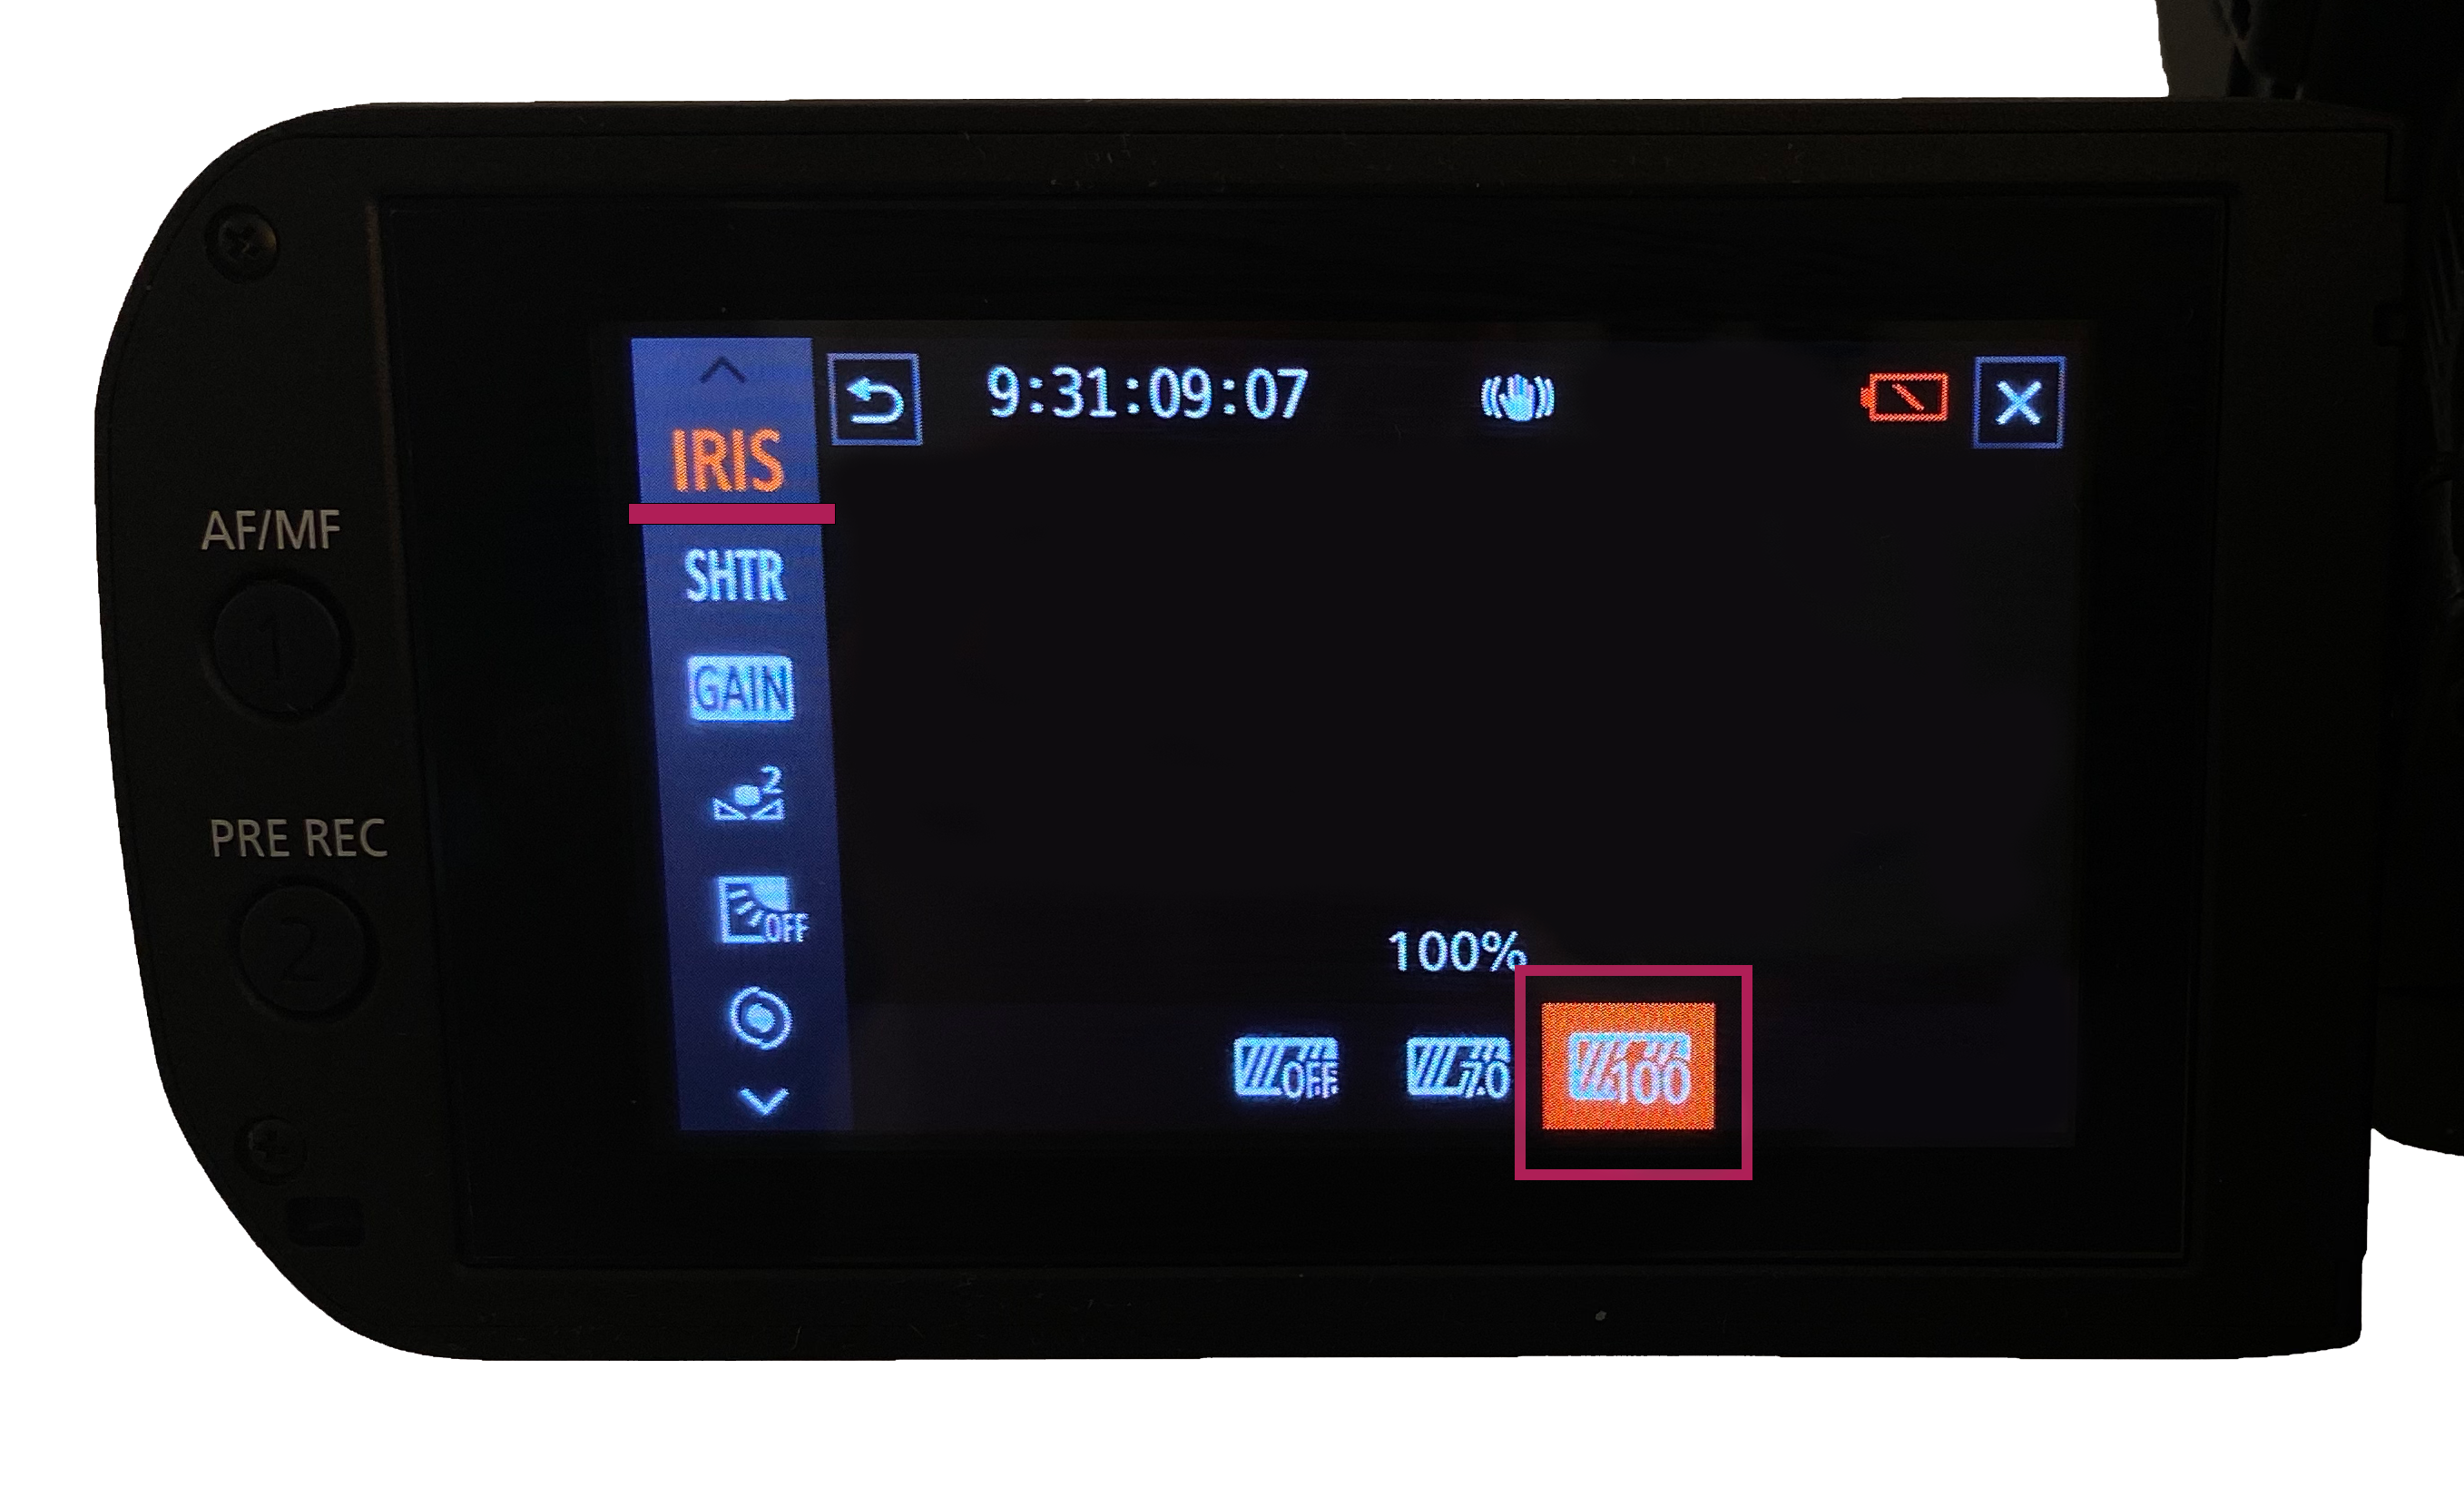
One such setting is “zebra” highlights. This places black and white stripes over areas of the image the camera believes to be overexposed. These stripes don’t appear on the final image, just the LCD screen at the back of the camera. You can set the zebra to appear at certain thresholds. The most common are 70% and 100%.
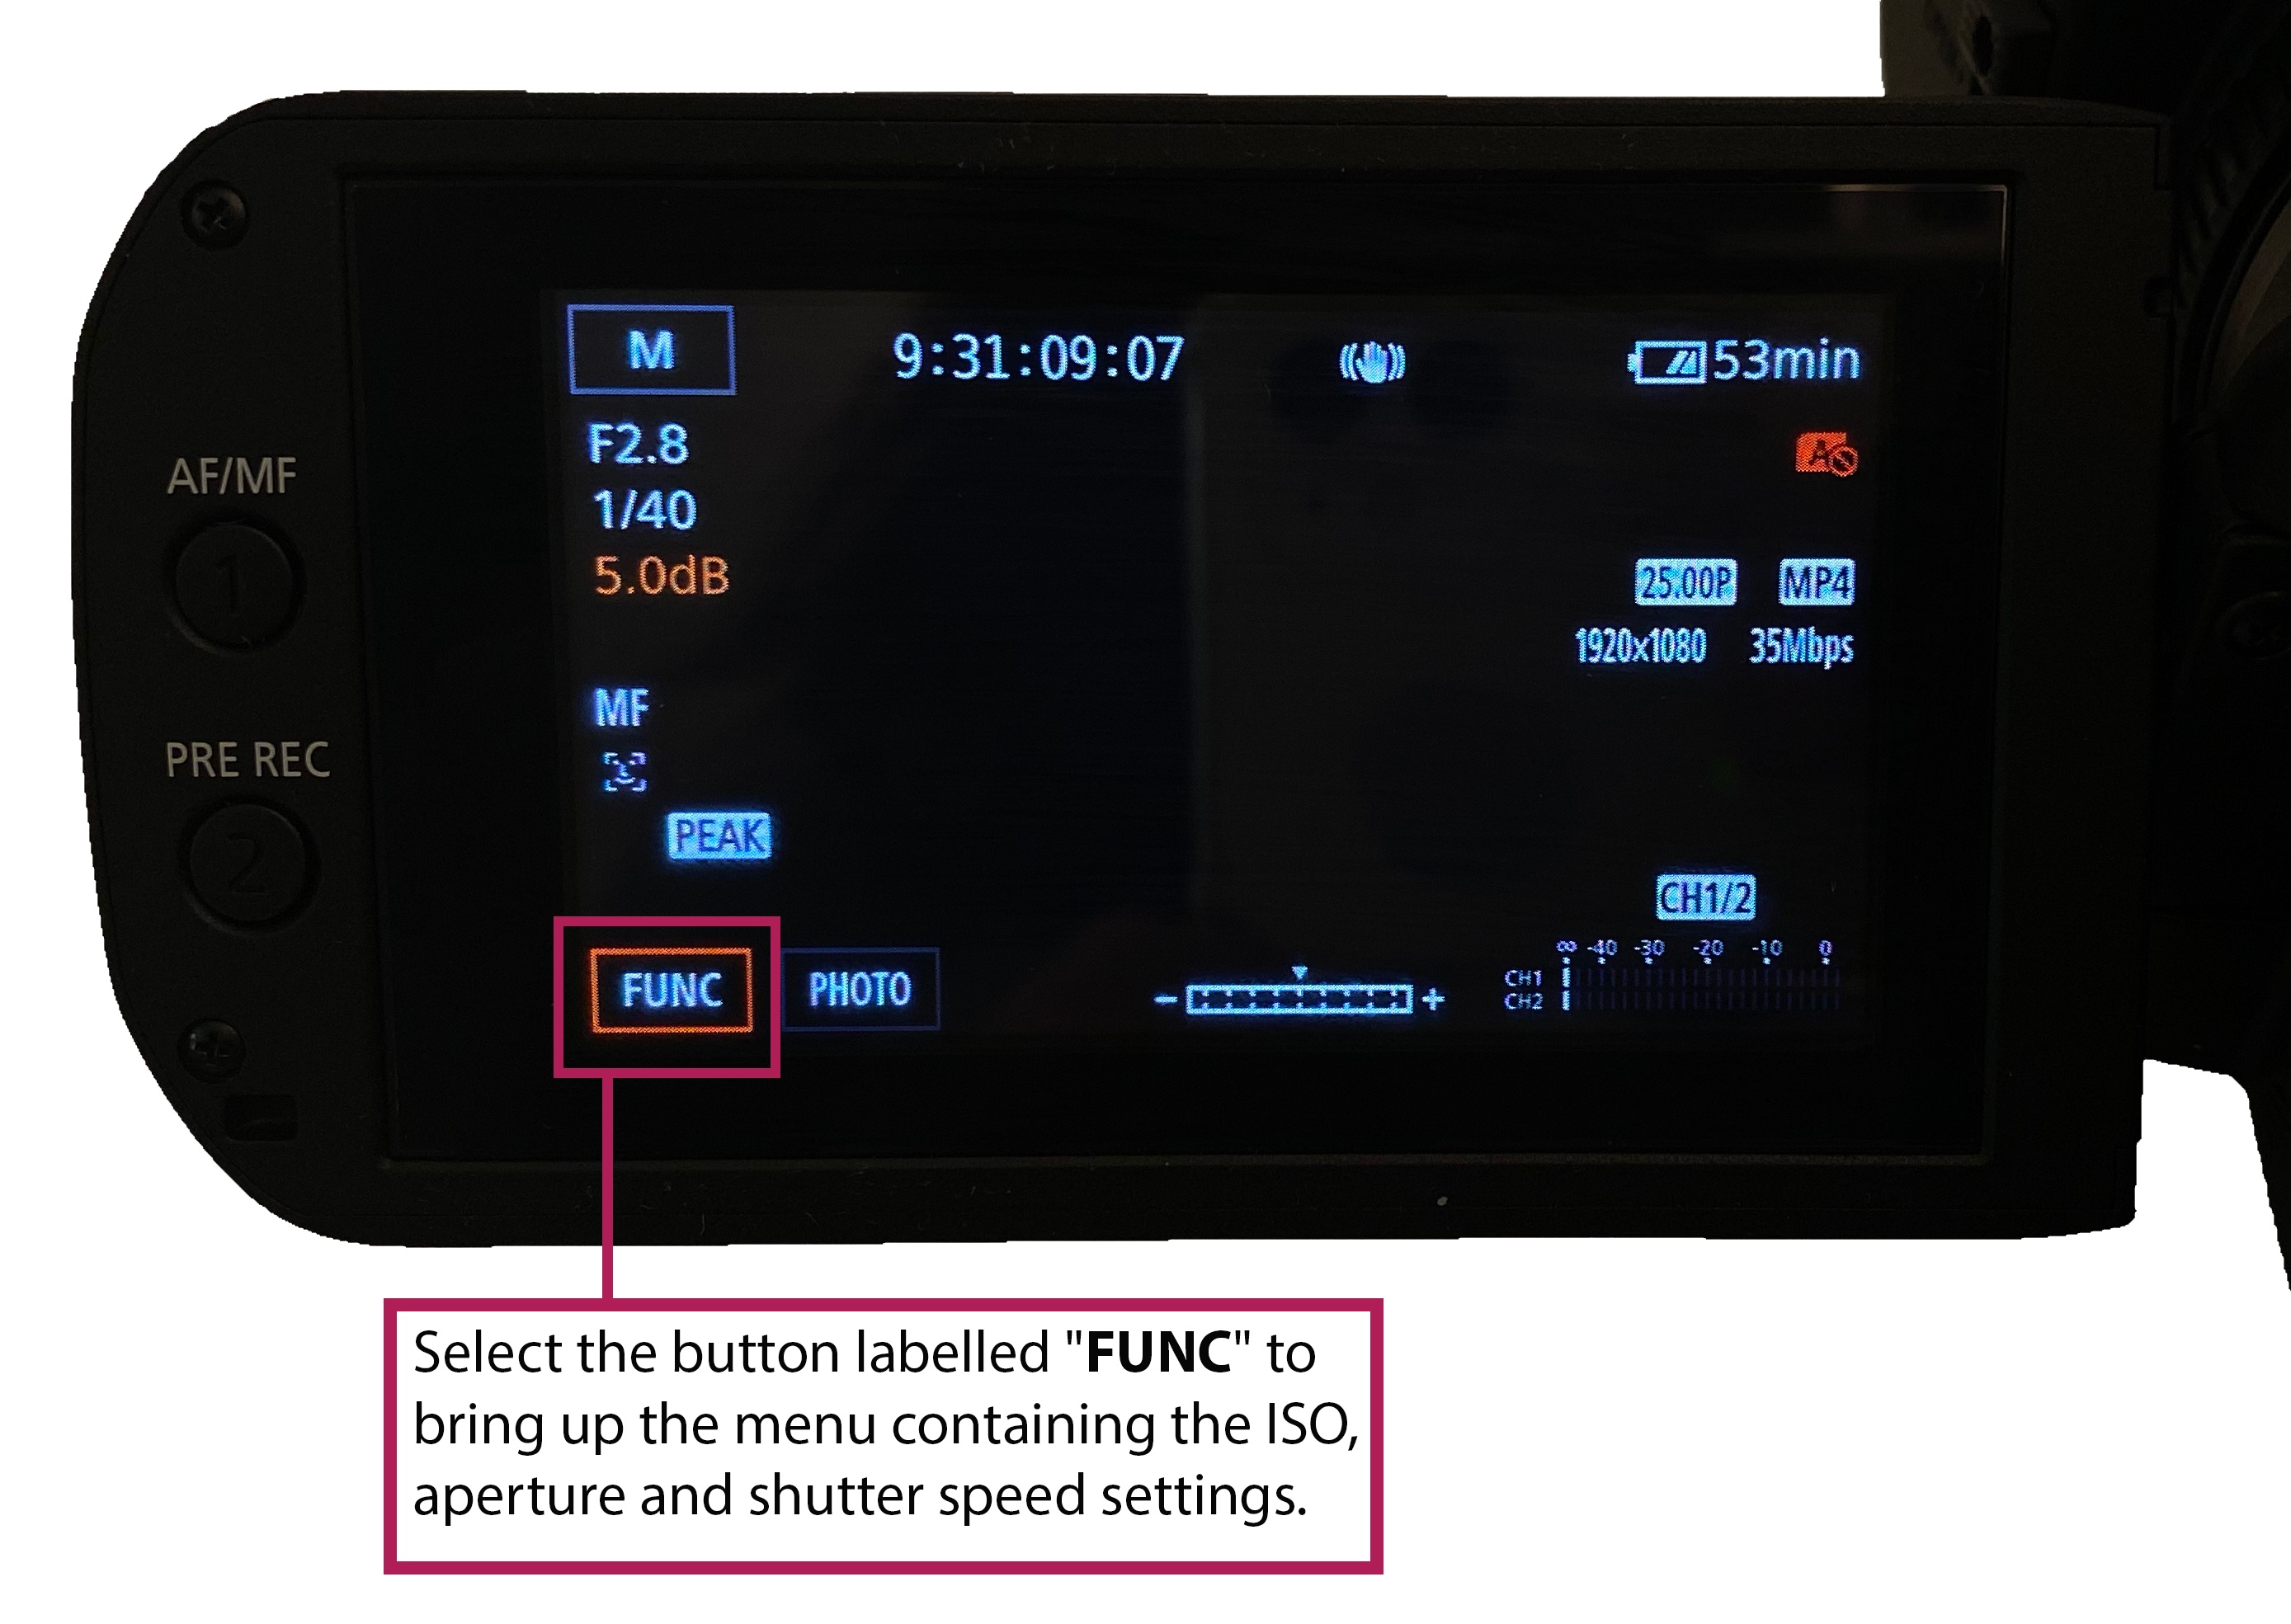
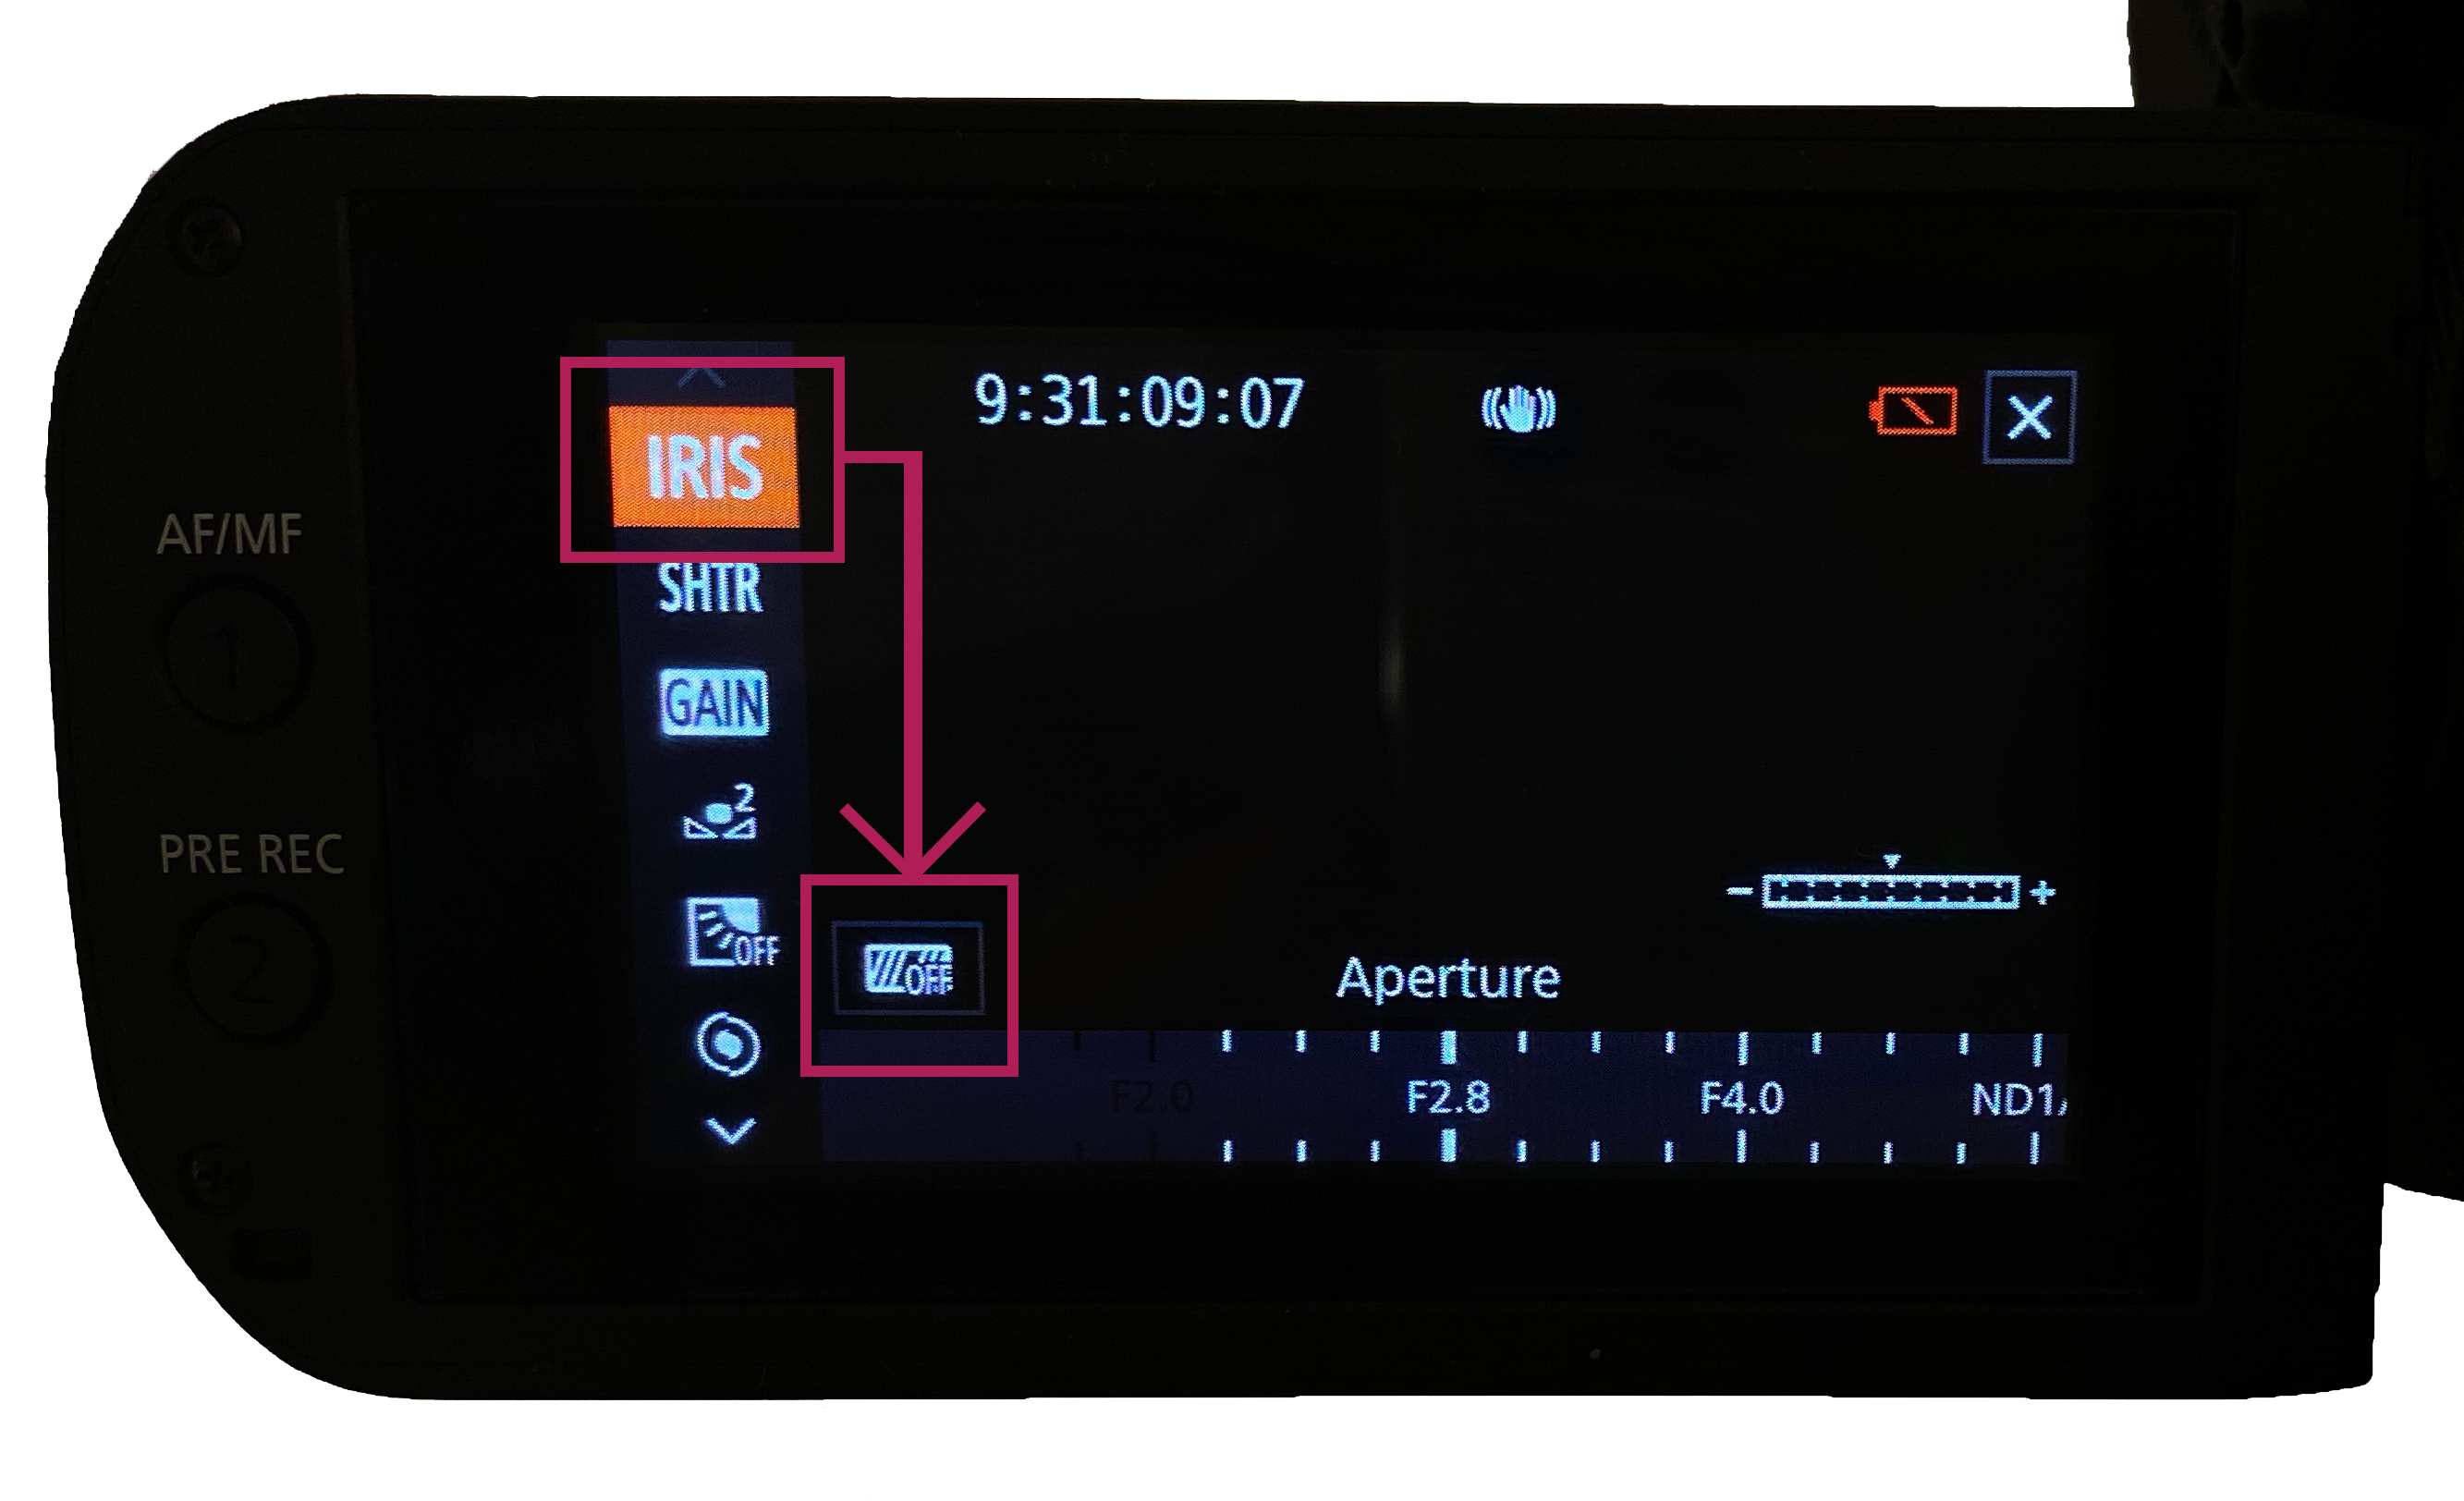
Here’s how you can turn zebras on and off.
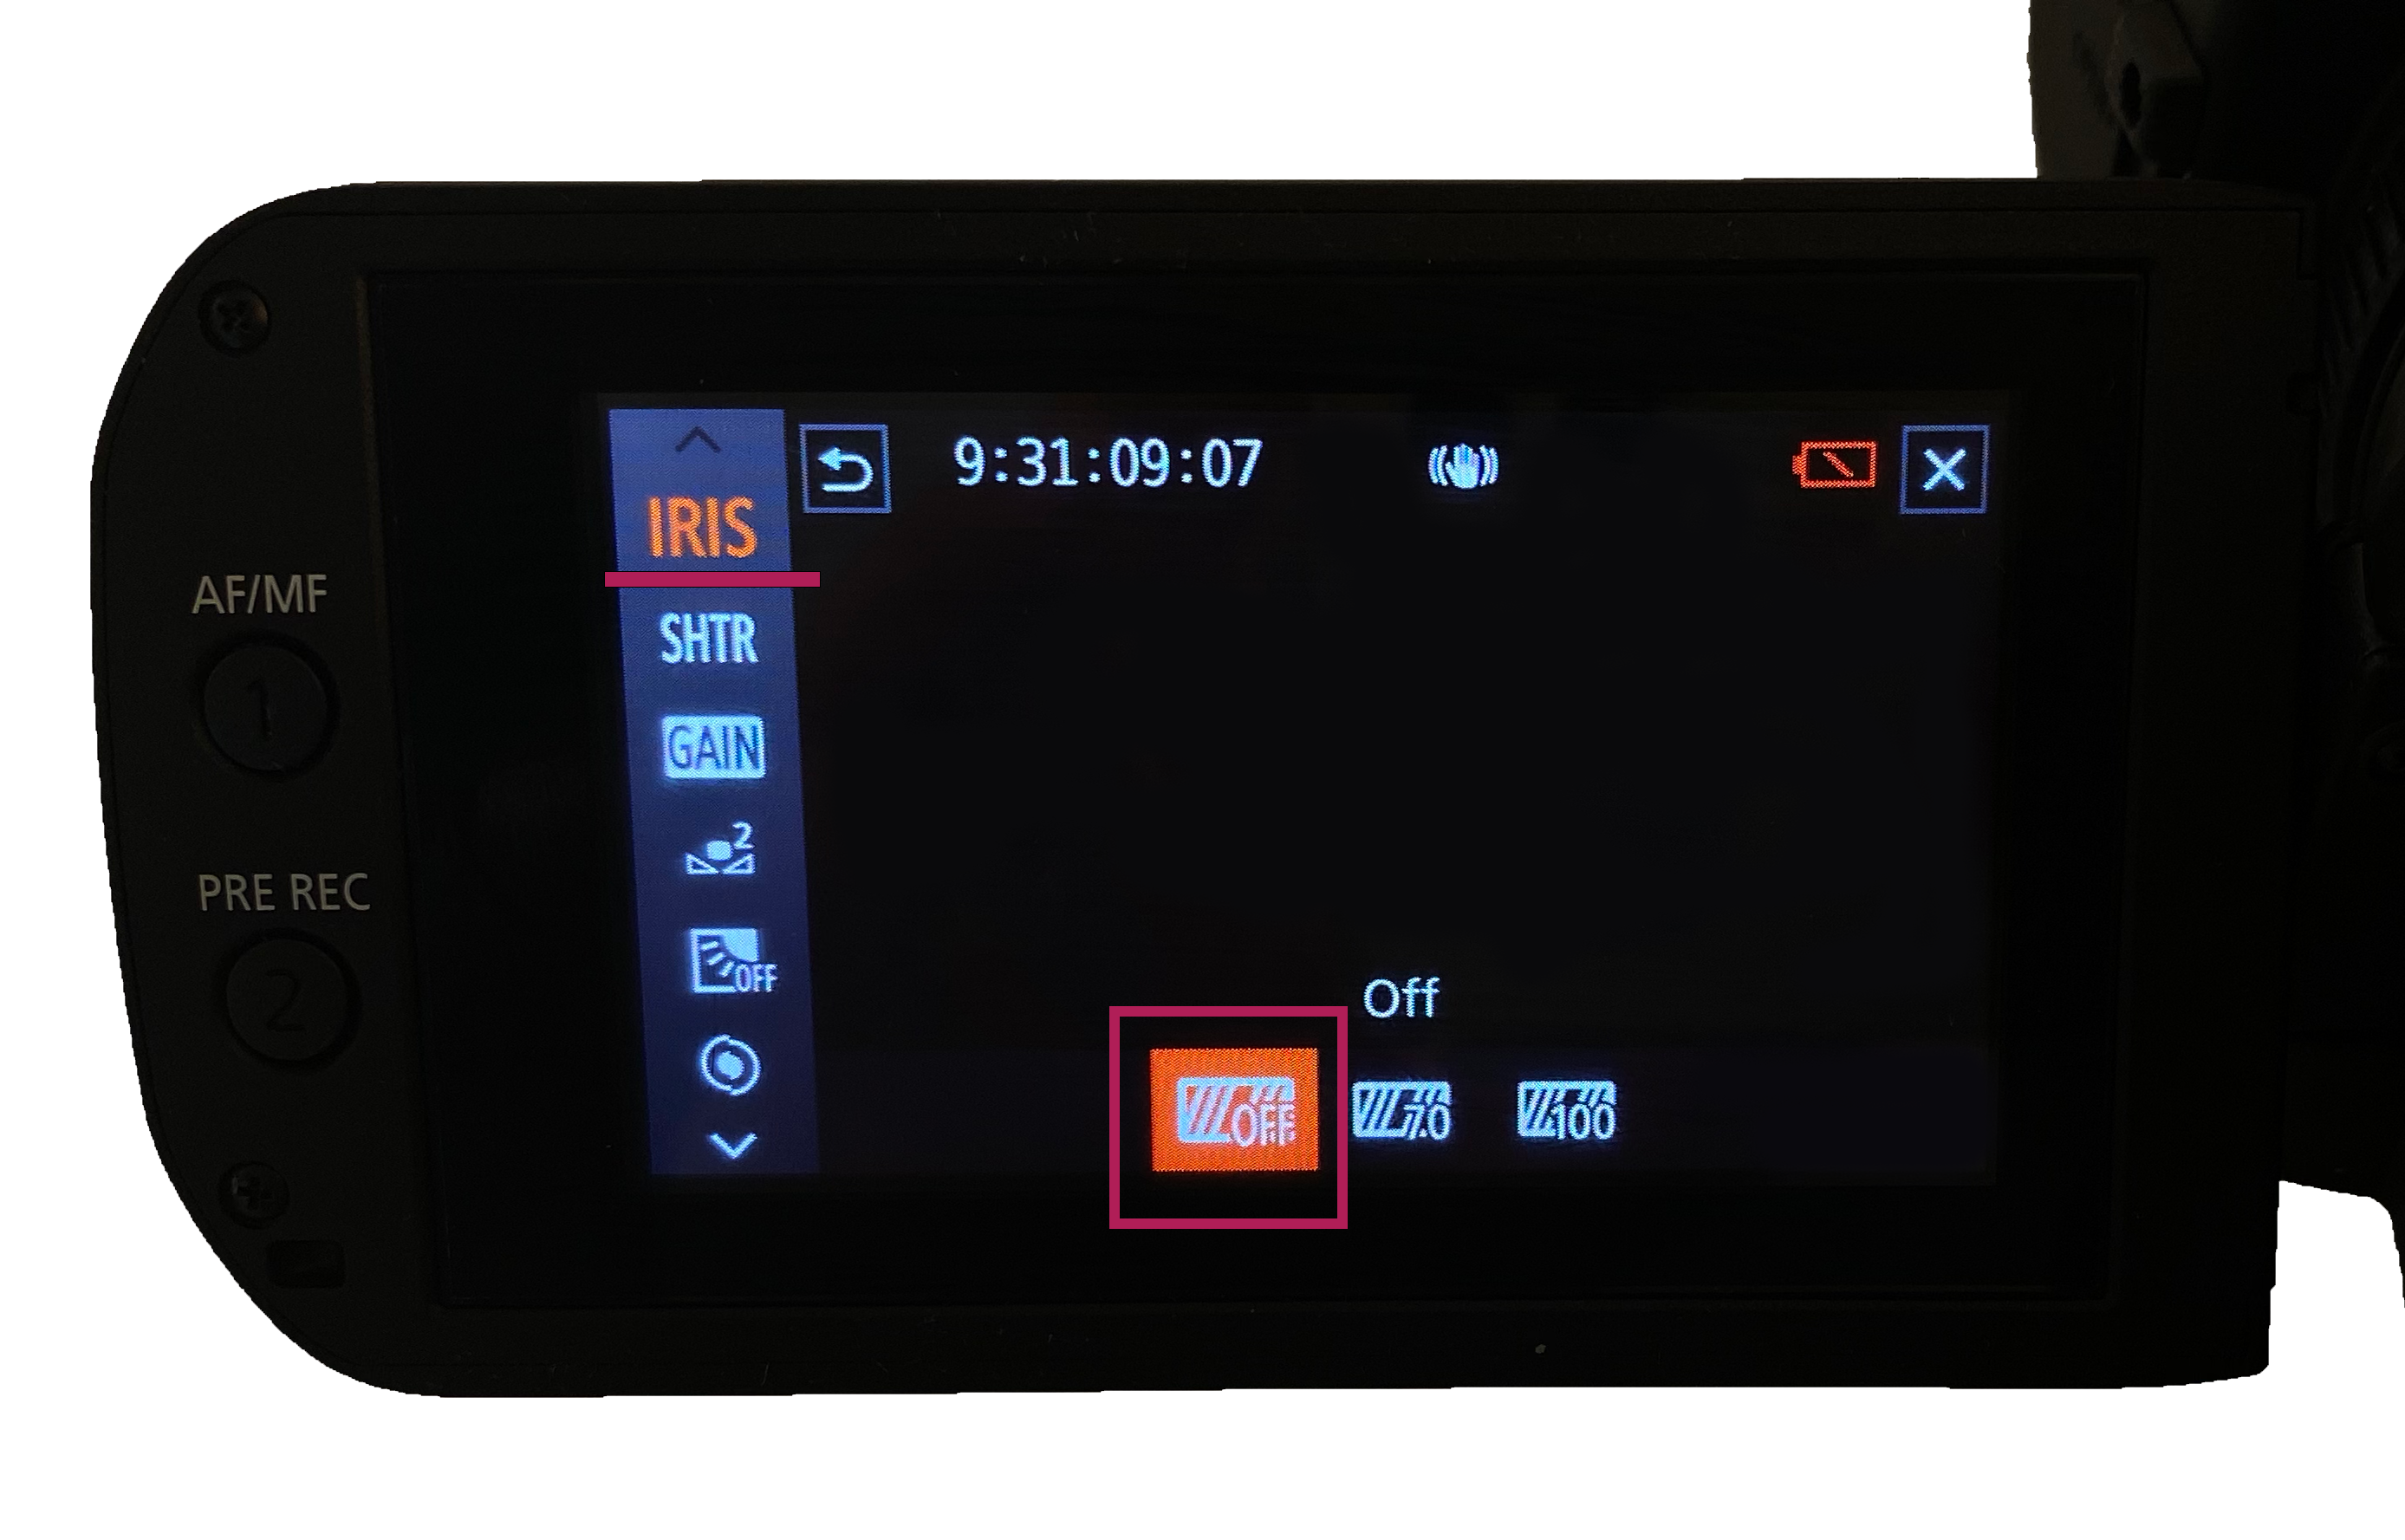
When set to 70%, zebras appear on anything with a brightness over the 70% value. This highlights areas that are overexposed along with areas at risk of becoming overexposed.
When set to 100%, zebras appear on anything with a brightness over the 100% value. This highlights areas that are overexposed.
Dynamic Range
Sometimes, the way light is distributed within a scene means the exposure cannot be set in a way that captures everything around you. This is where something called dynamic range comes into the picture.
Dynamic range can refer to two different things, so it’s important to know what you are referring to when you use dynamic range. Dynamic range can refer to the conditions of the scene you are photographing. It can also refer to the capabilities of your camera’s sensor and the variety of light and shadow it can capture.
If your camera cannot capture the range of light to dark present in the scene, or you want to create an atmospheric image, sometimes you may choose to leave parts of your image under or overexposed.